Comprehensive 11-Color Flow Cytometry Panels for Deep Immunophenotyping of Human Blood: A Guide for Researchers
This article provides a comprehensive guide to designing and implementing robust 11-color flow cytometry panels for deep immunophenotyping of human peripheral blood.
Comprehensive 11-Color Flow Cytometry Panels for Deep Immunophenotyping of Human Blood: A Guide for Researchers
Abstract
This article provides a comprehensive guide to designing and implementing robust 11-color flow cytometry panels for deep immunophenotyping of human peripheral blood. Targeted at researchers, scientists, and drug development professionals, it covers foundational principles, panel design and application, troubleshooting strategies, and comparative validation approaches. The content synthesizes current methodologies to enable high-dimensional, reproducible immune profiling in translational and clinical research.
Core Principles of High-Parameter Immunophenotyping: Why 11 Colors?
Deep immunophenotyping moves beyond the quantification of major lymphocyte subsets (T, B, NK cells) provided by standard TBNK panels. It employs high-parameter flow cytometry, such as 11-color panels, to dissect the functional, maturational, and activation states of immune cells within human blood. This granular analysis is critical for understanding immune dysregulation in disease, identifying predictive biomarkers, and monitoring therapeutic responses in drug development.
Key Immune Subsets Revealed by Deep Phenotyping
The following table summarizes quantitative data on key subsets identifiable with an 11-color panel that are missed by standard TBNK analysis.
Table 1: Deep Immunophenotyping Targets Beyond TBNK
| Cell Population | Phenotypic Markers (Beyond CD3/4/8/19/56) | Typical Frequency in Peripheral Blood (% of Parent) | Functional/Developmental Significance |
|---|---|---|---|
| T Helper Subsets | CD45RA, CCR7, CD27, CD28, CD127, CD25, CXCR5 | Naïve (TN): 40-60% of CD4+ T cellsCentral Memory (TCM): 10-30%Effector Memory (TEM): 20-40%TFH-like: 1-3% of CD4+ T cells | Defines differentiation, migration, and function (e.g., TFH for B-cell help). |
| Cytotoxic T & TEMRA | CD45RA, CCR7, CD27, CD28, CD57, KLRG1 | Effector Memory RA+ (TEMRA): 5-20% of CD8+ T cells (increases with age) | Terminally differentiated, highly cytotoxic, senescence-associated. |
| Regulatory T Cells (Tregs) | CD25hi, CD127lo, FoxP3+, CD45RA | 5-10% of CD4+ T cells | Immune suppression and homeostasis. |
| Gamma Delta (γδ) T Cells | TCRγδ, Vδ1/Vδ2 subsets, CD27, CD45RA | 1-5% of total lymphocytesVδ2+ predominant in blood | Bridging innate/adaptive immunity, tissue surveillance. |
| Innate Lymphoid Cells (ILCs) | Lineage- (CD3, CD14, CD19, CD20, CD56), CD127, CRTH2, CD117 | ILC1/2/3: <1% of total lymphocytes | Tissue-resident innate effectors and regulators. |
| Monocyte Subsets | CD14, CD16, HLA-DR, CD86, CD163 | Classical (CD14++CD16-): 80-90%Intermediate (CD14++CD16+): 2-10%Non-classical (CD14+CD16++): 2-10% | Distinct inflammatory, patrolling, and antigen-presenting functions. |
| B Cell Subsets | IgD, CD27, CD38, CD24, CD21, CXCR5 | Naïve (IgD+CD27-): 60-70%Memory (IgD-/+CD27+): 20-30%Plasmablasts (CD38++CD27++): 0.5-2% | Humoral immunity, antibody production, and regulation. |
Detailed Protocol: 11-Color Deep Immunophenotyping of Human PBMCs
Title: Protocol for 11-Color Deep Immunophenotyping of Human Blood
I. Reagent and Panel Design
- Antibody Panel: See "The Scientist's Toolkit" below.
- Other Reagents: Ficoll-Paque PLUS, PBS (Ca2+/Mg2+-free), FBS, EDTA blood collection tubes, Flow Cytometry Staining Buffer, LIVE/DEAD Fixable Viability Dye (e.g., Zombie NIR), FoxP3/Transcription Factor Staining Buffer Set, 1.5% Paraformaldehyde (PFA).
- Equipment: Flow cytometer (capable of detecting 11+ fluorochromes), centrifuge, biosafety cabinet, vortex.
II. Step-by-Step Methodology
- Sample Collection & Preparation: Collect human peripheral blood in EDTA tubes. Process within 4 hours. Isolate Peripheral Blood Mononuclear Cells (PBMCs) using density gradient centrifugation with Ficoll-Paque. Wash cells twice with PBS + 2% FBS. Count and assess viability.
- Viability Staining: Resuspend up to 5x10^6 cells in PBS. Add LIVE/DEAD dye (1:1000 dilution). Incubate for 15 minutes at RT in the dark. Wash with 2 mL of staining buffer.
- Surface Staining: Prepare antibody cocktail in staining buffer. Resuspend cell pellet in 100 µL of antibody mix. Vortex gently. Incubate for 25 minutes at 4°C in the dark. Wash twice with 2 mL staining buffer.
- Intracellular Staining (for FoxP3): Fix and permeabilize cells using the FoxP3 buffer set according to manufacturer's instructions. Incubate with anti-FoxP3 antibody (diluted in permeabilization buffer) for 30 minutes at 4°C in the dark. Wash twice with permeabilization buffer, then once with staining buffer.
- Fixation: Resuspend cells in 300 µL of 1.5% PFA. Store at 4°C in the dark until acquisition (within 24 hours).
- Data Acquisition: Acquire data on a flow cytometer. Adjust voltages using unstained and single-stained compensation controls. Acquire at least 500,000 events per sample to ensure adequate detection of rare populations.
- Data Analysis: Use FlowJo or similar software. Apply sequential gating: single cells (FSC-A vs FSC-H) > live cells (LIVE/DEAD dye negative) > lymphocyte/monocyte gate (FSC vs SSC) > subset-specific gates based on panel design.
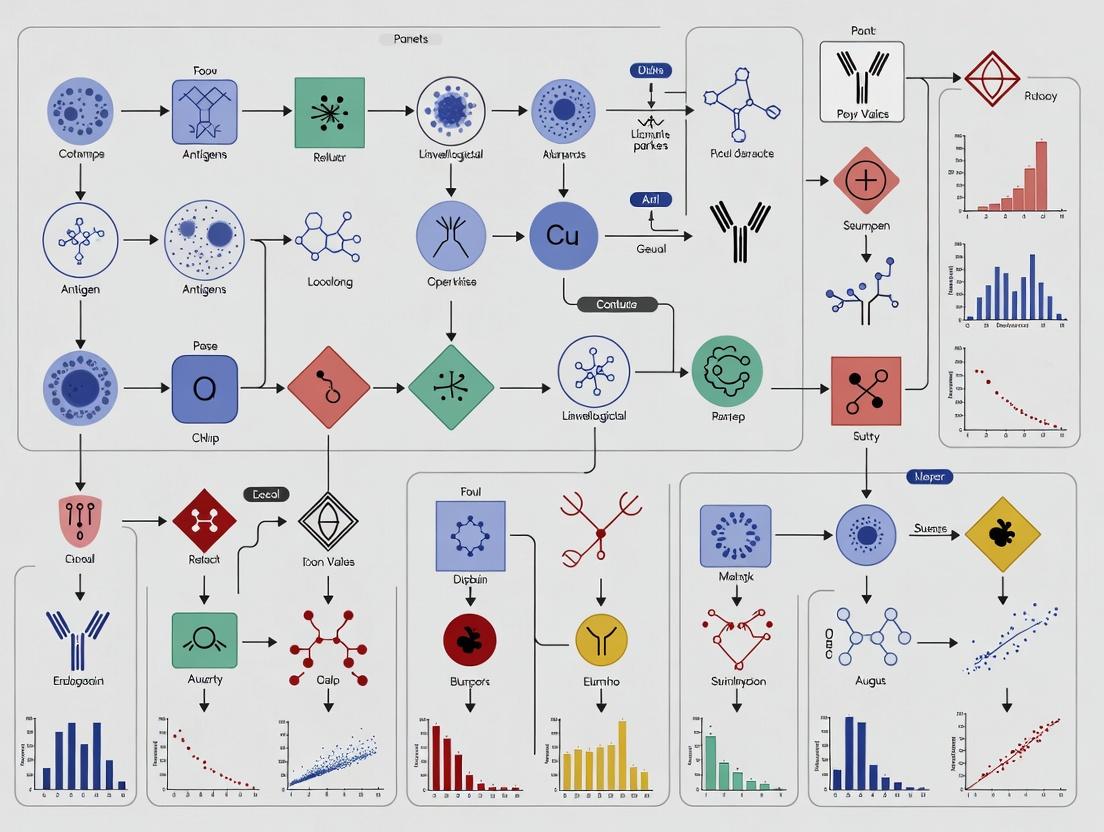
Visualization: Experimental Workflow & Pathway
Diagram 1: Deep Immunophenotyping Workflow
Diagram 2: T Cell Differentiation & Key Markers
The Scientist's Toolkit: Key Research Reagent Solutions
Table 2: Essential Materials for an 11-Color Panel
| Reagent/Material | Function in Experiment | Example Specificity/Clone |
|---|---|---|
| Anti-human CD3 (V500) | Pan T-cell identifier; backbone marker. | Clone UCHT1 |
| Anti-human CD4 (BV605) | Helper T cell and Treg subset identification. | Clone RPA-T4 |
| Anti-human CD8 (BV785) | Cytotoxic T cell identification. | Clone RPA-T8 |
| Anti-human CD45RA (FITC) | Identifies naïve/terminally differentiated cells. | Clone HI100 |
| Anti-human CCR7 (PE) | Homing receptor for central memory cells. | Clone G043H7 |
| Anti-human CD27 (PerCP-Cy5.5) | Co-stimulatory marker; memory subsetting. | Clone O323 |
| Anti-human CD28 (PE-Cy7) | Co-stimulatory marker; activation/differentiation. | Clone CD28.2 |
| Anti-human CD127 (APC) | IL-7Rα; identifies non-Treg CD4+ cells. | Clone A019D5 |
| Anti-human CD25 (APC-R700) | IL-2Rα; critical for Treg identification. | Clone 2A3 |
| Anti-human FoxP3 (BV421) | Master transcription factor for Tregs (intracellular). | Clone 206D |
| LIVE/DEAD Fixable NIR Dye | Excludes dead cells for improved data quality. | N/A |
| FoxP3 Transcription Factor Buffer Set | Permeabilizes cells for intracellular FoxP3 staining. | N/A |
| UltraComp eBeads | Used for single-color compensation controls. | N/A |
In the realm of human immunophenotyping research, flow cytometry panel design represents a critical strategic decision. This application note, framed within a broader thesis on deep immunophenotyping of human blood, argues that 11-color panels occupy a strategic "sweet spot." They offer substantially increased dimensionality over 6-8 color panels for deep investigation while remaining more accessible and manageable than 15+ color configurations for many research and drug development laboratories.
Strategic Comparison: 6-Color, 11-Color, and 15+ Color Panels
Table 1: Strategic Comparison of Flow Cytometry Panel Configurations for Human Blood Immunophenotyping
| Parameter | 6-8 Color Panel | 11-Color Panel | 15-18 Color Panel |
|---|---|---|---|
| Primary Strategic Purpose | Targeted phenotyping, Clinical screening | Deep phenotyping, Translational research | Exhaustive discovery, Systems immunology |
| Typical Cell Subsets Resolved | Major lineages (T, B, NK, monocytes) | Lineages + key subsets (e.g., TH1/2/17, Treg, M1/M2, memory B) | Ultra-rare subsets, complex differentiation states |
| Required Instrumentation | Standard 2-laser cytometer | Common 3-4 laser cytometer (e.g., BD FACS Canto II, CytoFLEX S) | Specialized 4-5 laser cytometer |
| Data Complexity | Low; manual analysis often sufficient | Moderate; requires automated tools (e.g., t-SNE, FlowSOM) | High; dependent on advanced computational pipelines |
| Key Advantage | Accessibility, speed, cost | Optimal balance of resolution & practicality | Maximum biological insight per sample |
| Key Limitation | Limited biological insight | Requires careful spillover management | High expertise barrier, cost, analysis time |
Table 2: Quantitative Performance Metrics (Representative Data from Recent Studies)
| Metric | 8-Color Panel | 11-Color Panel | % Improvement with 11-Color |
|---|---|---|---|
| Identifiable CD4+ T Cell Subsets | 4-6 | 10-12 | +100% |
| Median Spillover Spread (SSC)* | 1.5 - 2.0 | 2.2 - 3.0 | +40% |
| Average Setup & Compensation Time | 2.5 hours | 3.5 hours | +40% |
| Typical Sample Acquisition Time | 8 minutes | 12 minutes | +50% |
| Data File Size (per sample) | ~15 MB | ~45 MB | +200% |
*Spillover Spread Matrix (SSM) values are instrument and fluorochrome-dependent. Higher SSC requires more rigorous compensation.
Core Protocol: Designing and Validating an 11-Color Panel for Human Peripheral Blood Mononuclear Cells (PBMCs)
Aim: To simultaneously identify major immune lineages and functionally relevant subsets from cryopreserved human PBMCs.
Research Reagent Solutions & Essential Materials
Table 3: Essential Research Reagent Toolkit
| Item | Function | Example (Vendor) |
|---|---|---|
| Pre-conjugated Antibodies | Target-specific detection with minimal non-specific binding. | Anti-human CD3 BV785, CD4 FITC, CD8 BV510, CD45RA PE-Cy7, CCR7 APC, CD25 PE, CD127 PerCP-Cy5.5, CD19 APC-Cy7, CD56 PE-Cy5, CD14 BV421, CD16 PE-Dazzle594 |
| Brilliant Stain Buffer | Mitigates fluorochrome polymer interactions, reducing spillover. | BD Biosciences Cat. No. 563794 |
| LIVE/DEAD Fixable Stain | Excludes non-viable cells, critical for accurate immunophenotyping. | Thermo Fisher Scientific L34957 (Aqua) |
| Fc Receptor Blocking Reagent | Reduces non-specific antibody binding via Fcγ receptors. | Human TruStain FcX (BioLegend 422302) |
| Cell Staining Buffer | PBS-based buffer with protein for optimal antibody dilution. | BioLegend 420201 |
| Fixation Buffer | Stabilizes stained cells for delayed acquisition or biosafety. | BD Cytofix (BD 554655) |
| Compensation Bead Set | Single-stained controls for accurate spectral spillover calculation. | UltraComp eBeads (Thermo Fisher 01-2222) |
| Reference Control Cells | Known positive/negative cells for setting PMT voltages. | Human PBMCs from healthy donor |
Experimental Workflow
Step-by-Step Protocol
Panel Design & Preparation:
- Select fluorochromes using a panel design tool (e.g., FluoroFinder, BD Panel Designer). Prioritize bright fluorochromes (e.g., PE, APC) for low-density antigens (e.g., CD127, chemokine receptors) and dim fluorochromes (e.g., FITC, PerCP-Cy5.5) for high-density antigens (e.g., CD4, CD8).
- Prepare antibody master mix in Brilliant Stain Buffer plus standard staining buffer. Include all surface antibodies and the viability dye at their titrated optimal volumes.
Cell Staining:
- Resuspend 1x10^6 PBMCs in 100 µL of cold cell staining buffer.
- Add 5 µL of Human TruStain FcX. Incubate for 10 minutes at 4°C.
- Add the pre-mixed antibody cocktail. Vortex gently and incubate for 30 minutes in the dark at 4°C.
- Wash cells twice with 2 mL of cell staining buffer by centrifugation (350 x g, 5 min).
- Resuspend cell pellet in 200 µL of fixation buffer (e.g., 2% PFA). Incubate for 20 minutes at 4°C in the dark.
- Wash once with cell staining buffer. Resuspend in 300 µL of buffer for acquisition. Store at 4°C in the dark if acquisition is delayed (>4 hours).
Instrument Setup & Acquisition:
- Daily QC: Run calibration beads to ensure laser alignment and fluidics stability.
- Voltage Setting: Using unstained and single-color stained PBMCs or beads, adjust PMT voltages to place negative populations in the first decade of the log scale.
- Compensation Controls: Prepare single-stained compensation beads for each fluorochrome in the panel plus a separate control for the viability dye using cells.
- Acquisition: Collect a minimum of 100,000 live, singlet lymphocytes per sample. Record all events.
Data Analysis Workflow
Advanced Application: Signaling Pathway Activation Profiling in T Cell Subsets
This protocol details combining phenotyping with phospho-protein detection to assess signaling pathway activity across immune subsets within an 11-color framework.
Protocol: Intracellular pSTAT Staining Post-Cytokine Stimulation
- Stimulation: Aliquot 1x10^6 PBMCs in 1 mL serum-free media. Stimulate with 50 ng/mL IL-6 (for pSTAT1/3 in T cells/monocytes) or 10 ng/mL IL-2 (for pSTAT5 in Tregs) for 15 minutes at 37°C. Include an unstimulated control.
- Fixation: Immediately add 1 mL of pre-warmed (37°C) 2x Phosflow Fix Buffer I (BD). Vortex and incubate for 10 minutes at 37°C.
- Permeabilization: Pellet cells, resuspend in 1 mL of ice-cold 90% methanol. Vortex and incubate at -20°C for at least 30 minutes.
- Staining: Wash cells twice with cell staining buffer. Perform surface staining for lineage markers (CD3, CD4, CD8, CD45RA, CCR7) as described in the core protocol.
- Intracellular Staining: Wash, then incubate with anti-pSTAT1 (PE), pSTAT3 (Alexa Fluor 647), or pSTAT5 (PE-Cy5) antibodies in permeabilization buffer for 60 minutes at 4°C.
- Acquisition: Wash and resuspend cells. Acquire on cytometer within 4 hours.
Integrated Signaling-Phenotyping Analysis Pathway
The 11-color panel provides a powerful and accessible platform for deep immunophenotyping. It enables researchers to move beyond basic lineage identification to interrogate functional subsets and signaling states within a single tube, optimizing precious sample volume. Successful implementation hinges on strategic fluorochrome pairing, meticulous experimental protocol, and the integration of automated analysis tools to extract maximal biological insight from the acquired high-dimensional data.
Key Immune Cell Subsets Detectable in Human Blood with an 11-Parameter Approach
This application note details an 11-parameter flow cytometry panel designed for deep immunophenotyping of human peripheral blood mononuclear cells (PBMCs). Framed within a broader thesis on standardized multi-color panels, this protocol enables simultaneous identification of major and minor immune cell subsets critical for immunomonitoring in research and clinical development.
Panel Design and Antibody Conjugation
The panel leverages 11 fluorescence parameters (10 antibodies + viability dye) to maximize spectral separation on a 3-laser (488nm, 561nm, 640nm) flow cytometer. Fluorochrome assignment follows brightness-to-antigen expression principles.
Table 1: 11-Parameter Flow Cytometry Panel Configuration
| Specificity | Clone | Fluorochrome | Purpose |
|---|---|---|---|
| Viability Dye | - | Zombie NIR | Live/Dead discrimination |
| CD3 | UCHT1 | BV785 | Pan T-cell marker |
| CD19 | HIB19 | BV650 | Pan B-cell marker |
| CD56 | HCD56 | BV605 | NK and NKT cells |
| CD4 | RPA-T4 | FITC | Helper T cells |
| CD8 | RPA-T8 | PerCP-Cy5.5 | Cytotoxic T cells |
| CD45RA | HI100 | PE-Cy7 | Naïve/effector marker |
| CCR7 | G043H7 | PE | Central memory marker |
| CD14 | M5E2 | Alexa Fluor 700 | Classical monocytes |
| CD16 | 3G8 | APC | Monocyte/NK subset, neutrophils |
| CD25 | BC96 | PE-Cy5 | Activated Tregs/activated T cells |
Table 2: Key Subsets Identifiable with the 11-Parameter Panel
| Cell Population | Phenotype | Approximate Frequency in PBMCs* |
|---|---|---|
| Helper T Cells | CD3+ CD4+ | 25-45% |
| Cytotoxic T Cells | CD3+ CD8+ | 10-25% |
| Naïve CD4+ T Cells | CD3+ CD4+ CD45RA+ CCR7+ | 40-60% of CD4+ |
| Central Memory CD4+ T Cells | CD3+ CD4+ CD45RA- CCR7+ | 10-30% of CD4+ |
| Effector Memory CD4+ T Cells | CD3+ CD4+ CD45RA- CCR7- | 15-25% of CD4+ |
| Terminal Effector CD8+ T Cells | CD3+ CD8+ CD45RA+ CCR7- | 20-40% of CD8+ |
| Naïve CD8+ T Cells | CD3+ CD8+ CD45RA+ CCR7+ | 20-40% of CD8+ |
| B Cells | CD3- CD19+ | 5-15% |
| NK Cells | CD3- CD56+ | 5-15% |
| Classical Monocytes | CD14+ CD16- | 80-90% of monocytes |
| Non-Classical Monocytes | CD14+/- CD16++ | 5-10% of monocytes |
| T Regulatory Cells (Tregs) | CD3+ CD4+ CD25++ | 2-5% of CD4+ |
*Frequencies are representative of healthy donor blood and can vary widely.
Detailed Experimental Protocol
Part 1: PBMC Isolation and Preparation
Materials: Fresh human whole blood (heparin or EDTA), Ficoll-Paque PLUS, PBS (w/o Ca2+/Mg2+), FBS, 70μm cell strainer.
- Dilute blood 1:1 with PBS.
- Carefully layer 25 mL of diluted blood over 15 mL of Ficoll-Paque in a 50 mL conical tube.
- Centrifuge at 800 x g for 30 minutes at 20°C with NO brake.
- Aspirate the PBMC layer at the interface and transfer to a new 50 mL tube.
- Wash cells with 30 mL PBS, centrifuge at 350 x g for 10 minutes.
- Resuspend pellet in 10 mL PBS, filter through a 70μm strainer. Count cells.
- Centrifuge again and resuspend at 10 x 10^6 cells/mL in cold PBS + 2% FBS (Staining Buffer).
Part 2: Surface Staining for 11-Parameter Panel
- Viability Staining: Add 100μL of cell suspension (1x10^6 cells) to a FACS tube. Add 1μL of Zombie NIR viability dye. Vortex and incubate for 15 minutes in the dark at RT.
- Wash: Add 2 mL Staining Buffer, centrifuge at 350 x g for 5 minutes. Decant supernatant.
- Fc Block: Resuspend pellet in 100μL Staining Buffer containing human Fc block (1:50 dilution). Incubate for 10 minutes on ice.
- Surface Antibody Stain: Add the pre-titrated cocktail of 10 surface antibodies (mixed in Staining Buffer, total volume 50-100μL) directly to the tube without washing. Vortex gently.
- Incubate for 30 minutes in the dark at 4°C.
- Wash: Add 2 mL Staining Buffer, centrifuge at 350 x g for 5 minutes. Decant supernatant.
- Fixation: Resuspend cells in 300μL of 2% paraformaldehyde (PFA) in PBS. Incubate for 15 minutes in the dark at 4°C.
- Acquisition: Wash once with 2 mL Staining Buffer. Resuspend in 300-500μL Staining Buffer. Acquire data on a flow cytometer within 24 hours, using appropriate calibration beads.
Part 3: Gating Strategy & Data Analysis
- Singlets: Plot FSC-H vs FSC-A to exclude doublets.
- Live Cells: Gate on Singlets, then plot viability dye vs. FSC-A. Gate viability dye-negative (live) population.
- Lymphocyte/Monocyte Gate: On live cells, plot FSC-A vs SSC-A to identify lymphocytes and monocytes.
- Lineage Identification:
- Gate on lymphocytes: Plot CD3 vs CD19 to identify T cells (CD3+) and B cells (CD19+).
- From CD3- lymphocytes: Plot CD56 vs CD16 to identify NK cells.
- Gate on monocytes (from FSC/SSC): Plot CD14 vs CD16 to subset classical (CD14+ CD16-) and non-classical (CD14+ CD16++) monocytes.
- T Cell Subsetting:
- Gate on CD3+ T cells: Plot CD4 vs CD8 to separate helper and cytotoxic subsets.
- For CD4+ or CD8+ subsets: Plot CCR7 vs CD45RA to delineate naïve, central memory, effector memory, and terminally differentiated effector memory cells.
- For CD4+ T cells: Plot CD25 vs FSC-A or CD4 to identify CD25++ Tregs.
The Scientist's Toolkit: Key Research Reagent Solutions
| Item | Function in Protocol |
|---|---|
| Ficoll-Paque PLUS | Density gradient medium for PBMC isolation from whole blood. |
| Zombie NIR Viability Dye | Fixable viability dye (NIR laser excitation) to exclude dead cells. |
| Human TruStain FcX (Fc Block) | Blocks non-specific antibody binding via Fc receptors. |
| Brilliant Stain Buffer Plus | Mitigates fluorochrome polymer interactions (especially for BV dyes). |
| UltraComp eBeads | Compensation beads for creating single-color controls. |
| Flow Cytometry Staining Buffer (PBS/BSA) | Preserves cell viability and reduces non-specific binding during staining. |
| Pre-titrated Antibody Cocktails | Ensures optimal signal-to-noise ratio and minimizes reagent waste. |
| Paraformaldehyde (2%) | Fixes cells post-staining, stabilizing fluorescence and ensuring biosafety. |
Visualization: Experimental Workflow and Gating Strategy
Title: 11-Parameter Flow Cytometry Workflow and Gating
Title: T Cell Subset Differentiation via CD45RA/CCR7
This application note details the principles of fluorochrome selection for high-parameter flow cytometry, specifically within the context of an 11-color panel for deep immunophenotyping of human peripheral blood mononuclear cells (PBMCs). The core challenge is maximizing data quality by balancing fluorochrome brightness, antigen density, and spectral spillover, all constrained by the specific laser and filter configuration of the instrument.
Core Principles in Panel Design
Fluorochrome Brightness
Brightness is a product of a fluorochrome's extinction coefficient and quantum yield, and its suitability depends on the expression level of the target antigen.
- High-Brightness Fluorochromes: Use for low-density antigens (e.g., transcription factors, some cytokines, low-abundance surface markers).
- Low-Brightness Fluorochromes: Assign to highly expressed antigens (e.g., CD45, CD3, CD19).
Spillover and Spillover Spread
Spillover (crosstalk) is signal detected in a non-primary detector. The Spillover Spreading Matrix (SSM) is critical for assessing the impact. Compensation corrects for mean signal overlap but cannot fix spreading error, which obscures dim populations.
Instrument Configuration
The available lasers (e.g., 355nm, 405nm, 488nm, 561nm, 640nm) and bandpass filters define the possible fluorochrome combinations.
Quantitative Data for Common Fluorochromes
Table 1: Fluorochrome Properties for an 11-Color Panel (Example for a 3-Laser Config)
| Fluorochrome | Primary Laser (nm) | Brightness (Relative) | Recommended For Antigen Density | Key Spillover Considerations |
|---|---|---|---|---|
| FITC | 488 | Medium | Medium-High | Broad emission into PE detector. |
| PE | 488 | Very High | Low | Significant spill into PE-Cy5/7 detectors. |
| PE-Cy7 | 488 | High | Medium | Susceptible to spill from BV421; requires careful compensation. |
| PerCP-Cy5.5 | 488 | Medium | Medium-High | Minimal spill into other channels. |
| APC | 640 | Very High | Low | Spill into APC-Cy7/Alexa Fluor 700. |
| APC-Cy7 | 640 | High | Medium | Highly sensitive to laser-induced damage; avoid with high-expression antigens. |
| BV421 | 405 | Very High | Low | Spill into BV510 and FITC detectors. |
| BV510 | 405 | Medium | Medium-High | Good choice for mid-expression markers. |
| BV605 | 405 | High | Medium | Spill into BV650/PE-Cy5. |
| BV650 | 405 | Medium | Medium-High | Often a good alternative to APC. |
| Alexa Fluor 700 | 640 | Medium | Medium-High | Lower spillover vs APC-Cy7. |
Table 2: Example 11-Color T Cell Immunophenotyping Panel
| Marker | Specificity | Fluorochrome | Rationale |
|---|---|---|---|
| CD3 | Pan T cell | BV510 | High expression; medium fluor on 405nm laser. |
| CD4 | Helper T cell | BV650 | Medium expression; bright fluor on 405nm laser. |
| CD8 | Cytotoxic T cell | APC-Cy7 | Medium expression; uses 640nm laser, spares 405/488. |
| CD45RA | Naïve/Memory | PE-Cy7 | Medium expression; high fluor on 488nm laser. |
| CCR7 | Lymph node homing | PE | Low density; very bright fluor. |
| CD25 | IL-2Rα (Activation) | BV605 | Low-Med density; high fluor on 405nm laser. |
| CD127 | IL-7Rα | APC | Low density; very bright fluor on 640nm laser. |
| PD-1 | Exhaustion | BV421 | Very low density; very bright fluor on 405nm laser. |
| CD28 | Co-stimulation | FITC | High expression; medium fluor. |
| CD95 | Activation/Apoptosis | PerCP-Cy5.5 | Medium expression; stable, low-spill fluor. |
| Viability Dye | Live/Dead | Alexa Fluor 700 | Uses 640nm laser, distinct from critical markers. |
Experimental Protocols
Protocol 1: Spillover Spreading Matrix (SSM) Calculation and Panel Validation
Purpose: To quantitatively assess and visualize spillover, informing panel optimization. Materials: See "Scientist's Toolkit." Procedure:
- Prepare single-color controls for each fluorochrome in the panel using compensation beads or stained cells.
- Acquire each single-color control on the flow cytometer using the full panel configuration.
- Export the median fluorescence intensity (MFI) for all detectors from each single-stained control.
- In analysis software (e.g., FlowJo, FCS Express), generate an SSM. The value in each cell is calculated as:
Spillover (%) = [MFI in secondary detector / MFI in primary detector] * 100. - Identify spillover values >2-3%. Evaluate if the affected parameter is critical and if fluorochrome assignments can be swapped to minimize spread into a channel detecting a dim marker.
- Validate the final panel using a fully stained sample and FMO (Fluorescence Minus One) controls for gating.
Protocol 2: Titration of Conjugated Antibodies
Purpose: To determine the optimal antibody concentration that maximizes signal-to-noise. Materials: PBMCs, antibody conjugates, flow staining buffer. Procedure:
- Perform serial dilutions of each conjugated antibody (e.g., 1:50, 1:100, 1:200, 1:400) in staining buffer.
- Aliquot identical cell samples (~1x10^6 cells/tube).
- Stain each tube with a single titrated antibody following standard surface staining protocol (block, stain, wash).
- Acquire samples on the cytometer.
- Plot MFI vs. antibody dilution. The optimal concentration is at the "knee" of the curve, just before the plateau, providing maximal staining index (MFI/background).
Diagrams
Fluorochrome Selection Logic
Panel Design and Validation Workflow
The Scientist's Toolkit
Table 3: Essential Research Reagent Solutions
| Item | Function in Protocol |
|---|---|
| UltraComp eBeads / Compensation Beads | Arcylic beads coated with anti-rodent/anti-human antibodies. Used to create consistent, bright single-color controls for accurate spillover matrix calculation. |
| Human TruStain FcX / Fc Receptor Blocking Solution | Blocks non-specific antibody binding via Fc receptors on myeloid cells, B cells, and activated T cells, reducing background signal. |
| Cell Staining Buffer (with BSA) | Protein-based buffer used to wash and resuspend cells. BSA reduces non-specific sticking and maintains cell viability. |
| Viability Dye (e.g., Fixable Viability Stain) | Distinguishes live from dead cells. Dead cells cause nonspecific antibody binding; their exclusion is critical for data accuracy. |
| FBS (Fetal Bovine Serum) | Used in staining buffers or to quench enzymatic digestion. Provides protein to reduce non-specific binding. |
| PBS (Phosphate Buffered Saline) | Isotonic solution used as a base for buffers and for washing cells without causing lysis. |
| Paraformaldehyde (PFA) 1-4% | Fixative used to stabilize stained cells prior to acquisition, especially for intracellular targets, ensuring biosafety and sample stability. |
| Permeabilization Buffer (e.g., Foxp3 Kit) | Contains saponin or detergent to permeabilize the cell membrane for staining of intracellular antigens (cytokines, transcription factors). |
This application note details the deployment of an 11-color flow cytometry panel for deep immunophenotyping of human peripheral blood mononuclear cells (PBMCs). Framed within a thesis on translational immunology, this protocol enables simultaneous assessment of immune cell subsets, activation states, and exhaustion markers, bridging discovery research with clinical trial immunomonitoring in oncology and autoimmunity.
Application Note: An 11-Color Panel for Comprehensive Immune Profiling
This panel is designed to provide a systems-level view of the human immune system from a single stained sample. It quantifies major lineages (T, B, NK, monocytes, dendritic cells) and delves deeply into T cell differentiation and functional states, which are critical for evaluating responses to immunotherapy and inflammatory diseases.
Table 1: 11-Color Flow Cytometry Panel Configuration
| Target Specificity | Fluorochrome | Clone | Purpose & Biological Significance |
|---|---|---|---|
| CD45 | BV785 | HI30 | Leukocyte gate (Lineage) |
| CD3 | AF700 | UCHT1 | Pan T-cell identifier |
| CD4 | BUV395 | SK3 | Helper T cell subset |
| CD8 | BUV737 | SK1 | Cytotoxic T cell subset |
| CD19 | BUV496 | SJ25C1 | Pan B-cell identifier |
| CD56 (NCAM) | BB630 | N901 | NK cell & NKT cell identifier |
| CD14 | BB700 | MφP9 | Classical monocyte identifier |
| CD16 | BV605 | 3G8 | Monocyte/NK subset, FcγRIII |
| CD25 | PE-Cy7 | M-A251 | Treg & T cell activation (IL-2Rα) |
| PD-1 | APC | EH12.2H7 | T cell exhaustion/checkpoint |
| HLA-DR | PE | G46-6 | Late activation (MHC Class II) |
| Viability Dye | Near-IR | -- | Exclude dead cells |
Table 2: Representative Quantitative Reference Ranges from Healthy Donor PBMCs (n=20)
| Immune Subset | Phenotypic Definition | Mean Frequency (% of Live CD45+ cells) | ± 1 SD |
|---|---|---|---|
| Total T Cells | CD3+ | 58.7% | ± 8.2 |
| Helper T Cells | CD3+CD4+ | 38.1% | ± 6.5 |
| Cytotoxic T Cells | CD3+CD8+ | 20.3% | ± 5.1 |
| Tregs | CD3+CD4+CD25hi | 2.1% | ± 0.6 |
| Activated CD8+ T Cells | CD3+CD8+HLA-DR+ | 4.5% | ± 2.3 |
| Exhausted CD8+ T Cells | CD3+CD8+PD-1+ | 2.8% | ± 1.7 |
| B Cells | CD19+ | 12.5% | ± 4.1 |
| NK Cells | CD3-CD56+ | 10.2% | ± 3.8 |
| Monocytes | CD14+ and/or CD16+ | 16.8% | ± 5.0 |
Detailed Experimental Protocols
Protocol 1: PBMC Isolation, Staining, and Acquisition for 11-Color Panel
Objective: To prepare, stain, and acquire high-parameter flow cytometry data from human blood samples for deep immunophenotyping.
Materials & Reagents:
- Sodium Heparin or EDTA blood collection tubes.
- Lymphoprep or equivalent density gradient medium.
- PBS (Ca2+/Mg2+-free), 2% Fetal Bovine Serum (FBS).
- Viability dye (e.g., Zombie NIR, Fixable Viability Dye).
- Antibody cocktail (Table 1) in Brilliant Stain Buffer.
- Flow cytometry staining buffer (PBS + 2% FBS + 0.1% NaN2).
- Fixation buffer (1-4% paraformaldehyde in PBS).
- 5mL Polystyrene round-bottom FACS tubes.
- Refrigerated centrifuge.
- Flow Cytometer: Equipped with 3-4 lasers (355nm, 405nm, 488nm, 640nm) and capable of detecting 11+ colors (e.g., BD FACSymphony, Cytek Aurora).
Procedure:
- PBMC Isolation: Dilute fresh blood 1:1 with PBS. Carefully layer over Lymphoprep in a SepMate or standard 50mL tube. Centrifuge at 1200xg for 20 minutes at 20°C, with brake off. Collect the PBMC layer, wash twice with PBS + 2% FBS at 350xg for 8 minutes. Count cells.
- Viability Staining: Resuspend up to 5x10^6 PBMCs in 1mL PBS. Add 1µL of Near-IR viability dye, incubate for 15 minutes at RT in the dark. Wash with 2mL of staining buffer.
- Surface Staining: Prepare antibody cocktail in a total volume of 100µL Brilliant Stain Buffer per test. Resuspend cell pellet in the cocktail. Vortex gently. Incubate for 30 minutes at 4°C in the dark.
- Wash & Fix: Add 2mL staining buffer, centrifuge at 500xg for 5 minutes. Aspirate supernatant. Resuspend in 300µL of fixation buffer. Incubate for 20 minutes at 4°C in the dark.
- Acquisition: Transfer fixed cells to FACS tubes. Acquire data on the flow cytometer within 24 hours. Use instrument setup and tracking beads (e.g., CS&T beads) daily for performance validation. Collect a minimum of 500,000 events per sample.
Protocol 2: Data Analysis Gating Strategy for Deep Subset Identification
Objective: To identify and quantify immune subsets from the acquired high-dimensional data.
Procedure:
- Software: Use FlowJo v10.8 or similar.
- Doublet Exclusion: Plot FSC-A vs. FSC-H to gate single cells.
- Live Cell Gate: Gate single cells on viability dye (negative) vs. SSC-A.
- Leukocyte Gate: Gate live cells on CD45+ vs. SSC-A.
- Lineage Gating:
- T Cells: CD3+ from CD45+.
- B Cells: CD19+ from CD45+CD3-.
- Monocytes: CD14+ and/or CD16+ from CD45+CD3-CD19-.
- NK Cells: CD56+ from CD45+CD3-CD19-CD14-CD16-.
- Deep T Cell Phenotyping:
- From CD3+, plot CD4 vs. CD8 to define helpers, cytotoxic, and DP/DN subsets.
- On CD4+ T cells, plot CD25 vs. HLA-DR to identify activated (HLA-DR+) and regulatory (CD25hi) subsets.
- On CD8+ T cells, plot PD-1 vs. HLA-DR to identify exhausted (PD-1+) and activated (HLA-DR+) populations.
The Scientist's Toolkit: Key Research Reagent Solutions
| Item | Example Product/Brand | Function & Application Note |
|---|---|---|
| High-Parameter Flow Cytometer | BD FACSymphony, Cytek Aurora | Enables detection of 11+ colors simultaneously with high sensitivity and resolution. |
| Ultraviolet (355nm) Laser Dyes | BUV395, BUV496, BUV737 | Critical for expanding panel dimensionality with minimal spillover into visible detectors. |
| Brilliant Polymer Dyes | BV605, BV785, BB630, BB700 | Bright, photostable fluorochromes with defined spillover spreading matrices for panel design. |
| Brilliant Stain Buffer | BD Horizon | Mitigates fluorescence resonance energy transfer (FRET) between polymer dyes, preserving signal integrity. |
| Viability Dye (Near-IR) | Zombie NIR, Live/Dead Fixable NIR | Distinguishes live from dead cells; Near-IR minimizes spillover into common detection channels. |
| Single-Cell Isolation Media | Lymphoprep, Ficoll-Paque | Density gradient medium for consistent isolation of viable PBMCs from whole blood. |
| Standardized Beads | CS&T Beads, UltraComp eBeads | For daily instrument performance tracking and automated compensation calculation. |
| Advanced Analysis Software | FlowJo, OMIQ, FCS Express | For high-dimensional data analysis, including dimensionality reduction (t-SNE, UMAP) and clustering. |
Signaling & Analytical Pathway Diagrams
Diagram 1: T Cell Fate: Activation to Exhaustion & Immunotherapy Action
Diagram 2: Flow Cytometry Workflow from Sample to Data
Diagram 3: Hierarchical Gating Strategy for Immune Lineages
Building Your Panel: A Step-by-Step Guide to 11-Color Panel Design and Staining
In the context of developing an 11-color flow cytometry panel for deep immunophenotyping of human blood, the initial and most critical step is the precise definition of biological targets and the strategic prioritization of corresponding antibody-fluorochrome conjugates. This process ensures the panel delivers specific, sensitive, and non-overlapping data on immune cell subsets, activation states, and signaling pathways, which is foundational for both basic research and therapeutic drug development.
Application Notes
Target Definition Criteria
Biological targets are selected based on their role in delineating immune cell populations and functional states. The primary criteria include:
- Cell Identity and Lineage: Surface markers defining major immune subsets (e.g., CD3, CD19, CD56, CD14).
- Functional and Activation State: Markers indicating cell activation, exhaustion, or signaling (e.g., CD25, PD-1, pSTAT proteins).
- Therapeutic Relevance: Targets associated with drug mechanisms of action, such as checkpoint inhibitors or cell therapy targets (e.g., CD274/PD-L1, BCMA).
- Co-expression Patterns: Understanding marker co-expression is vital to avoid spectral overlap and ensure logical gating strategies.
Antibody-Conjugate Prioritization Framework
The selection of specific antibody-fluorochrome conjugates is governed by a multi-parameter optimization process to fit within an 11-color panel. Key factors are summarized in the table below.
Table 1: Quantitative Parameters for Antibody-Conjugate Selection in an 11-Color Panel
| Parameter | Optimal Range/Consideration | Measurement/Assessment Method | Impact on Panel Design |
|---|---|---|---|
| Antigen Density (Target Expression Level) | High (>10,000 copies/cell), Medium (1,000-10,000), Low (<1,000) | Literature review, quantitative flow cytometry | Low-density antigens require bright fluorochromes. |
| Fluorochrome Brightness (Relative to FITC) | Brilliant Violet 421 (~2.5), PE (~2.0), FITC (1.0), Alexa Fluor 647 (~1.2) | Manufacturer specifications, validation with compensation beads | Match brightest fluorochromes to lowest density antigens. |
| Spreading Error (SE) Coefficient | Aim for low SE (<5) between closely paired detectors | Calculated from single-stained control samples using flow cytometry software | High SE between two channels necessitates separation of markers in those channels. |
| Excitation/Emission Spectra Overlap | Minimal spillover into neighboring detectors | Review of spectrum viewer tools (e.g., Fluorofinder, BioLegend Spectra Analyzer) | Determines compensation requirements and panel feasibility. |
| Clone Specificity & Affinity | High specificity, validated for human blood | Published data, manufacturer validation sheets | Ensures accurate target detection and minimal non-specific binding. |
Table 2: Example Prioritization for a Human Immunophenotyping Panel
| Target (CD) | Cellular Expression | Antigen Density | Priority Conjugate (Example) | Justification |
|---|---|---|---|---|
| CD3 | Pan T-cell | Very High | BV605 | Essential lineage marker; bright fluorochrone ensures clean population identification. |
| CD4 | Helper T-cells | High | FITC | High density allows use of a moderate fluorochrome, reserving bright ones for rarer targets. |
| CD8 | Cytotoxic T-cells | High | PerCP-Cy5.5 | Good brightness, minimal spillover into BV605 (CD3). |
| CD25 | Activated T-cells, Tregs | Low-Medium | PE | Very bright fluorochrome necessary for clear resolution of positive population. |
| CD127 | T-cell subset, low on Tregs | Low | PE-Cy7 | Paired with CD25 for Treg identification; requires good sensitivity. |
| CD19 | Pan B-cell | High | APC | Bright fluorochrome for clear separation from null cells. |
| CD56 | NK cells, subset of T-cells | Medium | BV421 | Bright fluorochrome for good resolution of dim NK cell populations. |
| CD14 | Monocytes | Very High | AF700 | High antigen density tolerates less bright, far-red fluorochrome. |
| CD16 | Neutrophils, NK cells, Monocytes | Variable | APC-Cy7 | Used on a high-expression population (neutrophils) to minimize impact of its high SE. |
| PD-1 (CD279) | Exhausted T-cells | Very Low | BV785 | Requires one of the brightest available fluorochromes in the near-IR. |
| HLA-DR | Activated immune cells | Medium | Spark NIR-685 | Newer fluorochrome with good separation from other red channels. |
Experimental Protocols
Protocol 1: Spreading Error Measurement and Compensation Setup
Objective: To quantitatively assess spectral overlap and establish a compensation matrix for the 11-color panel. Materials: UltraComp eBeads or similar, individual antibody-fluorochrome conjugates for each channel, flow cytometry staining buffer (PBS + 2% FBS), flow cytometer with 11+ detectors (e.g., 3-laser configuration). Method:
- Prepare one tube of unstained beads.
- For each fluorochrome in the panel, prepare a separate tube of beads stained with the single antibody conjugate, using the same volume/concentration planned for the full panel.
- Incubate beads for 15-20 minutes at 4°C in the dark. Wash once and resuspend in buffer.
- Acquire data on the flow cytometer. For the unstained and each single-stained sample, collect a minimum of 10,000 bead events.
- Using flow cytometry software (e.g., FlowJo, FCS Express), generate a compensation matrix by assigning the positive and negative populations for each fluorochrome.
- Critical Step: Apply the matrix to all single-stain controls and verify proper compensation. Calculate Spreading Error (SE) for critical channel pairs (e.g., PE vs PE-Cy7) using the software's SE tool or by manual gating on the negative population in the spillover channel.
Protocol 2: Panel Validation and Titration on Human PBMCs
Objective: To determine the optimal antibody dilution and confirm staining specificity for the final 11-color panel. Materials: Fresh or cryopreserved human Peripheral Blood Mononuclear Cells (PBMCs), antibody conjugates (titrated), viability dye (e.g., Fixable Viability Stain 780), fixation buffer, flow cytometry staining buffer. Method:
- Thaw/resuspend PBMCs, count, and assess viability.
- Aliquot 1x10^6 cells per titration tube (e.g., for an antibody, test 0.125µg, 0.25µg, 0.5µg, 1.0µg per test).
- Stain cells with viability dye according to manufacturer instructions. Wash.
- Add titrated antibody volumes to respective tubes. Incubate for 30 minutes at 4°C in the dark. Wash twice.
- Fix cells with 1% PFA for 10-15 minutes. Wash and resuspend in buffer for acquisition.
- Acquire data using the pre-defined compensation matrix.
- Analyze the median fluorescence intensity (MFI) of the target population for each antibody at each concentration. Plot MFI vs. concentration. The optimal concentration is at the plateau just before the MFI saturates, providing the best signal-to-noise ratio.
The Scientist's Toolkit
Table 3: Essential Research Reagent Solutions for Panel Development
| Item | Function in Target Definition & Conjugate Prioritization |
|---|---|
| Spectrum Viewer Software (e.g., Fluorofinder) | Visualizes excitation/emission spectra of fluorochromes to predict spillover and plan panel layout. |
| Compensation Beads (e.g., UltraComp eBeads) | Uniform particles for generating single-stain controls to calculate an accurate compensation matrix. |
| Pre-defined Multicolor Panels (e.e.g., BD Horizon) | Commercially available, pre-optimized panels serve as a starting reference for fluorochrome pairing strategies. |
| Single-Color Controls | Individual antibody-fluorochrome conjugates identical to those in the panel, essential for compensation and SE analysis. |
| Viability Dye (Fixable) | Distinguishes live from dead cells, as dead cells cause nonspecific antibody binding and inaccurate data. |
| Fc Receptor Blocking Reagent | Reduces nonspecific antibody binding via Fc receptors on monocytes, B cells, etc., improving specificity. |
| Flow Cytometry Staining Buffer | PBS-based buffer with protein (e.g., FBS, BSA) to minimize nonspecific background staining. |
| Standardized Cell Control (e.g., PBMCs from a donor) | Provides a consistent biological sample for titration and panel validation across experiments. |
Visualization: Panel Design Logic Workflow
Panel Design Decision Workflow
Visualization: Spectral Overlap and Spillover Concept
Fluorochrome Spillover Between Detectors
In the context of an 11-color flow cytometry panel for deep immunophenotyping of human blood, strategic fluorochrome assignment is paramount. The advent of spectral flow cytometry and advanced computational tools like the Spillover Spread Matrix (SSM) allows researchers to quantitatively assess and minimize spreading error, thereby maximizing panel resolution and data quality. This Application Note details the protocols for using spectral viewer data and SSM analysis to guide optimal fluorochrome-antibody conjugate placement.
The following tables summarize core quantitative data essential for panel optimization.
Table 1: Representative Spillover Spread Matrix (SSM) Values for Common Fluorochromes in a Blue (488 nm) Laser Configuration
| Detector (nm) | FITC | PE | PE-Cy5 | PE-Cy7 | PerCP-Cy5.5 |
|---|---|---|---|---|---|
| 530/30 (FITC) | 1.000 | 0.012 | 0.0003 | 0.0001 | 0.0002 |
| 585/42 (PE) | 0.065 | 1.000 | 0.045 | 0.002 | 0.001 |
| 670/30 (PE-Cy5) | 0.001 | 0.150 | 1.000 | 0.085 | 0.005 |
| 780/60 (PE-Cy7) | 0.0005 | 0.008 | 0.095 | 1.000 | 0.210 |
| 695/40 (PerCP-Cy5.5) | 0.002 | 0.005 | 0.025 | 0.175 | 1.000 |
Note: Diagonal values (bold) represent the primary signal. Off-diagonal values are spillover coefficients. The SSM is computed from single-stained controls.
Table 2: Impact of Fluorochrome Brightness and Antigen Density on Optimal Placement
| Antigen Category | Expression Level | Recommended Fluorochrome Brightness | Max Acceptable Cumulative Spillover (from SSM) |
|---|---|---|---|
| Key Lineage Markers (e.g., CD4, CD8) | High | Low/Medium | < 0.15 |
| Activation Markers (e.g., CD25, HLA-DR) | Low/Medium | High | < 0.08 |
| Rare Population Markers (e.g., chemokine receptors) | Very Low | Very High | < 0.05 |
| Dump Channel Markers (e.g., Live/Dead) | High | Any (often bright) | N/A |
Protocols
Protocol 1: Generating the Spillover Spread Matrix (SSM)
Objective: To calculate the precise spillover coefficients between all detector-fluorochrome pairs in the panel.
Materials:
- Single-stained compensation controls (one per fluorochrome in the panel).
- Unstained control.
- Flow cytometer with configuration matching the experimental setup.
- Software capable of SSM calculation (e.g., FlowJo v10.8+, FCS Express 7, or custom R/Python scripts).
Methodology:
- Prepare Controls: For each fluorochrome-antibody conjugate in the 11-color panel, stain a separate aliquot of cells or compensation particles. Use the same cell type as the experimental sample (e.g., human PBMCs).
- Acquire Data: Acquire data for all single-stained controls and the unstained control using the identical instrument settings (voltages, gains) planned for the full panel experiment.
- Calculate Spillover Coefficients:
a. For each single-stained control (Fluorochrome i), measure the median fluorescence intensity (MFI) in its primary detector and in every other detector (j).
b. For each detector j, subtract the MFI of the unstained control in that detector to obtain the spillover signal.
c. The spillover coefficient
S_ijis calculated as:S_ij = (MFI_ij - MFI_unstained_j) / (MFI_ii - MFI_unstained_i). - Construct the Matrix: Populate an n x n matrix where rows are detectors and columns are fluorochromes. The diagonal represents the primary signal (set to 1.000). Each off-diagonal cell contains the calculated
S_ij. - Validate: The sum of spillover into a detector for any given control should be minimal. High values indicate problematic spread requiring fluorochrome reassignment.
Protocol 2: Using Spectral Viewer for Pre-Panel Assessment
Objective: To visualize emission spectra and predict potential conflicts before purchasing reagents or running samples.
Methodology:
- Access Spectral Viewer: Use online tools (e.g., Fluorescence Spectrum Viewer from Thermo Fisher, BioLegend Spectra Viewer) or instrument-specific software (e.g., Cytek Aurora Spectra Viewer).
- Overlay Spectra: Overlay the full emission spectra of all 11 proposed fluorochromes, aligned to the specific laser lines and detector bands of your cytometer.
- Identify Conflicts: a. Direct Overlap: Look for significant spectral overlap between fluorochromes detected in the same or adjacent detectors. b. "Shoulder" Leakage: Pay attention to the tail-end emissions of bright fluorochromes (e.g., PE) spilling into far-red detectors.
- Iterative Adjustment: Use the viewer to test alternative fluorochrome candidates. The goal is to maximize spectral spacing for markers co-expressed on the same cell subsets.
Protocol 3: Optimal Fluorochrome Assignment Using SSM Data
Objective: To algorithmically assign the brightest fluorochromes to the dimmest markers while minimizing spillover-induced spreading error.
Methodology:
- List Parameters: Create a table of your 11 target antigens with their expected expression level (High, Medium, Low, Rare) on the populations of interest.
- Rank Fluorochromes: Rank your available fluorochromes by relative brightness (from literature or prior SSM diagonal MFI values).
- Initial Assignment: Propose an initial panel where the brightest fluorochromes are paired with the lowest expression antigens.
- Calculate Cumulative Spillover: For each antigen-fluorochrome pair in your proposed panel, use the SSM to calculate the total spillover signal it will receive from all other fluorochromes in the panel. This is the cumulative spillover.
- Evaluate and Swap: a. Identify markers where the cumulative spillover exceeds the acceptable threshold (see Table 2). b. Systematically swap fluorochrome assignments between markers, prioritizing moves that reduce spillover for the most critical (rare population) markers. c. Re-calculate cumulative spillover after each change.
- Final Validation: The optimal panel minimizes the sum of
(Cumulative Spillover / Antigen Expression Level)across all markers, ensuring dim signals are not buried by noise.
Visualizations
Title: SSM-Based Panel Optimization Workflow
Title: Spillover Between Fluorochromes and Detectors
The Scientist's Toolkit: Research Reagent Solutions
Table 3: Essential Materials for SSM Analysis and Panel Design
| Item | Function in Protocol |
|---|---|
| UltraComp eBeads / Compensation Beads | Provide a consistent, bright signal for generating single-stained controls without requiring cells, ensuring stable spillover coefficient calculation. |
| Viability Dye (e.g., Fixable Viability Stain 780) | Critical for a "dump channel" to exclude dead cells. Must be spectrally placed in a bright channel with minimal spillover into key markers. |
| Pre-conjugated Antibody Clones | Antibody-fluorochrome conjugates from reputable suppliers. Clone choice affects specificity and brightness, impacting placement strategy. |
| Human PBMCs or Whole Blood | The biological matrix for controls and experiments. Using the same matrix for controls and experiments is critical for accurate SSM. |
| Flow Cytometry Analysis Software (e.g., FlowJo, FCS Express) | Required for calculating MFI from single stains, generating compensation matrices, and often for computing the SSM. |
| Spectral Viewer Web Tool | Enables in silico assessment of fluorochrome combinations before physical testing, saving time and resources. |
| Panel Design Software (e.g., Cytek SpectroFlo, Panel Designer) | Some platforms offer automated tools that suggest fluorochrome placements based on antigen density and known spectra. |
This application note provides detailed 11-color flow cytometry panels and protocols for deep immunophenotyping of major human peripheral blood mononuclear cell (PBMC) subsets. Designed within the broader thesis of maximizing data from limited clinical samples, these focused panels enable simultaneous evaluation of cell identity, activation, and functional potential for T-cells, B-cells, myeloid cells, and innate lymphocytes (ILCs).
Panel Configurations
The following 11-color panels are built on a common backbone of viability and lineage exclusion markers, with specialized fluorochrome conjugates selected for minimal spillover and optimal resolution on standard 3-laser (488nm, 561nm, 640nm) flow cytometers.
Table 1: 11-Color Focused Panel Configurations
| Target Population | Specificity | Fluorochrome | Clone | Purpose/Population Identified |
|---|---|---|---|---|
| Common Backbone | ||||
| Viability | LIVE/DEAD Fixable Aqua Dead Cell Stain | - | Exclude dead cells | |
| CD45 | BV785 | HI30 | Leukocyte gate | |
| T-cell Panel | ||||
| CD3 | FITC | UCHT1 | Pan T-cell | |
| CD4 | PerCP-Cy5.5 | SK3 | Helper T-cells | |
| CD8 | APC-H7 | SK1 | Cytotoxic T-cells | |
| CD25 | PE-Cy7 | M-A251 | Activation/Tregs | |
| CD127 | BV605 | A019D5 | Treg/effector distinction | |
| CD45RA | BV510 | HI100 | Naïve/Memory | |
| CCR7 | PE | G043H7 | Central/Effector memory | |
| PD-1 | APC | EH12.2H7 | Exhaustion | |
| CD28 | AF700 | CD28.2 | Co-stimulation | |
| B-cell Panel | ||||
| CD19 | FITC | HIB19 | Pan B-cell | |
| CD20 | PerCP-Cy5.5 | 2H7 | Mature B-cells | |
| IgD | PE-Cy7 | IA6-2 | Naïve/Memory | |
| CD27 | BV605 | M-T271 | Memory B-cells | |
| CD38 | APC | HIT2 | Plasmablasts/Germinal Center | |
| CD24 | BV510 | ML5 | Immature/Transitional | |
| CD21 | PE | Bu32 | Activation/Tissue resident | |
| CD86 | APC-H7 | FUN-1 | Activation status | |
| CXCR5 | AF700 | RF8B2 | Follicular homing | |
| Myeloid Panel | ||||
| CD14 | FITC | M5E2 | Classical Monocytes | |
| CD16 | PE-Cy7 | 3G8 | Non-classical Monocytes | |
| CD11c | APC-H7 | B-ly6 | Dendritic cells (DCs) | |
| HLA-DR | BV510 | G46-6 | Antigen presentation | |
| CD141 | BV605 | M80 | cDC1 subset | |
| CD1c | APC | L161 | cDC2 subset | |
| CD123 | PE | 6H6 | pDCs | |
| CD33 | AF700 | WM53 | Pan-myeloid | |
| CD64 | PerCP-Cy5.5 | 10.1 | Monocyte/activation | |
| Innate Lymphocyte Panel | ||||
| CD3 | FITC | UCHT1 | Lineage exclusion | |
| CD19 | FITC | HIB19 | Lineage exclusion | |
| CD14 | FITC | M5E2 | Lineage exclusion | |
| CD56 | PE-Cy7 | HCD56 | NK cells & ILCs | |
| CD127 | BV605 | A019D5 | ILC progenitor | |
| CRTH2 | PE | BM16 | ILC2 subset | |
| CD117 | APC | 104D2 | ILC progenitor/c-Kit | |
| NKp44 | PerCP-Cy5.5 | P44-8 | Activated ILCs/NK | |
| NKG2D | AF700 | 1D11 | NK/ILC1 activation | |
| CD161 | BV510 | HP-3G10 | Mucosal-associated ILCs |
Experimental Protocols
Protocol 1: PBMC Staining for 11-Color Panels
Key Reagent Solutions:
- FACS Buffer: PBS + 2% FBS + 1mM EDTA.
- Human Fc Block: 1:50 dilution in FACS Buffer.
- Fixation Buffer: 2% Formaldehyde in PBS or commercial fixative.
- Permeabilization Buffer: 0.5% Saponin or commercial perm buffer (for intra-cellular targets).
Procedure:
- Sample Preparation: Isolate PBMCs from fresh heparinized blood via density gradient centrifugation (Ficoll-Paque PLUS). Adjust to 1x10^7 cells/mL in FACS Buffer.
- Viability Staining: Resuspend cell pellet in 1mL PBS. Add 1µL of LIVE/DEAD Aqua stain. Incubate 20 minutes at 4°C in the dark. Wash with 2mL FACS Buffer.
- Fc Blocking: Resuspend cells in 100µL FACS Buffer containing Human Fc Block. Incubate 10 minutes at 4°C.
- Surface Staining: Add pre-titrated antibody cocktail (in 100µL volume) directly without washing. Vortex gently. Incubate 30 minutes at 4°C in the dark.
- Wash: Add 2mL FACS Buffer, centrifuge at 400xg for 5 minutes. Decant supernatant.
- Fixation: Resuspend cells in 250µL Fixation Buffer. Incubate 20 minutes at 4°C in the dark.
- Wash & Resuspend: Wash once with 2mL FACS Buffer. Resuspend in 300-500µL FACS Buffer for acquisition.
- Acquisition: Acquire on flow cytometer within 24 hours. Use 8-peak UltraComp eBeads for compensation.
Protocol 2: Intracellular Cytokine Staining (ICS) Add-on for T-cell Panel
Procedure: Follow Protocol 1 through Step 5. Then:
- Stimulation: Prior to staining, resuspend PBMCs in complete RPMI with 1X Cell Stimulation Cocktail (PMA/Ionomycin + Brefeldin A). Incubate 4-6 hours at 37°C, 5% CO2.
- Fix/Perm: After surface staining/wash, use Foxp3/Transcription Factor Staining Buffer Set per manufacturer's instructions.
- Intracellular Staining: Add anti-cytokine antibodies (e.g., IFN-γ, IL-2, TNF-α, IL-17) diluted in Permeabilization Buffer. Incubate 30 minutes at 4°C.
- Wash & Resuspend: Wash twice with Permeabilization Buffer, then once with FACS Buffer. Resuspend in FACS Buffer for acquisition.
Visualizations
Panel Design Hierarchy
T-cell Gating Hierarchy
The Scientist's Toolkit
Table 2: Essential Research Reagent Solutions
| Item | Function | Example Product/Catalog |
|---|---|---|
| Ficoll-Paque PLUS | Density gradient medium for PBMC isolation from whole blood. | Cytiva, 17144002 |
| LIVE/DEAD Fixable Viability Dyes | Amine-reactive dyes to exclude dead cells in fixed samples. | Thermo Fisher, L34957 (Aqua) |
| Human TruStain FcX (Fc Block) | Blocks non-specific antibody binding via Fc receptors. | BioLegend, 422302 |
| Brilliant Stain Buffer | Mitigates fluorochrome polymer interaction in BV dye panels. | BD Biosciences, 566349 |
| Cell Stimulation Cocktail | PMA/Ionomycin + Protein Transport Inhibitors for ICS. | Thermo Fisher, 00-4970-93 |
| Foxp3/Transcription Factor Buffer Set | Permeabilization buffers for nuclear/intracellular targets. | Thermo Fisher, 00-5523-00 |
| UltraComp eBeads | Compensation beads for single-color controls. | Thermo Fisher, 01-2222-42 |
| Flow Cytometry Setup Beads | Daily QC beads for instrument performance tracking. | BD Biosciences, 642412 (CS&T) |
| DNAse I | Prevents cell clumping during processing of tissue samples. | Sigma, D4513-1VL |
These optimized 11-color panels and standardized protocols enable comprehensive, reproducible immunophenotyping of human blood immune subsets. By providing deep subset resolution within constrained color budgets, they form a critical toolset for translational research in immunology, oncology, and infectious disease.
Within a thesis focused on 11-color flow cytometry for deep immunophenotyping of human blood, the integrity of data hinges on sample preparation. Optimized staining protocols for Peripheral Blood Mononuclear Cells (PBMCs) and whole blood are critical to minimize background, ensure accurate identification of live cells, and preserve epitopes and fluorescence post-staining. This application note details current best practices for viability dye staining, Fc receptor blocking, and fixation steps, which are foundational to any high-parameter immunophenotyping panel.
The Scientist's Toolkit: Key Research Reagent Solutions
| Item | Function | Example Products |
|---|---|---|
| Viability Dye | Distinguishes live from dead cells based on permeability; critical for excluding autofluorescent dead cells from analysis. | LIVE/DEAD Fixable Near-IR, Zombie NIR, 7-AAD (for post-fixation). |
| Fc Receptor Block | Reduces nonspecific antibody binding via Fc receptors, lowering background and improving signal-to-noise ratio. | Human TruStain FcX, Purified anti-human CD16/32, Human IgG. |
| RBC Lysis Buffer | Lyses red blood cells in whole blood samples while preserving leukocytes for staining. | ACK Lysing Buffer, BD Pharm Lyse. |
| Cell Staining Buffer | Protein-based buffer for antibody dilution and washing to minimize nonspecific binding. | PBS + 2% FBS + 0.09% NaN3, Commercial Cell Staining Buffer. |
| Surface Stain Antibody Cocktail | Pre-mixed or custom antibody panels targeting cell surface markers for immunophenotyping. | Custom 11-color panels (e.g., CD3, CD4, CD8, CD19, CD56, CD14, CD16, etc.). |
| Fixative Solution | Stabilizes the antibody-cell conjugate, inactivates biohazards, and permits delayed acquisition. | 1–4% Paraformaldehyde (PFA), BD Cytofix. |
| Permeabilization Buffer | Required for intracellular staining; not typically used in surface-only panels described here. | BD Perm/Wash, FoxP3 Transcription Factor Staining Buffer Set. |
Table 1: Comparison of Viability Dyes
| Dye | Excitation/Emission (nm) | Compatible Fixation | Staining Step | Key Advantage | Consideration for 11-Color Panel |
|---|---|---|---|---|---|
| LIVE/DEAD Fixable Near-IR | 633/780 | Yes (post-stain) | Before surface stain | Far-red emission, minimizes spillover into common channels. | Ideal for panels using BV711, APC-Cy7. |
| Zombie NIR | 633/780 | Yes (post-stain) | Before surface stain | Similar to LIVE/DEAD; stable signal post-fixation. | Optimize concentration to avoid dim cell exclusion. |
| 7-AAD | 546/647 | No (pre-fixation) | After surface stain, pre-fixation | Inexpensive, good for immediate acquisition. | Not fixable; requires immediate acquisition. May spill into APC channel. |
Table 2: Fc Block Reagent Comparison
| Reagent | Type | Incubation Time & Temp | Recommended Use |
|---|---|---|---|
| Human TruStain FcX (anti-CD16/32) | Monoclonal Antibody | 10 min, RT | Specific, high-affinity block; ideal for human PBMCs. |
| Purified Human IgG | Polyclonal Protein | 15-20 min, 4°C | Broad competition; may require higher concentration. |
| Serum (FBS/Human) | Serum Proteins | 10-15 min, 4°C | Inexpensive; but variable and may contain cytokines. |
Table 3: Fixation Conditions
| Fixative | Concentration | Incubation Time | Stability Post-Fixation | Impact on Fluorescence |
|---|---|---|---|---|
| Paraformaldehyde (PFA) | 1–2% | 15-20 min, 4°C | Up to 48-72 hours at 4°C | Minimal with short fixation; can quench some dyes over time. |
| Commercial Fixatives | As per mfr. | As per mfr. (often 30 min) | Often longer (1 week) | Formulated for stability; test panel compatibility. |
Detailed Experimental Protocols
Protocol 4.1: Whole Blood Staining for 11-Color Immunophenotyping
Principle: Stain surface markers directly in whole blood, lyse RBCs, then fix. This method preserves fragile cell populations and minimizes activation artifacts.
Materials:
- Anticoagulated human whole blood (Heparin or EDTA).
- Viability dye (e.g., LIVE/DEAD Fixable Near-IR, reconstituted in DMSO).
- Fc Block reagent (e.g., Human TruStain FcX).
- Pre-titrated surface antibody cocktail in staining buffer.
- RBC lysis buffer (e.g., 1X BD Pharm Lyse).
- Fixation buffer (e.g., 2% PFA).
- Cell staining buffer (PBS + 2% FBS).
- Centrifuge, vortex, flow cytometer.
Step-by-Step Method:
- Viability Staining (Whole Blood): Dilute viability dye in PBS (typically 1:1000). Add 100 µL of whole blood to a tube. Add 100 µL of diluted viability dye. Mix immediately and incubate for 20 minutes at room temperature (RT) in the dark.
- Quenching & Wash: Add 2 mL of cold staining buffer. Centrifuge at 300-500 x g for 5 minutes at 4°C. Aspirate supernatant completely.
- Fc Block: Resuspend cell pellet in 100 µL staining buffer. Add 5 µL of Fc block reagent per 100 µL blood. Incubate for 10 minutes at RT in the dark.
- Surface Staining: Without washing, add the pre-mixed 11-color surface antibody cocktail directly to the tube. Vortex gently. Incubate for 30 minutes at 4°C in the dark.
- RBC Lysis & Wash: Add 2 mL of 1X RBC lysis buffer. Vortex and incubate for 15 minutes at RT in the dark. Centrifuge at 500 x g for 5 minutes. Aspirate supernatant.
- Wash: Add 2 mL staining buffer, centrifuge, aspirate.
- Fixation: Resuspend cell pellet in 250-500 µL of 2% PFA. Incubate for 20 minutes at 4°C in the dark.
- Final Wash & Acquisition: Add 2 mL staining buffer, centrifuge, aspirate. Resuspend in 300-500 µL staining buffer. Acquire on a flow cytometer within 48 hours.
Workflow for Whole Blood Staining and Fixation
Protocol 4.2: PBMC Staining for 11-Color Immunophenotyping
Principle: Isolate PBMCs via density gradient centrifugation first. This removes RBCs, granulocytes, and platelets, reducing background and simplifying analysis.
Materials:
- Ficoll-Paque PLUS or equivalent.
- Isolated PBMCs.
- Viability dye.
- Fc Block reagent.
- Surface antibody cocktail.
- Fixation buffer.
- Cell staining buffer.
Step-by-Step Method:
- PBMC Isolation: Isolate PBMCs from whole blood using standard Ficoll density gradient centrifugation. Wash cells twice with staining buffer. Count and assess viability.
- Viability Staining (PBMCs): Resuspend 1-5x10^6 PBMCs in 1 mL PBS. Add viability dye (pre-diluted in PBS). Incubate 20 minutes at RT in the dark.
- Wash: Add 2 mL staining buffer, centrifuge, aspirate.
- Fc Block & Surface Stain: Resuspend pellet in 100 µL staining buffer. Add Fc block (5 µL per 10^6 cells). Incubate 10 min at 4°C. Add surface antibody cocktail directly. Incubate 30 minutes at 4°C in the dark.
- Wash: Add 2 mL buffer, centrifuge, aspirate. Repeat once.
- Fixation: Resuspend cells in 250 µL of 1% PFA. Incubate 20 minutes at 4°C in the dark.
- Final Wash & Acquisition: Wash once with 2 mL buffer. Resuspend in 300-500 µL buffer. Acquire on flow cytometer.
PBMC Isolation and Staining Workflow
Logical Decision Pathway for Protocol Selection
Decision Tree for Staining Protocol Selection
Application Notes
In the context of deep immunophenotyping of human blood using 11-color flow cytometry, managing high-dimensional data requires a systematic, hierarchical approach to cell subset identification. A sequential gating strategy is paramount to resolving complex immune populations, such as naive/memory T cell subsets, B cell maturation stages, and monocyte dendritic cell (DC) subsets, while maintaining statistical rigor and minimizing data loss.
Key Principles:
- Hierarchical Exclusion: Gates are applied sequentially, starting with broad, well-defined populations (e.g., single cells, live lymphocytes) and progressively narrowing to rare subsets (e.g., antigen-specific T cells).
- Dimensionality Reduction: Each gating step typically uses 1-2 parameters, transforming an 11-dimensional problem into a series of simpler 2D analyses.
- Compensation & Spillover Management: Accurate fluorescence compensation is non-negotiable. The use of fluorescence-minus-one (FMO) controls is critical for setting boundaries, especially for dim populations or highly expressed antigens with spillover.
Quantitative Data Summary: Table 1: Typical Recovery Rates Through a Standardized Gating Hierarchy for Major Lymphocyte Populations in Human PBMCs (n=10 healthy donors).
| Gating Step | Target Population | Median % of Parent (IQR) | Key Markers Used |
|---|---|---|---|
| 1. Singlets | Single Cells | 99.5% (98.8-99.7) | FSC-A vs FSC-H |
| 2. Live/Dead | Live Cells | 95.2% (93.1-96.8) | Viability dye (e.g., Zombie NIR) |
| 3. Lymphocyte Gate | Lymphocytes | 65.3% (58.4-72.1) | FSC-A vs SSC-A |
| 4. CD3+ | T Cells | 73.1% (68.5-77.9) | CD3 |
| 5. CD4+/CD8+ | Helper vs Cytotoxic T | CD4+: 45.2% (41.5-49.1); CD8+: 28.7% (25.3-32.4) | CD4, CD8 |
| 6. Naive/Memory | T Cell Subsets | Naive (CD45RA+CCR7+): ~40% of CD4+ | CD45RA, CCR7 |
Table 2: Impact of Sequential vs. Boolean Gating on Data Recovery in an 11-Color Panel.
| Analysis Strategy | Total CD4+ T Cells Identified | Time to Analyze (per sample) | Consistency (Operator CV) |
|---|---|---|---|
| Sequential Hierarchy | 100% (reference) | 5-7 minutes | 3.2% |
| Boolean (All Gates Simultaneous) | 98.5% | <1 minute | 8.7% |
Experimental Protocols
Protocol 1: Standardized 11-Color Panel Staining for Human PBMC Deep Immunophenotyping
I. Materials & Sample Prep
- Fresh or Cryopreserved PBMCs: ≥1x10^6 cells per tube.
- Staining Buffer: PBS + 2% FBS + 1mM EDTA.
- Viability Dye: Zombie NIR Fixable Viability Kit (BioLegend).
- Fc Receptor Blocking Solution: Human TruStain FcX.
- Antibody Cocktail: Pre-titrated antibodies in 11 colors (See Toolkit).
- Fixation Buffer: 1-4% Paraformaldehyde (PFA) in PBS.
- Equipment: Flow cytometer capable of detecting 11+ fluorochromes (e.g., BD FACSymphony A5).
II. Procedure
- Thaw & Wash: Thaw cryopreserved PBMCs rapidly, wash twice in warm complete media, rest for 1 hour at 37°C.
- Viability Staining: Resuspend cell pellet in PBS. Add Zombie NIR dye, incubate 15 min in the dark at RT. Wash with 2mL staining buffer.
- Fc Block: Resuspend pellet in 100µL staining buffer, add 5µL TruStain FcX, incubate 10 min on ice.
- Surface Staining: Add pre-mixed 11-color antibody cocktail directly to cells (without washing). Vortex gently. Incubate 30 min in the dark at 4°C.
- Wash & Fix: Wash cells twice with 2mL cold staining buffer. Resuspend in 300µL of 1% PFA fixative. Transfer to FACS tubes.
- Acquisition: Acquire data on cytometer within 24 hours. Aim for ≥100,000 live lymphocyte events.
Protocol 2: Fluorescence-Minus-One (FMO) Control Preparation
Purpose: To accurately define positive populations and gate boundaries, especially for dim markers or in densely populated regions.
- Prepare one tube for each fluorochrome in the panel that requires precise gating.
- For a given FMO control tube, prepare the full antibody cocktail omitting only the antibody conjugated to the fluorochrome of interest.
- Stain cells from the same donor/pool as the full stain, following the main protocol.
- During analysis, use the FMO control to set the negative-positive boundary for the omitted channel.
Visualization: Gating Hierarchy and Analysis Workflow
Diagram 1: Sequential Gating Hierarchy for T Cell Subsets
Diagram 2: High-Dimensional Data Analysis Strategy
The Scientist's Toolkit: Research Reagent Solutions
Table 3: Essential Materials for 11-Color Deep Immunophenotyping
| Item | Example Product (Supplier) | Function in Protocol |
|---|---|---|
| Viability Dye | Zombie NIR Fixable Viability Kit (BioLegend) | Distinguishes live from dead cells; fixable for later staining. |
| Fc Block | Human TruStain FcX (BioLegend) | Blocks non-specific antibody binding via Fc receptors. |
| Surface Antibodies | Pre-conjugated mAbs (BioLegend, BD, Thermo Fisher) | Specific detection of cell surface antigens. Must be titrated. |
| Staining Buffer | PBS + 2% FBS + 1mM EDTA (In-house) | Maintains cell viability, reduces non-specific binding & clumping. |
| Compensation Beads | UltraComp eBeads (Thermo Fisher) | Single-stain controls for accurate fluorescence compensation. |
| Fixative | 16% Paraformaldehyde (Electron Microscopy Sciences) | Stabilizes stained cells for later acquisition (1% final conc.). |
| Analysis Software | FlowJo v10.8 (BD), FCS Express 7 | Data analysis, gating hierarchy application, and visualization. |
| Cytometer | BD FACSymphony A5, Cytek Aurora | High-parameter flow cytometer capable of 11+ color detection. |
Solving Common Challenges in 11-Color Panel Performance and Data Quality
Identifying and Correcting High Spillover Spread (SSC) and Compensation Issues
In high-parameter flow cytometry, such as the 11-color panels used for deep immunophenotyping of human blood, accurate data is critically dependent on managing fluorescence spillover and its spread. Spillover Spread (SSC), quantified by the spillover spreading matrix (SSM), directly impacts resolution and can lead to misinterpretation of rare populations. This Application Note provides protocols for identifying, quantifying, and correcting high SSC, framed within a research thesis focused on immunophenotyping for human immunology and drug development.
Quantifying Spillover Spread
The SSM is superior to the traditional compensation matrix for diagnosing panel performance. Each value represents the increase in spread (coefficient of variation, CV) in a detector caused by spillover from a given fluorochrome. Values >2-3% typically indicate problematic combinations requiring panel revision.
Table 1: Example Spillover Spreading Matrix (SSM) for an 11-Color Panel
| Target Detector (nm) | 488-B530 | 561-B585 | 638-B670 | 405-B450 | 488-B710 |
|---|---|---|---|---|---|
| FITC (488) | - | 0.5% | 0.1% | 0.0% | 6.2% |
| PE (561) | 1.8% | - | 0.3% | 0.1% | 1.5% |
| APC (638) | 0.1% | 0.2% | - | 0.0% | 0.8% |
| BV421 (405) | 0.0% | 0.1% | 0.5% | - | 0.2% |
| PerCP-Cy5.5 (488) | 4.5% | 1.2% | 0.7% | 0.1% | - |
Key Finding: High SSC is observed from FITC into B710 and from PerCP-Cy5.5 into B530, suggesting spectral adjacency conflicts.
Experimental Protocols
Protocol 1: Generating the Spillover Spreading Matrix (SSM)
- Single Stain Controls: Prepare individual compensation beads or cells stained singly with each fluorochrome-conjugated antibody used in the panel.
- Acquisition: Acquire data for each single-stain control using the full panel configuration on the cytometer. Collect sufficient events (~10,000).
- Data Processing: In analysis software (e.g., FlowJo, FCS Express), create a new SSM.
- Calculation: The software calculates the median (for compensation) and the robust standard deviation (for SSM) of the signal in all detectors for each fluorochrome. The SSM value is the percentage increase in spread in a secondary detector relative to its autofluorescence spread.
- Interpretation: Export the SSM and identify high values (>3%) that indicate problematic spillover spread requiring mitigation.
Protocol 2: Correcting High SSC Through Panel Re-Design
- Identify Culprits: From the SSM, note the fluorochrome-detector pairs with high values (e.g., FITC → B710).
- Assess Marker Importance: Determine if the marker detected in the affected channel (e.g., B710) is of high biological importance (e.g., a key lineage marker) or is rare/low expression.
- Fluorochrome Reassignment:
- Option A (Preferred): Swap the high-spillover fluorochrome (FITC) on its marker with a more spectrally distant one (e.g., switch to BV421) if the laser/filter configuration allows.
- Option B: Reassign the affected marker (in B710) to a brighter fluorochrome on a different laser to overcome the added spread.
- Validation: Re-run single stains with the revised panel and generate a new SSM to confirm reduction of problematic spread.
Protocol 3: Post-Acquisition Mitigation Using Spectral Unmixing or Gating
- Spectral Flow Cytometry: If using a spectral cytometer, apply the full spectrum reference library and unmixing algorithms during data analysis. This mathematically separates signals, effectively reducing SSC.
- Conventional Cytometry - Bi-exponential Scaling: Visualize data using biexponential (Logicle) scales to properly display events with negative values after compensation.
- Conventional Cytometry - Sequential Gating: Gate on brightly positive populations first to isolate them before analyzing co-expressed markers affected by spread. This avoids spread into dim/negative regions.
Visualization of Key Concepts
High SSC Leads to Analytical Artifacts
SSC Identification & Correction Protocol Workflow
The Scientist's Toolkit: Research Reagent Solutions
Table 2: Essential Materials for SSC Management
| Item | Function & Relevance to SSC |
|---|---|
| UltraComp eBeads / Compensation Beads | Provide a consistent, negative and bright positive signal for each fluorochrome, essential for accurate SSM calculation. |
| Cell Staining Buffer (with Fc Block) | Reduces nonspecific antibody binding, ensuring spillover measurements are from specific signal only. |
| Titrated Antibody Panels | Using the optimal antibody dilution (determined by titration) minimizes aggregate formation and background, reducing spread. |
| Viability Dye (Fixable, Near-IR) | A dead cell exclusion marker on a long-wavelength laser (e.g., 638nm or 785nm) minimizes spillover into critical visible channels. |
| Antibody Clones Conjugated to | |
| "Brighter" vs "Dimmer" Fluorochromes | Enables strategic panel design: assign bright fluorochromes to low-expression markers and dim fluorochromes to highly expressed markers to overcome SSC. |
| Spectral Flow Cytometer | |
| & Full Spectrum Reference Library | The primary tool for post-acquisition SSC correction via linear unmixing algorithms. |
Managing Autofluorescence and Improving Rare Population Detection
Within deep 11-color immunophenotyping of human blood, autofluorescence and spectral overlap compromise the detection of rare populations (e.g., antigen-specific T cells, hematopoietic stem cells). Autofluorescence, originating primarily from granulocytes and monocytes, emits broadly across wavelengths, consuming dynamic range and increasing background. This application note details protocols to mitigate autofluorescence and enhance rare event resolution.
Quantitative Impact of Autofluorescence
The table below summarizes the median fluorescence intensity (MFI) contributed by cellular autofluorescence in key channels, illustrating the signal-to-noise challenge.
Table 1: Typical Autofluorescence MFI in Human Blood Leukocytes
| Cell Type | FITC Channel (488/530 nm) | PE Channel (488/575 nm) | APC Channel (640/660 nm) |
|---|---|---|---|
| Lymphocytes | Low (200-500) | Low (150-400) | Low (100-300) |
| Monocytes | Medium-High (600-1200) | Medium (400-800) | Low-Medium (200-500) |
| Granulocytes | High (1000-2500) | High (800-2000) | Medium (400-900) |
Core Protocol: Autofluorescence Subtraction via Blank Controls
This method calculates and subtracts the autofluorescence spectrum for each cell.
Materials & Reagents:
- Unstained Control: Cells processed identically without antibodies.
- Single Stain Controls: For spillover matrix calculation.
- Viability Dye: Fixable viability dye e.g., Zombie NIR.
- Fc Receptor Blocking Agent: Human TruStain FcX.
- Flow Cytometer: Capable of full spectrum or conventional PMT detection.
Procedure:
- Sample Preparation: Isolate PBMCs or use whole blood. Block Fc receptors for 10 min.
- Staining: Stain sample with full 11-color panel. Prepare matched unstained and single-stain controls.
- Data Acquisition: Acquire all samples on the cytometer using identical instrument settings.
- Compensation: Calculate spillover matrix from single-stain controls.
- Autofluorescence Subtraction: In analysis software (e.g., FlowJo, FCS Express), use the unstained control to create an "Autofluorescence Signature."
- Gate on live, single cells.
- For conventional cytometry, use the unstained sample to determine mean autofluorescence MFI in each channel. Apply a median subtraction from the stained sample.
- For spectral cytometry, employ built-in algorithms to unmix and subtract the autofluorescence signal as a distinct "fluorophore."
Protocol: Enhancing Rare Population Detection
Optimized staining and gating to resolve low-frequency events (<0.01% of parent).
Materials & Reagents:
- Brightest Fluorophores: Assign to markers defining the rare population (e.g., APC/Fire 750, PE/Cyanine7).
- Titrated Antibodies: To optimize S/N ratio.
- Cell Enrichment Cocktails (Optional): e.g., CD4+ T cell enrichment kit for rare antigen-specific T cells.
- DNA-intercalating Dye (for dump channel): To exclude dead cells (e.g., 7-AAD).
Procedure:
- Panel Design: Assign brightest fluorophores to low-expression markers on the rare population. Use Pacific Blue, FITC for high-expression, abundant markers.
- Antibody Titration: Titrate all antibodies to establish optimal concentration (point of saturation).
- "Live/Dead/Dump" Channel: Combine viability dye, lineage markers (CD14, CD16, CD19), and a DNA dye in a single, highly-quenched channel (e.g., BV510) to exclude irrelevant/dead cells.
- Enhanced Staining:
- Use 2x more cells (e.g., 5-10 million PBMCs).
- Increase staining volume to reduce background (e.g., 100 µL in PBS).
- Stain for 30 min at 4°C in the dark. Wash twice with cold buffer.
- Fix cells (if required) with 1% PFA.
- Acquisition & Analysis:
- Acquire a high event count (≥5 million total events).
- Use stringent, sequential gating: Singlets > Live > Lineage-negative > primary phenotype > rare population.
- Apply biexponential scaling for visualization.
The Scientist's Toolkit
Table 2: Essential Reagent Solutions
| Item | Function/Application |
|---|---|
| Fixable Viability Dyes (e.g., Zombie NIR) | Distinguishes live/dead cells; infrared dye saves visible channels. |
| Human TruStain FcX | Blocks non-specific antibody binding via Fc receptors. |
| Brilliant Stain Buffer Plus | Mitigates polymer-induced aggregation of brilliant violet/ultraviolet dyes. |
| Cell Preservation Medium (e.g., Cytodelics) | Stabilizes cells, reduces autofluorescence for delayed acquisition. |
| Compensation Beads (Anti-Mouse/Rat) | Generate consistent single-color controls for spillover matrix. |
| DNA-intercalating Dye (7-AAD or DAPI) | Adds dead cell exclusion to a dump channel. |
| MACS or EasySep Enrichment Kits | Pre-enriches target population to increase rare event frequency. |
Visualization
Title: Workflow for Autofluorescence Mitigation & Rare Cell Detection
Title: Cellular Autofluorescence Emission Mechanism
Title: Sequential Gating Strategy for Rare Events
Titration, Lot-to-Lot Variability, and Antibody Cocktail Stability
In the context of deep immunophenotyping human blood using 11-color flow cytometry panels, the generation of reliable, reproducible data is paramount. This Application Note details critical protocols and considerations for antibody titration, assessing lot-to-lot variability, and ensuring the stability of pre-mixed antibody cocktails. These factors directly impact panel sensitivity, specificity, and the validity of longitudinal studies central to immunology research and drug development.
Key Protocols
Antibody Titration Protocol
Purpose: To determine the optimal antibody concentration that provides the best signal-to-noise ratio (Stain Index) for each conjugate in a panel. Materials: Target cells (e.g., PBMCs or whole blood), antibody of interest, isotype control, staining buffer (PBS + 2% FBS), flow cytometer. Procedure:
- Prepare Cells: Aliquot 1x10^5 target cells into five tubes.
- Serial Dilution: Prepare a 2x serial dilution series of the antibody (e.g., 1:50, 1:100, 1:200, 1:400, 1:800) in staining buffer. An unstained control is essential.
- Staining: Add 50 µL of each antibody dilution to the cell pellets. Incubate for 30 minutes in the dark at 4°C.
- Wash: Add 2 mL of staining buffer, centrifuge (300 x g, 5 min), and aspirate supernatant.
- Acquire Data: Resuspend in 200 µL of buffer and acquire immediately on a flow cytometer.
- Analysis: Calculate the Stain Index (SI) for each dilution:
SI = (Median Positive − Median Negative) / (2 × SD of Negative). Plot SI vs. dilution. The optimal dilution is at or near the peak of the curve before saturation.
Table 1: Example Titration Data for a CD3-FITC Antibody
| Dilution | Median Fluorescence (Positive) | Median Fluorescence (Negative) | SD of Negative | Stain Index |
|---|---|---|---|---|
| 1:50 | 45,200 | 520 | 95 | 234.7 |
| 1:100 | 38,500 | 510 | 92 | 206.5 |
| 1:200 | 25,100 | 505 | 90 | 136.4 |
| 1:400 | 12,300 | 498 | 88 | 67.0 |
| 1:800 | 5,600 | 495 | 87 | 29.3 |
Optimal dilution for this example: 1:100.
Assessing Lot-to-Lot Variability
Purpose: To compare the performance of a new lot of antibody against the established lot to ensure consistency in panel staining. Procedure:
- Parallel Staining: Using the same cell source (fresh or viably frozen aliquots from a large donor batch), stain replicates with the old lot (control) and the new lot (test) at the optimized concentration.
- Full Panel Context: Perform staining both as a single antibody and within the full 11-color panel.
- Acquisition: Acquire data on the same instrument with identical settings within the same session.
- Key Metrics: Compare Median Fluorescence Intensity (MFI), Stain Index, and percentage of positive cells for the target population. A variance of >15-20% in MFI or SI may warrant panel re-optimization.
Table 2: Lot-to-Lot Comparison Template
| Parameter | Established Lot (A123) | New Lot (B456) | % Difference | Acceptable Threshold |
|---|---|---|---|---|
| MFI (Target Pop.) | 10,250 | 11,100 | +8.3% | ±15% |
| Stain Index | 45.2 | 48.7 | +7.7% | ±15% |
| % Positive | 65.4% | 63.9% | -2.3% | ±5% |
Antibody Cocktail Stability Testing Protocol
Purpose: To determine the usable shelf-life of a pre-mixed, multi-color antibody cocktail when stored at 4°C. Materials: Master antibody cocktail (all conjugates in staining buffer), sodium azide (0.09% final), target cells. Procedure:
- Cocktail Preparation: Prepare a large master mix of the 11-color panel antibodies in staining buffer + 0.09% sodium azide. Aliquot into single-use volumes.
- Baseline Staining (Day 0): Use a fresh aliquot to stain control cells. Acquire data.
- Longitudinal Testing: Store the remaining aliquots at 4°C in the dark. At weekly intervals (e.g., Day 7, 14, 21, 28), use a new aliquot to stain cells from the same frozen donor batch used on Day 0.
- Analysis: For each critical marker, track the change in MFI and Stain Index over time relative to Day 0. A significant drop (>15%) in SI indicates degradation.
Table 3: Cocktail Stability Over Time (Example CD4-APC)
| Storage Time (Days at 4°C) | MFI | Stain Index | % Change in SI from Day 0 |
|---|---|---|---|
| 0 (Baseline) | 8,500 | 40.1 | 0% |
| 7 | 8,450 | 39.8 | -0.7% |
| 14 | 8,200 | 38.5 | -4.0% |
| 21 | 7,900 | 35.2 | -12.2% |
| 28 | 6,800 | 28.9 | -27.9% |
In this example, the cocktail is stable for ~2-3 weeks.
The Scientist's Toolkit: Research Reagent Solutions
Table 4: Essential Materials for Panel Validation
| Item | Function & Importance |
|---|---|
| Lyophilized or Recombinant Antibody Standards | Provide a consistent, cellular antigen-free control for monitoring instrument performance and antibody integrity over time. |
| UltraComp eBeads / Compensation Beads | Capture antibodies to generate consistent, bright single-stain controls for spectral compensation, critical for 11-color panels. |
| Viability Dye (e.g., Fixable Viability Stain) | Distinguishes live from dead cells; dead cells cause non-specific antibody binding and must be excluded from analysis. |
| Cell Stabilization Cocktails (e.g., TransFix) | Allow for extended storage or shipment of stained samples prior to acquisition without significant loss of signal or viability. |
| Standardized Biological Controls (e.g., CD-Chex) | Commercially prepared human blood controls with known, stable values for key markers to monitor inter-assay reproducibility. |
| Antibody Stabilizer / Storage Buffer | Commercial formulations (e.g., containing BSA, gelatin, sodium azide) to extend the shelf-life of concentrated and working-dilution antibodies. |
Visualizations
Title: Antibody Titration Experimental Workflow
Title: Decision Tree for Assessing New Antibody Lots
Title: Protocol for Testing Antibody Cocktail Stability
1. Introduction Within a comprehensive thesis on 11-color flow cytometry for deep immunophenotyping of human blood, rigorous instrument quality control (QC) is the foundational step ensuring data integrity and reproducibility. Consistent daily performance, optimized photomultiplier tube (PMT) voltages, and stable laser output are non-negotiable prerequisites for multiplexed panel resolution and accurate biomarker quantification.
2. Key Quality Control Parameters and Protocols 2.1 Daily QC with Calibration Beads A daily QC protocol using stabilized fluorescent beads tracks instrument performance over time, monitoring laser delays, fluidics, and optical alignment.
Protocol:
- Vortex QC beads (e.g., CS&T, Rainbow, or similar) thoroughly.
- Acquire a preset number of bead events (e.g., 10,000) using the instrument's standardized QC application or template.
- Record key metrics: Median Fluorescence Intensity (MFI) for each channel, % Coefficient of Variation (%CV) for the bright bead population, and laser delay/alignment values.
- Compare values to established baseline means and acceptable ranges (typically ± 3 standard deviations). Document any deviations.
Quantitative QC Tracking Data: Table 1: Example Baseline and Tolerance Ranges for Daily QC Beads (11-color panel relevant fluorochromes)
Parameter Laser (nm) Detector Target Fluor Baseline MFI Acceptable Range (± 3SD) Target %CV Laser Power 488 - - 14.5 mW ± 0.2 mW - PMT Voltage 488 FITC FITC 450 V ± 15 V - Performance 488 FITC Bead Signal 28,500 26,000 - 31,000 < 3% Performance 640 APC Bead Signal 45,200 42,500 - 47,900 < 3% Alignment All - Time - - < 5% (of peak)
2.2 PMT Voltage Optimization via Titration Optimal PMT voltages maximize signal-to-noise ratio and resolution between negative and positive populations. Voltages are set using the stain index (SI) or signal-to-background ratio.
Protocol:
- Prepare a single stained control for each fluorochrome in the panel using compensation beads or cells with known antigen expression.
- Create a voltage titration series (e.g., from 200V to 800V in 50V increments) for the corresponding PMT.
- For each voltage, acquire data for the positive and negative bead/cell populations.
- Calculate SI = (MFIpositive – MFInegative) / (2 * SD_negative).
- Plot SI versus voltage. The optimal voltage is typically at the beginning of the plateau region of the curve, balancing resolution with detector linearity and longevity.
Quantitative Voltage Titration Data: Table 2: Example Stain Index Calculation at Different PMT Voltages for APC Fluorochrome
PMT Voltage (V) MFI (Positive) MFI (Negative) SD (Negative) Stain Index 400 5,200 520 22 106.4 450 12,500 650 28 211.6 500 25,000 850 35 345.0 550 45,000 1,200 48 456.3 600 70,000 2,100 85 399.4
2.3 Laser Stability Monitoring Laser power fluctuations directly impact fluorescence intensity. Monitoring requires a power meter integrated into the system or specialized stability beads.
- Protocol:
- For systems with internal power meters, log the laser power output before and after each run.
- Alternatively, use high-intensity stability beads and track the MFI in a scatter channel or a dedicated fluorescent channel over an extended acquisition time (e.g., 1 hour).
- Calculate the % coefficient of variation (%CV) of the MFI over time. Drift >5% or sudden drops indicate instability requiring service.
3. Visualizing the QC Workflow
Daily Flow Cytometry QC Workflow
4. The Scientist's Toolkit: Essential QC Materials
Table 3: Research Reagent Solutions for Flow Cytometry QC
| Item | Function | Example Product Type |
|---|---|---|
| UltraComp eBeads | Single-stained compensation controls for multicolor panels. | Compensation Beads |
| CS&T / Rainbow QC Beads | Daily performance tracking of lasers, fluidics, and optics. | Calibration & Tracking Beads |
| Positive/Negative Staining Control | Verification of antibody staining protocol and reagent viability. | Cells or beads with known expression. |
| Laser Power Meter | Direct measurement of laser output power for stability verification. | Integrated or external photodiode sensor. |
| Sheath Fluid & Clean Solution | Particle-free fluid for sample delivery and system decontamination. | Filtered saline buffer, system cleaner. |
| Validation Antibody Panel | A small, characterized panel to verify full system performance post-QC. | CD4, CD8, CD3 on human PBMCs. |
In 11-color flow cytometry for deep immunophenotyping of human blood, data artifacts like cellular debris and antibody aggregates constitute major sources of error, obscuring true biological signals and compromising high-dimensional analysis. Accurate immunophenotyping requires robust protocols to identify and exclude these artifacts through appropriate thresholding strategies. This document provides application notes and detailed protocols for managing these challenges within complex multicolor panels.
Quantitative Profiling of Common Artifacts
The following table summarizes the typical characteristics and frequency of key artifacts encountered in human peripheral blood mononuclear cell (PBMC) analysis using an 11-color panel.
Table 1: Characteristics of Common Flow Cytometry Artifacts in PBMC Analysis
| Artifact Type | Typical FSC/SSC Profile | Common Causes | Approximate Frequency in Unfiltered Samples* | Primary Markers Affected |
|---|---|---|---|---|
| Cellular Debris | Low FSC-A, Low to Mid SSC-A | Cell processing, freeze-thaw, apoptotic fragments | 15-30% of total events | All, via non-specific binding |
| Antibody Aggregates | Low FSC-A, Low SSC-A | Aged antibody stocks, improper conjugation, | 1-5% of total events | Specific channels of aggregated conjugate |
| Cell Doublets/Aggregates | High FSC-W, High FSC-H | Over-concentration during acquisition, clumping | 2-8% of singlet gate | All, via incorrect volumetry |
| Electronic Noise | Very low FSC/SSC | Instrument start-up, voltage fluctuations | <0.5% | All channels |
| Frequency can vary significantly based on sample preparation quality and reagent handling. |
Core Protocol: Establishing a Thresholding Strategy for Debris Exclusion
This protocol is designed to systematically set thresholds for removing debris and aggregates prior to downstream immunophenotyping analysis.
Experimental Workflow: Sequential Gating for Artifact Removal
Materials & Reagents
- Sample: Human PBMCs, freshly isolated or viably frozen.
- Staining Panel: 11-color panel including a viability dye (e.g., Zombie NIR) and a ubiquitously expressed lineage marker (e.g., CD45-APC/Cy7).
- Buffer: High-quality PBS with 0.5-2% BSA or FBS, pre-filtered (0.1µm).
- Equipment: Flow cytometer with 3-laser (488nm, 561nm, 637nm) minimum configuration, capable of detecting 11 fluorochromes. 5ml polypropylene FACS tubes.
Step-by-Step Protocol
- Sample Preparation:
- Resuspend PBMCs at 10-20x10^6 cells/ml in cold buffer.
- Filter cell suspension through a pre-wetted 30-40µm cell strainer into a FACS tube immediately before acquisition to reduce aggregates.
- Instrument Setup & QC:
- Perform daily startup and quality control using calibration beads (e.g., CS&T beads). Ensure lasers are stable.
- Create a primary acquisition plot: FSC-A vs. SSC-A. Set a preliminary threshold on FSC-A just above the electronic noise cloud to avoid collecting empty droplets.
- Live Cell Gating:
- Acquire a small portion of an unstained or viability-dye-only control sample.
- Create a plot: FSC-A vs. Viability Dye. For a viability dye where dead cells are positive, gate the negative population as Live Cells.
- Apply this gate to all subsequent samples.
- Singlets Gating:
- On the Live Cells population, create two plots: FSC-A vs. FSC-H and SSC-A vs. SSC-H.
- Draw a tight gate around the diagonal population where pulse height correlates with pulse area. This excludes cell doublets and aggregates.
- The Singlets gate is now defined.
- Debris Exclusion via Lineage Marker:
- On the Singlets population, create a plot: SSC-A vs. CD45.
- True leukocytes will be CD45+ with a range of SSC signals (lymphocytes low, monocytes medium, granulocytes high).
- Draw a gate to include all CD45+ events. Explicitly exclude the CD45- / low SSC-A population, which constitutes non-leukocyte debris and some antibody aggregates.
- This CD45+ Singlets population is now the basis for all downstream lineage-specific gating (e.g., CD3+ T cells, CD19+ B cells).
Protocol: Identification and Mitigation of Antibody Aggregates
Antibody aggregates can cause false-positive signals in the channels of the affected fluorochrome.
Diagnostic and Mitigation Workflow
Detailed Method
- Detection: Observe an unexpected, tight population in a channel that should be negative based on fluorescence-minus-one (FMO) controls. It will typically have very low FSC and SSC.
- Confirmation: Run a "buffer-only" sample stained with the full panel. The presence of events in the suspect channel confirms reagent-derived aggregates.
- Mitigation - Ultracentrifugation:
- Prepare the antibody cocktail at 2-4x the final staining concentration in a small volume (e.g., 50µl).
- Use a benchtop ultracentrifuge or a high-speed microcentrifuge with a fixed-angle rotor.
- Spin the antibody cocktail at 100,000 x g for 10 minutes at 4°C to pellet large aggregates.
- Carefully transfer the top 90% of the supernatant to a new tube for use in staining. Do not disturb the pellet.
- Alternative - Filtration:
- Pass the prepared antibody cocktail through a pre-rinsed 0.1µm low-protein-binding centrifugal filter.
- Centrifuge according to manufacturer instructions (typically 10,000 x g for 2-5 minutes).
- Re-assessment: Stain and acquire a test sample with the treated antibody cocktail. Compare the event rate in the previously affected channel to the pre-treatment data. A significant reduction confirms successful mitigation.
The Scientist's Toolkit: Key Research Reagent Solutions
Table 2: Essential Materials for Artifact Management in Deep Immunophenotyping
| Item | Function & Rationale |
|---|---|
| Viability Dye (e.g., Zombie NIR, Fixable Viability Stain 780) | Distinguishes live from dead cells. Dead cells increase nonspecific binding and fragment into debris. Critical for initial gate. |
| Lineage Anchor Antibody (e.g., anti-human CD45) | A pan-leukocyte marker. The SSC-A vs. CD45 plot is the most reliable method to separate leukocytes from non-cellular debris and platelets. |
| Pre-Separation Filters (30µm, 40µm) | Removes large cell clumps before sample introduction to the cytometer, reducing aggregate events in the singlet gate. |
| High-Quality, Protein-Free Buffer | Used for final cell resuspension before acquisition. Reduces background and stickiness that can cause aggregate formation in the fluidics. |
| Ultracentrifuge / 0.1µm Nanosep Filters | For removing aggregates from antibody cocktails immediately prior to use, eliminating a major source of false-positive signals. |
| Quality Control Beads (e.g., CS&T, Rainbow Beads) | Ensures instrument laser alignment, fluorescence detection, and fluidics are performing optimally, allowing for accurate threshold setting. |
| Fluorescence-Minus-One (FMO) Controls | Essential for defining accurate positive/negative boundaries for each marker, especially when spread from debris or aggregates contaminates a channel. |
Benchmarking and Validating Your Panel for Reproducible, Publication-Ready Data
1. Introduction: Validation within an 11-Color Flow Cytometry Thesis In a thesis focused on deep immunophenotyping of human blood using 11-color panels, rigorous validation is paramount. The complexity of multicolor panels introduces spectral overlap, compensation challenges, and potential inter-assay variability. This document provides application notes and protocols for assessing reproducibility (inter- and intra-assay precision), precision (measurement consistency), and analytical sensitivity (low-abundance population detection) to ensure data robustness for research and drug development.
2. Key Research Reagent Solutions
| Reagent / Material | Function in Validation |
|---|---|
| Viability Dye (e.g., Zombie Aqua) | Distinguishes live from dead cells, critical for accurate immunophenotyping and preventing non-specific antibody binding. |
| Lytic Solution (e.g., BD FACS Lysing Solution) | Standardized erythrocyte lysis for consistent leukocyte preparation from whole blood. |
| UltraComp eBeads / Compensation Beads | Antibody-capture beads used with single-color controls to generate accurate compensation matrices for 11 colors. |
| Standardized Stabilized Whole Blood Controls (e.g., Cyto-Trol) | Provides a biologically relevant control for inter-assay reproducibility testing across multiple experiment days. |
| Titrated Antibody Panels | Pre-optimized antibody cocktails where each conjugate has been titrated for optimal signal-to-noise in the 11-color combination. |
| Counting Beads (e.g., AccuCount Beads) | Absolute counting beads for quantifying cell populations per unit volume, essential for sensitivity assessments. |
| Instrument QC Beads (e.g., CS&T / Rainbows) | Daily performance tracking of cytometer lasers, fluorescence detectors, and fluidics to ensure precision. |
3. Protocols for Core Validation Experiments
Protocol 3.1: Intra- and Inter-Assay Reproducibility Assessment Objective: Quantify Coefficient of Variation (CV) for marker expression within a run and across multiple runs. Materials: Fresh or cryopreserved PBMCs from healthy donor, standardized 11-color T-cell panel (CD3, CD4, CD8, CD45RA, CCR7, CD28, CD95, CD25, CD127, HLA-DR, CD38), viability dye, lytic solution, instrument QC beads. Procedure:
- Prepare a single large master mix of antibody cocktail and stain a single donor sample in ten replicate tubes (Intra-assay).
- Repeat staining from the same donor using the same protocol on three separate days (Inter-assay).
- Acquire all samples on a calibrated cytometer, targeting 100,000 lymphocytes per tube.
- Apply consistent gating strategy (see Diagram 1).
- For key populations (e.g., CD4+ Naïve T-cells, CD8+ Effector Memory T-cells), record the percentage (%) and Median Fluorescence Intensity (MFI) of a key marker (e.g., CD95 on TEM).
- Calculate Mean, Standard Deviation (SD), and %CV for both % and MFI.
Protocol 3.2: Analytical Sensitivity and Limit of Detection (LoD) Objective: Determine the lowest frequency population that can be reliably detected. Materials: Primary sample (PBMCs), rare cell population of interest (e.g., antigen-specific T-cells using a MHC multimer), counting beads. Procedure:
- Spik-In Experiment: Serially dilute a known count of rare cells (e.g., MHC multimer+ cells) into a negative matrix (PBMCs from a different donor).
- Prepare dilution series expected to yield frequencies from 1% down to 0.01% of the lymphocyte gate.
- Stain each dilution with the 11-color panel, including the specific marker (MHC multimer).
- Acquire a defined total volume using counting beads to determine absolute count of the rare population.
- Define LoD as the concentration where the population is detected with a CV < 20% and recovery within 80-120%.
4. Quantitative Data Summary Tables
Table 1: Intra-Assay Precision (n=10 Replicates from One Run)
| Cell Population (Gate) | Mean % (SD) | %CV for % | Key Marker MFI (SD) | %CV for MFI |
|---|---|---|---|---|
| CD4+ Naïve (CD4+ CCR7+ CD45RA+) | 25.1 (0.5) | 2.0% | CD95 MFI: 405 (12) | 3.0% |
| CD8+ Effector Memory (CD8+ CCR7- CD45RA+) | 8.7 (0.3) | 3.4% | CD28 MFI: 1250 (50) | 4.0% |
| Tregs (CD4+ CD25hi CD127lo) | 4.2 (0.2) | 4.8% | FoxP3 MFI*: 8800 (350) | 4.0% |
*FoxP3 from intracellular staining post-fixation.
Table 2: Inter-Assay Precision (n=3 Independent Days)
| Cell Population | Mean % (SD) | %CV for % | Sensitivity (LoD) |
|---|---|---|---|
| CD19+ B Cells | 7.5 (0.4) | 5.3% | 0.1% of lymphocytes |
| NK Cells (CD3- CD56+) | 11.2 (0.7) | 6.3% | 0.05% of lymphocytes |
| Antigen-Specific CD8+ (MHC Multimer+) | 0.25 (0.03) | 12.0% | 30 cells per million PBMCs |
5. Visualization Diagrams
Comparative Analysis with Lower-Parameter Panels and Spectral Flow Cytometry
Within the broader thesis exploring 11-color flow cytometry panels for deep immunophenotyping of human peripheral blood mononuclear cells (PBMCs), a critical question arises: How do findings from high-parameter panels compare to those derived from strategically designed lower-parameter panels, and how does the emergence of spectral flow cytometry influence this comparison? This application note provides a framework and protocols for this comparative analysis, essential for validating findings, optimizing resource allocation, and ensuring robustness in translational research and drug development.
Key Comparative Metrics: Data Presentation
The following tables summarize core parameters for comparison between conventional polychromatic, lower-parameter, and spectral flow cytometry approaches within the context of human blood immunophenotyping.
Table 1: Panel Configuration & Capability Comparison
| Parameter | 11-Color Conventional Panel | 6-Color Lower-Parameter Panel | 11-Color Spectral Panel |
|---|---|---|---|
| Primary Purpose | Deep, high-resolution discovery | Targeted hypothesis testing; clinical validation | Deep phenotyping with superior spillover management |
| Typical Cell Populations Resolved | 30+ subsets (e.g., Treg, memory B, cDC1/2) | 10-15 core subsets (e.g., CD4+/CD8+ T, B, NK, Monocytes) | 30+ subsets with improved resolution of dim markers |
| Key Hardware | 3-laser (e.g., 488, 640, 405 nm) conventional analyzer | 2-laser (488, 640 nm) conventional analyzer | 1 laser (e.g., 488 nm) with full spectrum detection |
| Data Complexity | High; requires advanced compensation & analysis | Low to moderate; simpler analysis & gating | High; requires spectral unmixing algorithms |
| Approximate Acq. Time (for 100k PBMC events) | ~5-7 minutes | ~2-3 minutes | ~5-7 minutes |
| Relative Cost per Sample (Reagents + Analysis) | 1.0 (Reference) | 0.4 - 0.6 | 1.2 - 1.5 |
Table 2: Performance Metric Comparison from Recent Studies
| Metric | Conventional 11-Color | Lower-Parameter 6-Color | Spectral 11-Color |
|---|---|---|---|
| Median Fluorescence Intensity (MFI) CV for CD4 (Bright) | <5% | <5% | <3% |
| Spillover Spread Matrix (SSM) Mean | 1.0 - 2.5 | 0.5 - 1.5 | 0.1 - 0.5 |
| Detection Sensitivity (PE-Cy7 dim marker) | Moderate | Lower (if excluded) | High |
| Compensation Accuracy | Prone to error with complex panels | High, simple | N/A (Unmixing) |
| Post-acquisition Flexibility | Low (filters fixed) | Low | High (re-gatable post-acq) |
Experimental Protocols
Protocol 1: Design and Validation of a 6-Color Lower-Parameter Panel from an 11-Color Master Panel
Objective: To derive and validate a focused 6-color panel for core populations, ensuring data is directly comparable to the parent 11-color dataset.
Materials: See "The Scientist's Toolkit" below.
Procedure:
- Panel Derivation: From the thesis 11-color panel, select antibodies for the following mandatory lineages: CD3, CD19, CD56, CD14, CD4, CD8. Prioritize conjugates with minimal spillover (e.g., FITC, PE, PerCP-Cy5.5, APC, BV421, BV605).
- Staining Protocol: a. Prepare PBMCs: Isolate PBMCs from healthy donor blood via density gradient centrifugation (Ficoll-Paque). Adjust concentration to 10x10^6 cells/mL in FACS Buffer (PBS + 2% FBS). b. Aliquot Cells: Dispense 100 μL of cell suspension (1x10^6 cells) into a 5 mL FACS tube. c. Stain Surface Markers: Add titrated volumes of the 6 antibodies. Vortex gently. Incubate for 30 minutes at 4°C in the dark. d. Wash: Add 2 mL of FACS Buffer, centrifuge at 400 x g for 5 minutes. Decant supernatant. e. Resuspend: Resuspend cell pellet in 300 μL of FACS Buffer. Transfer to a 5 mL polystyrene round-bottom tube. Keep at 4°C and protect from light until acquisition.
- Acquisition & Validation: a. Acquire samples on the same conventional cytometer used for the 11-color panel. b. Using a single stain control for each fluorochrome, perform compensation manually or with auto-compensation software. c. Acquire at least 100,000 events per sample. d. Validation Gate: Apply identical forward/side scatter and viability gating strategies as the 11-color panel. Directly compare the frequency of parent populations (e.g., %CD4+ of CD3+ lymphocytes) between the 6-color and the gated 11-color dataset. A correlation coefficient (R^2) of >0.98 is expected for major populations.
Protocol 2: Parallel Acquisition for Spectral vs. Conventional Comparison
Objective: To directly compare population resolution and marker expression between spectral and conventional flow cytometry using the same 11-color reagent panel.
Procedure:
- Panel & Staining: Use the identical 11-color antibody cocktail and staining procedure from the core thesis work (as per Protocol 1 steps a-d, but with 11 antibodies).
- Sample Splitting: After the final wash, resuspend the stained cell pellet in 600 μL of FACS Buffer. Split into two equal aliquots of 300 μL each.
- Parallel Acquisition: a. Conventional Acquisition: Acquire Aliquot 1 on the configured conventional cytometer. Apply standard compensation using single-stain controls. b. Spectral Acquisition: Acquire Aliquot 2 on a spectral cytometer (e.g., Cytek Aurora). Do not perform compensation. Instead, apply a pre-generated spectral unmixing matrix derived from matched single-stain controls acquired on the same instrument.
- Comparative Analysis: a. Manually gate key immune subsets (e.g., T cell memory subsets, classical monocytes) on both datasets. b. Export the MFI for key markers (e.g., CD45RA, CCR7, HLA-DR) for each population. c. Calculate the Stain Index (SI) for a dim marker (e.g., PD-1) in both systems: SI = (MFIPositive - MFINegative) / (2 * SD_Negative). Compare SI values. d. Visually compare the spread of data in bivariate plots, particularly in channels with historical spillover issues (e.g., BV605 vs BV650).
Mandatory Visualizations
Diagram 1: Comparative Analysis Workflow (76 chars)
Diagram 2: Signal Processing: Conventional vs Spectral (78 chars)
The Scientist's Toolkit: Research Reagent Solutions
| Item | Function & Rationale |
|---|---|
| Pre-formulated 11-Color Master Panel | Core thesis reagent. Contains titrated, lyophilized or liquid antibody mixes for deep phenotyping. Serves as the gold standard for comparison. |
| Modular 6-Color Panel Kit | Customizable antibody-fluorochrome conjugates (FITC, PE, PerCP-Cy5.5, APC, BV421, BV605) for building the validated lower-parameter panel. Enables flexible scaling. |
| UltraComp eBeads / Compensation Beads | Artificial particles for generating consistent single-stain controls. Critical for accurate compensation on conventional cytometers and creating spectral unmixing libraries. |
| Viability Dye (e.g., Fixable Viability Stain 780) | Near-IR dye to exclude dead cells. Compatible with both conventional and spectral platforms, ensuring clean analysis. |
| FACS Buffer (PBS + 2% FBS + 2mM EDTA) | Standard washing and resuspension buffer. Preserves cell viability and reduces nonspecific binding and clumping. |
| Spectral Unmixing Software (e.g., SpectroFlo) | Proprietary algorithm-driven software required to deconvolve the full emission spectrum into individual fluorophore contributions on spectral cytometers. |
| High-Purity Human PBMCs (Fresh or Frozen) | Standardized biological starting material. Frozen vials from the same donor allow for paired, repeat experiments across platforms and time. |
Within the context of deep immunophenotyping of human blood using 11-color flow cytometry panels, standardization is paramount for generating reproducible, comparable, and high-quality data across laboratories and time. Two critical guidelines are the Minimal Information about a Single Immunophenotyping Experiment (MISIS) and the recommendations from the International Council for Standardization of Haematology (ICSH) and the International Clinical Cytometry Society (ICCS). Adherence to these frameworks ensures experimental rigor, facilitates data sharing, and bolsters the validity of findings in research and drug development.
| Guideline | Primary Focus | Key Relevance to 11-Color Panels |
|---|---|---|
| MISIS | Standardized reporting of experimental metadata. | Ensures all critical parameters from specimen collection to instrument configuration are documented for panel replication. |
| ICCS/ICSH | Pre-analytical, analytical, and post-analytical procedures for clinical flow cytometry. | Provides protocols for sample handling, staining, instrument setup/QC, and data analysis to minimize variability. |
Application Notes & Protocols
Pre-Analytical Phase: Sample Preparation & Panel Design
- ICCS Harmonization: Strict adherence to standardized blood collection tubes (e.g., K2EDTA), time-to-processing limits (<24h at RT), and staining initiation protocols is mandatory.
- MISIS Reporting: Document: anticoagulant type, time from collection to processing/staining, and storage conditions.
Protocol: Standardized Staining for 11-Color Panel
- Aliquot Cells: Transfer 100µL of whole blood or 0.5-1x10^6 PBMCs into a 12x75mm polystyrene tube.
- Blocking: Add 10µL of human Fc receptor blocking solution (e.g., human IgG). Vortex gently. Incubate for 10 minutes at RT (4°C if using surface + intracellular panels).
- Surface Staining: Add pre-titrated antibody cocktail (prepared in Brilliant Stain Buffer or equivalent to mitigate fluorochrome polymer interactions). Vortex. Incubate for 30 minutes in the dark at RT.
- RBC Lysis: Add 2mL of 1x lyse/fix buffer (e.g., BD FACS Lysing Solution). Vortex. Incubate for 15 minutes in the dark at RT.
- Wash: Centrifuge at 500 x g for 5 minutes. Decant supernatant. Wash once with 2mL of Cell Staining Buffer (e.g., PBS + 0.5% BSA + 2mM EDTA). Resuspend in 300-500µL of Cell Staining Buffer for acquisition. For intracellular staining (e.g., cytokines, transcription factors), follow ICCS protocols for fixation/permeabilization after surface staining.
Analytical Phase: Instrument Setup & Quality Control
- ICCS Calibration: Daily performance tracking using standardized calibration beads (e.g., CS&T, Rainbow) is required to maintain optimal optical alignment and fluidics.
- MISIS Reporting: Document: instrument manufacturer/model, laser configurations, filter sets, daily QC results, and software versions.
Protocol: Daily QC and Compensation Setup
- Instrument QC: Run calibration beads. Record Mean Fluorescence Intensity (MFI) and %CV for all channels. Verify values are within established laboratory ranges.
- Fluidics QC: Check sample pressure and drain pressure; record values.
- Compensation: Prepare single-color controls for every fluorochrome in the 11-color panel using the same biological substrate (e.g., stained lymphocytes or anti-mouse Igκ beads). Acquire and calculate compensation matrix in software. Apply matrix to all experimental samples.
Table: Example 11-Panel QC Metrics (Hypothetical Data)
| Parameter | Target | Typical Acceptable Range |
|---|---|---|
| Laser Delay Alignment | Optimal | < 0.5µs deviation |
| PMT Voltage (FITC Channel) | Fixed for QC beads | 400V ± 20V |
| QC Bead MFI (PE-Cy7) | Tracking | 15,000 - 25,000 a.u. |
| QC Bead %CV (APC) | Minimized | < 3% |
| Background (Buffer) | Minimized | < 150 events/sec |
Post-Analytical Phase: Gating, Analysis & Reporting
- ICCS Gating Harmonization: Use sequential, hierarchical gating based on intrinsic cell properties. Reference normal peripheral blood datasets for expected population distributions.
- MISIS Compliance: Ensure the final dataset or publication includes all required metadata elements, including the fully populated antibody panel table.
Table: MISIS-Compliant Antibody Panel Table
| Specificity | Clone | Fluorochrome | Purpose | Manufacturer | Catalog # | Dilution |
|---|---|---|---|---|---|---|
| CD45 | HI30 | BUV395 | Leukocyte gate | BD Biosciences | 563792 | 1:50 |
| CD3 | UCHT1 | BUV737 | T cells | BD Biosciences | 612759 | 1:50 |
| CD4 | SK3 | BB515 | Helper T cells | BD Biosciences | 564419 | 1:50 |
| CD8 | SK1 | BV650 | Cytotoxic T cells | BioLegend | 344732 | 1:50 |
| CD19 | HIB19 | BV786 | B cells | BD Biosciences | 563328 | 1:50 |
| CD56 | NCAM16.2 | PE | NK/NKT cells | BD Biosciences | 562281 | 1:50 |
| CD16 | 3G8 | PE-CF594 | FcγRIII, NK, monocytes | BD Biosciences | 562285 | 1:50 |
| CD14 | MφP9 | PE-Cy7 | Monocytes | BD Biosciences | 557742 | 1:50 |
| CD25 | 2A3 | APC | IL-2Rα (activated Tregs) | BD Biosciences | 340939 | 1:50 |
| CD127 | HIL-7R-M21 | Alexa Fluor 700 | IL-7R (low on Tregs) | BD Biosciences | 560822 | 1:50 |
| FoxP3 | 259D/C7 | BV421 | Transcription factor (Tregs) | BD Biosciences | 562596 | 1:50 |
The Scientist's Toolkit: Key Research Reagent Solutions
| Item | Function | Example Product |
|---|---|---|
| Brilliant Stain Buffer | Mitigates fluorochrome aggregation and quenching in polymer dye-based panels (e.g., BV, BY). | BD Horizon Brilliant Stain Buffer |
| Fc Receptor Blocking Reagent | Reduces non-specific antibody binding via Fc receptors. | Human TruStain FcX |
| Lyse/Fix Buffer | Simultaneously lyses red blood cells and fixes leukocytes. | BD FACS Lysing Solution |
| Cell Staining Buffer | Wash and resuspension buffer to maintain cell viability. | PBS + 0.5% BSA + 2mM EDTA |
| Viability Dye | Distinguishes live from dead cells; critical for data integrity. | Fixable Viability Dye eFluor 780 |
| Calibration Beads | Tracks instrument performance and sets photomultiplier tube voltages. | BD CST Beads, SPHERO Rainbow Beads |
| Single-Color Controls | Enables accurate calculation of spectral overlap compensation. | UltraComp eBeads, ArC Amine Beads |
Visualization of Workflow and Guidelines Integration
Standardized 11-Color Flow Workflow
MISIS Reporting Data Integration
Within the context of deep immunophenotyping of human blood using 11-color flow cytometry panels, data analysis is a critical bottleneck. This document provides application notes and detailed protocols for traditional sequential gating and modern high-dimensional analysis, enabling researchers to accurately dissect complex immune landscapes for research and drug development.
Comparison of Analytical Approaches
Table 1: Quantitative Comparison of Flow Cytometry Analysis Tools
| Feature | Traditional Biexponential Gating | t-SNE | UMAP | PhenoGraph |
|---|---|---|---|---|
| Core Principle | Manual, sequential 2D gate based on marker expression. | Stochastic neighbor embedding for non-linear dimensionality reduction. | Manifold learning with topological constraints. | Graph-based clustering of high-dimensional data. |
| Dimensionality | 2 dimensions per plot. | Reduces to 2 or 3 dimensions for visualization. | Reduces to 2 or 3 dimensions for visualization. | Operates in full high-dimensional space (e.g., 11+). |
| Output | Hierarchical subpopulations with defined statistics (% of parent). | 2D map where proximity indicates phenotypic similarity. | 2D/3D map preserving both local and global structure. | Discrete cluster assignments for each cell. |
| Speed (Typical for ~1M cells) | Fast to moderate (user-dependent). | Slow. | Fast. | Moderate to Fast. |
| Preserves Global Structure | N/A (local to plot). | Poor. | Excellent. | N/A (clustering). |
| Primary Use Case | Identifying predefined, known populations. | Visualizing high-dimensional relationships. | Rapid visualization and exploration. | Discovering novel or rare cell states without prior bias. |
| Key Parameter(s) | Gate position, biexponential scaling. | Perplexity (typically 30-50), learning rate. | Nearest Neighbors (nneighbors, ~15-50), mindist (~0.1). | k (nearest neighbors for graph construction). |
| Integration with Gating | Primary method. | Used post-gating for visualization of pre-gated data. | Used post-gating for visualization of pre-gated data. | Can inform or replace manual gating; clusters can be back-gated. |
Experimental Protocols
Protocol 1: Traditional Biexponential Gating for an 11-Color T Cell Panel Objective: To identify major and activated T cell subsets (Naïve, Memory, Effector, HLA-DR+). Materials: See "The Scientist's Toolkit" below. Procedure:
- Data Acquisition & Preprocessing: Run compensated and live-singlet cells. Apply biexponential transformation to all fluorescent channels to visualize negative and positive populations on a log scale.
- Sequential Hierarchical Gating: a. Lymphocytes: Plot FSC-A vs. SSC-A. Draw a gate around the low SSC, low-to-intermediate FSC population. b. Singlets: From (a), plot FSC-A vs. FSC-H. Gate the diagonal population. c. Live CD3+ T Cells: From (b), plot a viability dye vs. CD3. Gate viable (dye-negative), CD3+ cells. d. CD4+ and CD8+ Subsets: From (c), plot CD4 vs. CD8. Gate CD4+CD8-, CD4-CD8+, and double-negative populations. e. Memory/Phenotype Subsetting: From CD4+ gate, plot CD45RA vs. CCR7. Gate Naïve (CD45RA+CCR7+), Central Memory (CM: CD45RA-CCR7+), Effector Memory (EM: CD45RA-CCR7-), and Terminally Differentiated Effector (EMRA: CD45RA+CCR7-). f. Activation Marker Analysis: For any subset from (e), plot CD38 vs. HLA-DR to quantify activated cells.
- Statistical Export: Record the percentage of each gated population relative to its parent and the absolute count.
Protocol 2: High-Dimensional Analysis Workflow with UMAP and PhenoGraph Objective: To perform an unbiased, high-dimensional analysis of all immune cells in an 11-color panel. Materials: See "The Scientist's Toolkit" below. Software: R (flowCore, umap, Rphenograph) or Python (Scanpy). Procedure:
- Data Preparation: Export the compensated, singlet, live cell data for all events from your flow cytometry analysis software. Use all 11 fluorescence channels as analytical dimensions. Arcsinh transform the data with a cofactor of 150.
- Dimensionality Reduction with UMAP:
a. Downsample: If necessary, randomly downsample to 50,000-100,000 cells for computational efficiency.
b. Parameterize: Set
n_neighbors=30,min_dist=0.3, andmetric='euclidean'. c. Run UMAP: Apply the algorithm to the transformed 11-dimensional data to generate 2-dimensional (x, y) coordinates for each cell. - Clustering with PhenoGraph: a. Construct Graph: Using the same downsampled 11-dimensional data, construct a k-nearest neighbor graph (k=30). b. Community Detection: Apply the Louvain community detection algorithm to partition the graph into distinct clusters. Each cell receives a cluster ID (e.g., 1, 2, 3...).
- Visualization & Annotation: a. Create a UMAP scatter plot, coloring cells by their PhenoGraph cluster ID. b. Generate median expression heatmaps for all markers across all clusters. c. Annotate Clusters: Biologically annotate clusters by their median marker expression (e.g., Cluster 1: CD3+CD4+CD45RA+CCR7+ = Naïve CD4 T cells; Cluster 2: CD19+CD20+ = B cells).
- Validation via Back-Gating: Overlay specific annotated clusters onto traditional 2D plots to validate phenotype and ensure analytical consistency.
Visualizations
Title: Flow Cytometry Analysis Workflow Comparison
Title: PhenoGraph Clustering & Annotation Protocol
The Scientist's Toolkit
Table 2: Essential Research Reagent Solutions for 11-Color Deep Immunophenotyping
| Item | Function | Example/Note |
|---|---|---|
| 11-Color Antibody Panel | Simultaneous detection of multiple cell surface/intracellular targets. | Custom panel targeting CD3, CD4, CD8, CD19, CD20, CD14, CD16, CD45RA, CCR7, HLA-DR, CD38. |
| Viability Dye | Exclusion of dead cells to reduce non-specific binding. | Fixable Viability Dye eFluor 780 or Zombie NIR. |
| Lysing Solution | Removal of red blood cells from whole blood samples. | Ammonium-Chloride-Potassium (ACK) lysing buffer or commercial fix/lyse solutions. |
| Permeabilization Buffer | For intracellular target staining (if required). | Foxp3 / Transcription Factor Staining Buffer Set. |
| Flow Cytometry Setup Beads | Instrument calibration, compensation, and daily QC. | UltraComp eBeads or CS&T Research Beads. |
| Analysis Software | Data processing, transformation, and gating. | Traditional: FCS Express, FlowJo. High-Dim: R (flowCore), Python (Scanpy), Cytobank. |
Application Note 1: Monitoring Immunotherapy Response in a Phase II Melanoma Trial
- Objective: To identify predictive biomarkers of response to anti-PD-1 therapy using deep immunophenotyping of peripheral blood mononuclear cells (PBMCs).
- Panel Design: An 11-color panel was designed to dissect T cell and NK cell compartments, focusing on activation, exhaustion, and differentiation.
- Core Markers: CD3, CD4, CD8, CD45RA, CCR7, PD-1, LAG-3, TIM-3, CD16, CD56, HLA-DR, Ki-67 (with a viability dye).
- Key Finding: A sustained increase in the frequency of CD8+ T cells with a stem-like memory phenotype (CD45RA+ CCR7+) and low co-expression of multiple exhaustion markers (PD-1+ LAG-3- TIM-3-) at Cycle 3 Day 1 was significantly associated with radiographic response at Week 12.
Table 1: Flow Cytometry Findings Correlated with Clinical Response
| Immune Subset Phenotype | Non-Responders (Mean % ± SD) | Responders (Mean % ± SD) | p-value |
|---|---|---|---|
| CD8+ T cells (of CD3+) | 22.1% ± 5.4 | 35.8% ± 7.2 | 0.003 |
| CD8+ Tscm (of CD8+) | 2.1% ± 1.1 | 8.7% ± 2.5 | <0.001 |
| CD8+ PD-1+ LAG-3+ TIM-3+ | 15.3% ± 4.8 | 4.9% ± 2.1 | 0.001 |
| NK cells (CD56dim CD16+) | 12.5% ± 3.2 | 20.4% ± 4.6 | 0.012 |
Protocol 1: Longitudinal PBMC Analysis for Immunotherapy Trials
- Sample Acquisition: Collect patient whole blood (8-10 mL) in sodium heparin tubes at baseline, C1D1, C1D15, C2D1, C3D1, and at each restaging scan.
- PBMC Isolation: Isolate PBMCs within 4 hours using density gradient centrifugation (Ficoll-Paque). Wash twice with PBS. Count and assess viability (e.g., Trypan Blue).
- Staining: a. Resuspend 2x10^6 PBMCs in 100 µL PBS. b. Add 5 µL Human TruStain FcX and incubate for 10 minutes at RT. c. Add the pre-titrated 11-color antibody cocktail. Vortex gently and incubate for 30 minutes at 4°C in the dark. d. Wash cells twice with 2 mL of cold Cell Staining Buffer. Centrifuge at 350 x g for 5 min. e. For intracellular staining (Ki-67): Fix and permeabilize cells using the Foxp3/Transcription Factor Staining Buffer Set per manufacturer's instructions. Stain with anti-Ki-67 for 30 min at 4°C, then wash. f. Resuspend in 300 µL of fixation buffer (1% PFA) or directly in Cell Staining Buffer for immediate acquisition.
- Acquisition: Acquire on a 3-laser, 11-parameter capable flow cytometer (e.g., CytoFLEX S). Collect a minimum of 200,000 CD45+ events per sample. Use daily QC beads for performance tracking.
- Analysis: Analyze using high-dimensional analysis software (e.g., OMIQ, FlowJo). Employ sequential gating and/or unsupervised clustering (t-SNE, UMAP) to identify populations of interest.
Diagram 1: Biomarker Discovery Workflow for Clinical Trials
Figure 1: From sample to statistical validation in clinical biomarker discovery.
The Scientist's Toolkit: Key Reagents for 11-Color Immunophenotyping
| Reagent / Solution | Function / Purpose |
|---|---|
| Sodium Heparin Blood Collection Tubes | Anticoagulant preserving cell viability and surface markers. |
| Ficoll-Paque PLUS | Density gradient medium for PBMC isolation from whole blood. |
| Human TruStain FcX (Fc Receptor Blocking Solution) | Blocks non-specific antibody binding via Fc receptors, reducing background. |
| Brilliant Stain Buffer Plus | Mitigates fluorescence spillover between Brilliant Polymer Dye-conjugated antibodies. |
| Viability Dye (e.g., Zombie NIR) | Distinguishes live from dead cells; critical for data accuracy. |
| Fluorophore-Conjugated Antibodies | Primary detection reagents for surface/intracellular targets. |
| Foxp3/Transcription Factor Staining Buffer Set | For fixation/permeabilization prior to intracellular protein staining. |
| Counting Beads | Absolute quantification of cell subsets per volume of blood. |
| CS&T / QC Beads | Daily instrument performance tracking and calibration. |
Application Note 2: Biomarker Discovery in Autoimmune Disease (Rheumatoid Arthritis)
- Objective: To discover peripheral blood immune signatures correlating with disease activity score (DAS28-CRP) and treatment response to a novel JAK inhibitor.
- Panel Design: An 11-color panel was designed to profile T helper subsets, B cells, and monocytes.
- Core Markers: CD3, CD4, CD8, CD19, CD14, CD27, CD38, CD24, IgD, CXCR5, CD11c.
- Key Finding: A significant expansion of a double-negative (CD27- IgD-) B cell population and a CD14+ CD11c+ monocyte subset was strongly correlated (r > 0.75) with high disease activity. Treatment responders showed a marked reduction in these populations by Week 8.
Protocol 2: High-Dimensional Analysis of Flow Cytometry Data
- Data Export: Export all FCS files from the cytometer software.
- Preprocessing: Use a platform like Cytobank or OMIQ. Apply a standardized compensation matrix. Gate on single, live, lymphocytes. Downsample to 50,000 events per file for computational efficiency.
- Dimensionality Reduction: a. Select all lineage markers (CD3, CD4, CD8, CD19, CD14, etc.) for analysis. b. Run t-SNE (Barnes-Hut algorithm, perplexity=30) or UMAP (neighbors=15, min_dist=0.3) to generate 2-dimensional maps.
- Clustering: Apply a clustering algorithm (e.g., PhenoGraph or FlowSOM) to the compensated, transformed fluorescence data. This will assign each cell a cluster ID.
- Annotation & Comparison: Manually annotate clusters by their median marker expression. Compare the relative frequency of clusters between patient groups (e.g., high vs. low DAS28) using statistical tests (e.g., Mann-Whitney U test).
Diagram 2: Signaling Pathway in Autoimmunity & Therapy
Figure 2: JAK-STAT pathway and therapeutic inhibition.
Conclusion
Mastering 11-color flow cytometry for deep blood immunophenotyping requires a meticulous blend of foundational knowledge, strategic panel design, rigorous troubleshooting, and robust validation. This multi-faceted approach empowers researchers to unlock comprehensive immune profiles from a single sample, bridging the gap between discovery immunology and applied clinical research. As the field advances, these panels serve as a critical tool for identifying novel biomarkers, understanding disease mechanisms, and monitoring therapeutic interventions. Future directions will involve greater integration with spectral cytometry, increased standardization for multi-center studies, and the application of advanced computational analytics to fully leverage the rich, high-dimensional data these panels generate, ultimately driving personalized medicine forward.