Mastering IHC Validation: A Complete Guide to Reliable Antibody Testing in FFPE Tissues
This comprehensive guide details essential protocols for validating immunohistochemistry (IHC) antibodies in formalin-fixed paraffin-embedded (FFPE) tissues.
Mastering IHC Validation: A Complete Guide to Reliable Antibody Testing in FFPE Tissues
Abstract
This comprehensive guide details essential protocols for validating immunohistochemistry (IHC) antibodies in formalin-fixed paraffin-embedded (FFPE) tissues. It covers the foundational principles of FFPE antigenicity and fixation artifacts, provides step-by-step methodological workflows from antigen retrieval to detection, addresses common troubleshooting and optimization strategies for signal enhancement and background reduction, and establishes rigorous validation frameworks including comparator assays and positive/negative controls. Designed for researchers, scientists, and drug development professionals, this article consolidates current best practices to ensure the generation of specific, reproducible, and biologically relevant IHC data critical for both basic research and clinical diagnostics.
Understanding FFPE Complexity: The Science Behind Fixation, Antigen Masking, and Validation Needs
Within the critical thesis of immunohistochemistry (IHC) antibody validation for formalin-fixed paraffin-embedded (FFPE) tissues, understanding the specific structural alterations induced by FFPE processing is paramount. This document outlines the biochemical challenges and provides actionable Application Notes and Protocols for antigen recovery and validation, ensuring reliable research and diagnostic outcomes in oncology and drug development.
Section 1: Mechanisms of Antigen Alteration in FFPE Processing
Formalin fixation primarily induces methylene cross-links between proteins, creating a dense network that masks epitopes. Secondary damage occurs during dehydration, paraffin embedding, and long-term storage.
Quantitative Impact of FFPE on Common Antigens
Table 1: Antigen Detection Success Rate Pre- and Post-FFPE with Standard AR
| Antigen Target | Detection in Fresh Frozen (%) | Detection in FFPE, No AR (%) | Detection in FFPE, with HIER (%) | Key Cross-link Type |
|---|---|---|---|---|
| Cytokeratins | 100 | 15-30 | 95-99 | Protein-Protein |
| ER (Nuclear) | 100 | 5-20 | 85-95 | Protein-DNA |
| CD20 (Membrane) | 100 | 10-25 | 90-98 | Protein-Lipid |
| Ki-67 (Nuclear) | 100 | 20-40 | 95-99 | Protein-Protein |
| p53 | 100 | <10 | 80-90 | Protein-DNA |
Section 2: Core Protocols for Antigen Recovery & Validation
Protocol 2.1: Standardized Heat-Induced Epitope Retrieval (HIER)
Principle: Use of heat and pH to hydrolyze methylene cross-links. Reagents: Tris-EDTA pH 9.0 or Citrate Buffer pH 6.0. Procedure:
- Deparaffinize and rehydrate FFPE sections.
- Place slides in retrieval buffer-filled container.
- Heat in pressure cooker (121°C, 15 min) or water bath (96-98°C, 20-40 min).
- Cool to room temperature (20-25°C) for 30 min.
- Proceed with IHC staining.
Protocol 2.2: Enzymatic Retrieval for Specific Targets
Principle: Proteolytic cleavage of cross-linked proteins. Reagents: Proteinase K (1-10 µg/mL), Pepsin (0.1-0.5% in HCl). Procedure:
- Apply enzyme solution to rehydrated tissue section.
- Incubate at 37°C for 5-30 minutes (optimization required).
- Rinse thoroughly in PBS to halt digestion.
Protocol 2.3: Multi-Epitope Validation Protocol
Principle: Validate antibody performance using controlled FFPE and frozen serial sections from the same specimen. Procedure:
- Split tissue sample: one portion fresh frozen, one portion FFPE.
- Perform IHC on frozen section with antibody (positive control for antigen presence).
- Perform IHC on FFPE section with the same antibody, testing multiple AR conditions (e.g., Citrate pH 6.0, Tris-EDTA pH 9.0, Proteinase K).
- Compare staining intensity, localization, and pattern. True-positive FFPE signal should match frozen control localization.
- Include FFPE cell line pellets with known antigen expression as additional controls.
Section 3: Visualizing the Challenge and Solutions
Title: FFPE-Induced Epitope Masking and Recovery Process
Title: Antibody Validation Workflow for FFPE Tissues
Section 4: The Scientist's Toolkit: Research Reagent Solutions
Table 2: Essential Reagents for FFPE IHC Research
| Reagent Category | Specific Example | Function in FFPE IHC |
|---|---|---|
| Fixative Alternative | Neutral Buffered Formalin (NBF) | Standardizes fixation, minimizes acid-induced damage. |
| Antigen Retrieval Buffers | Tris-EDTA pH 9.0, Citrate pH 6.0 | Breaks protein cross-links via heat and pH. |
| Enzymatic Retrieval | Proteinase K, Pepsin | Cleaves peptide bonds to unmask epitopes (target-specific). |
| Validated Primary Antibodies | Rabbit Monoclonal Anti-Ki-67 (Clone SP6) | Antibodies specifically validated on FFPE with cited AR conditions. |
| Amplification Systems | Polymer-based HRP/IHC Detection Kits | Amplifies weak signals from partially recovered antigens. |
| Control Materials | FFPE Cell Line Microarrays, Multi-tissue Blocks | Provide consistent positive/negative controls for assay validation. |
| Bonding Agents | Poly-L-Lysine or Plus Slides | Prevents tissue detachment during rigorous HIER protocols. |
| Deparaffinization Agent | Xylene or Xylene Substitutes | Effectively removes paraffin wax to enable aqueous reagents to penetrate. |
Within a comprehensive thesis on Immunohistochemistry (IHC) antibody validation for Formalin-Fixed Paraffin-Embedded (FFPE) tissues, understanding artifacts is paramount. FFPE processing, while preserving morphology, introduces specific protein alterations that are primary sources of false-positive and false-negative results. Rigorous validation protocols must systematically address these four key causes to ensure data fidelity in research and drug development.
Detailed Analysis of Causes & Solutions
Cross-linking
Formalin fixation creates methylene bridges between proteins, trapping them in a meshwork. This can block antibody epitopes.
- Primary Impact: False negatives.
- Quantitative Data:
| Factor | Effect on IHC Signal | Typical Reduction (%) | Key Solution |
|---|---|---|---|
| Prolonged Fixation (>24-48h) | Severe attenuation | 60-95% | Antigen Retrieval |
| High Formalin Concentration (>10%) | Moderate-Severe attenuation | 40-80% | Optimized Fixation Protocol |
| Inadequate Fixation (<6h) | Variable, can cause degradation | N/A | Standardize to 24h |
- Experimental Protocol for Assessing Cross-linking Impact:
- Tissue Sample Preparation: Split a single tissue sample into multiple aliquots immediately after resection.
- Variable Fixation: Fix aliquots in neutral buffered formalin for different durations (e.g., 6h, 24h, 48h, 72h).
- Uniform Processing: Process all aliquots identically for paraffin embedding, sectioning, and slide preparation.
- IHC Staining: Perform IHC under identical conditions (antibody dilution, retrieval method, detection system) on all slides.
- Quantitative Analysis: Use digital pathology/image analysis software to quantify staining intensity (DAB) or signal area in identical regions of interest (ROIs).
- Analysis: Plot signal intensity vs. fixation time to identify the optimal fixation window and the point of significant signal loss.
Masking
The physical concealment of epitopes by cross-linked proteins and other biomolecules, preventing antibody access.
- Primary Impact: False negatives.
- Solution: Antigen Retrieval (AR). Breaking methylene bridges via heat-induced epitope retrieval (HIER) or proteolytic-induced epitope retrieval (PIER).
| Retrieval Method | Typical Conditions | Mechanism | Best For |
|---|---|---|---|
| HIER (Citrate Buffer, pH 6.0) | 95-100°C, 20-40 min | Hydrolysis of cross-links | Majority of nuclear & cytoplasmic antigens |
| HIER (EDTA/TRIS, pH 9.0) | 95-100°C, 20-40 min | Chelation & hydrolysis | Difficult, tightly folded epitopes |
| PIER (Proteinase K) | 37°C, 5-20 min | Enzymatic digestion of surrounding proteins | Some tightly masked epitomes (risk of tissue damage) |
- Experimental Protocol for Antigen Retrieval Optimization:
- Slide Preparation: Use consecutive sections from a well-characterized FFPE block (positive control tissue).
- Retrieval Matrix: Treat slides with different AR buffers (pH 6.0 citrate, pH 8.0-9.0 EDTA/TRIS) and varying heating times (10, 20, 30 min) in a calibrated pressure cooker or water bath.
- Controlled Staining: Process all slides with the same primary antibody, dilution, incubation time, and detection system.
- Evaluation: Score slides for signal intensity and background. Include a no-retrieval control. Optimal conditions yield maximal specific signal with minimal background or tissue damage.
Degradation
Pre-fixation delay (cold ischemia time) and poor fixation allow endogenous proteases and nucleases to degrade target proteins and nucleic acids.
- Primary Impact: False negatives, erratic staining.
- Quantitative Data:
| Pre-Analytical Variable | Effect on Protein Integrity | Recommended Standard |
|---|---|---|
| Cold Ischemia Time (Room Temp) | Significant degradation after 30-60 min | Minimize to <30 min |
| Storage of FFPE Blocks | Slow oxidation/hydrolysis over decades | Store at 4°C, low humidity |
| Section Age on Slides | Antigen loss over weeks, especially for labile targets | Stain sections within 4 weeks of cutting |
- Experimental Protocol for Monitoring Degradation:
- Controlled Degradation Model: Expose fresh tissue samples to room temperature for varying times (0, 30, 60, 120 min) before fixation.
- FFPE Processing & Staining: Process all samples identically. Perform IHC for both a labile target protein (e.g., phosphorylated epitope) and a stable "housekeeping" protein (e.g., beta-actin).
- Assessment: Quantify the signal ratio (labile/stable) across time points. A declining ratio indicates degradation. Use this to establish acceptable ischemia time for your lab.
Non-specific Binding
Non-immunological binding of antibodies to tissue components (e.g., hydrophobic interactions, Fc receptor binding) or endogenous enzyme activity.
- Primary Impact: False positives, high background.
- Key Sources & Blocking Solutions:
| Source of Background | Cause | Blocking Solution |
|---|---|---|
| Hydrophobic/ Ionic Interactions | Charge-based binding to collagen, etc. | Protein block (e.g., 2-5% normal serum, BSA, casein) |
| Endogenous Enzymes | Peroxidase or Alkaline Phosphatase activity | Incubation with 3% H₂O₂ (peroxidase) or levamisole (AP) |
| Endogenous Biotin | Binding of streptavidin-based detection systems | Sequential incubation with avidin then biotin |
| Fc Receptor Binding (esp. in immune cells) | Antibody Fc region binding | Use F(ab')₂ fragments; block with normal serum |
- Experimental Protocol for Background Assessment & Optimization:
- Critical Control: Include a No-Primary Antibody Control (replaced by antibody diluent/isotype control) and a Negative Tissue Control (known tissue lacking the target) in every run.
- Blocking Matrix: Test different blocking agents (normal serum from host species of secondary antibody, BSA, commercial blocking buffers) for efficacy. Incubate for 30 min at RT.
- Titration: Perform a primary antibody titration series. Optimal dilution gives strong specific signal with minimal background. High concentrations often increase non-specific binding.
Visualization of Concepts & Workflows
Diagram Title: Causes of False IHC Results and Their Primary Solutions
Diagram Title: FFPE IHC Workflow with Critical Validation Steps
The Scientist's Toolkit: Research Reagent Solutions
| Item | Category | Function in Mitigating False Results |
|---|---|---|
| pH 6.0 Citrate Buffer | Antigen Retrieval | Standard HIER buffer for hydrolyzing cross-links for many antigens. |
| pH 9.0 TRIS-EDTA Buffer | Antigen Retrieval | High-pHI HIER buffer for more challenging, tightly masked epitopes. |
| Protein Block (e.g., Normal Serum, BSA) | Blocking Agent | Saturates charge/hydrophobic sites to reduce non-specific binding. |
| Anti-Fade Mounting Medium | Mounting Medium | Preserves fluorescence signal by reducing photobleaching in IF-IHC. |
| Rabbit Monoclonal Antibody (Clone XX) | Primary Antibody | High specificity reduces non-specific binding vs. polyclonals. |
| Polymer-based HRP Detection System | Detection System | High sensitivity and low background (vs. avidin-biotin). |
| Validated Positive Control FFPE Block | Control Tissue | Essential for assessing protocol performance and antigen integrity. |
| Isotype Control IgG | Control Reagent | Distinguishes specific signal from background/Fc-mediated binding. |
| Digital Slide Scanner & Analysis Software | Analysis Tool | Enables objective, quantitative assessment of signal and background. |
This document provides application notes and protocols for the validation of immunohistochemistry (IHC) antibodies within the framework of formalin-fixed, paraffin-embedded (FFPE) tissue research. Validation is a critical prerequisite to ensure that IHC data is reliable, interpretable, and fit for purpose in both research and drug development contexts. The four pillars of IHC validation—Specificity, Sensitivity, Reproducibility, and Relevance—are defined and operationalized herein.
The Four Pillars of IHC Validation
Specificity: The ability of an antibody to bind exclusively to its intended target antigen. Lack of specificity is a primary source of erroneous results. Sensitivity: The detection threshold of an antibody, reflecting its ability to identify low-abundance antigens without excessive amplification that may induce background. Reproducibility: The consistency of staining results within a laboratory (intra-lab) and between different laboratories, operators, and reagent lots (inter-lab). Relevance (Applicability): The biological and clinical significance of the staining pattern, ensuring it reflects the true biological state (e.g., expression, localization, modification) of the target.
Quantitative Performance Metrics & Acceptance Criteria
The following table summarizes key quantitative metrics used to assess validation pillars, based on recent consensus guidelines (e.g., ICCV, 4i Initiative).
Table 1: Key Metrics for IHC Validation Pillars
| Validation Pillar | Key Metrics | Typical Acceptance Criteria (Example) | Common Assay/Test |
|---|---|---|---|
| Specificity | Signal Knockdown (siRNA/CRISPR), Genetic KO/IHC Correlation, Orthogonal Method Correlation (WB, IF), Isotype Control Staining. | ≥70% reduction in signal upon target depletion; ≥90% concordance with orthogonal method. | Knockdown/Knockout IHC, Multiplex Co-localization, Lineage Marker Panels. |
| Sensitivity | Limit of Detection (LOD), Titration Curve (Antibody Dilution), Staining Intensity vs. Antigen Load. | Clear linear dynamic range; LOD should detect biologically relevant low expression levels. | Cell Line Microarrays with known expression gradients, Tissue Dilution Arrays. |
| Reproducibility | Coefficient of Variation (CV) for staining intensity, Inter-/Intra-Observer Concordance (Kappa statistic), Lot-to-Lot Variation. | Intra-lab CV < 20%; Inter-lab Kappa > 0.7 (substantial agreement). | Multi-operator, Multi-lot, Multi-site Ring Studies. |
| Relevance | Correlation with Clinical Outcome/Pathology Grade, Expected Subcellular Localization, Expression in Known Positive/Negative Tissues. | Staining pattern aligns with established literature/pathology for ≥95% of control tissues. | Tissue Microarrays with annotated patient outcomes, Normal Tissue Arrays. |
Detailed Experimental Protocols
Protocol 4.1: Genetic Knockout/Knockdown Validation for Specificity
Purpose: To confirm antibody specificity by demonstrating loss of signal upon genetic ablation of the target gene. Materials: See "The Scientist's Toolkit" (Section 7). Workflow:
- Cell Model Generation: Use CRISPR-Cas9 to generate isogenic cell line pairs (wild-type vs. homozygous knockout) for the target antigen. Alternatively, use siRNA/shRNA for transient knockdown.
- FFPE Block Preparation: Culture both cell lines, pellet, and fix in 10% Neutral Buffered Formalin for 24 hours. Process into paraffin blocks using standard histological protocols.
- IHC Staining: Section both KO and WT cell blocks. Perform IHC under optimized conditions using the antibody under validation. Include relevant controls (no primary, isotype).
- Analysis: Quantify staining intensity (e.g., H-score, digital image analysis). A specific antibody will show a significant reduction (e.g., >70%) in signal in the KO/Knockdown sample compared to the WT.
Protocol 4.2: Orthogonal Method Validation
Purpose: To verify IHC results using a non-IHC method that detects the same target. Materials: Serial sections from the same FFPE block, equipment for Western Blot (WB) or immunofluorescence (IF). Workflow:
- Sample Preparation: For WB, protein is extracted from macro-dissected FFPE tissue sections or matching frozen tissue. For IF, use a serial section adjacent to the one used for IHC.
- Parallel Testing: Perform IHC on one section. Perform WB (using the same or a different validated antibody) or IF (using a different antibody clone conjugated to a fluorophore) on the paired sample.
- Correlation Analysis: Compare the patterns and semi-quantitative levels of detection. A strong positive correlation (e.g., Pearson r > 0.8) supports IHC antibody specificity.
Protocol 4.3: Inter-Laboratory Reproducibility (Ring) Study
Purpose: To assess the robustness of an IHC protocol across multiple sites. Workflow:
- Core Sample & Reagent Distribution: A central lab prepares a Tissue Microarray (TMA) containing a range of target expression levels and negative controls. Identical sets of pre-titrated antibody aliquots, protocol SOPs, and TMA slides are distributed to participating labs (n≥3).
- Blinded Staining: Each lab performs IHC staining on the TMAs following the SOP within a defined timeframe.
- Centralized Analysis: All stained slides are returned to the central lab for digitization. Staining intensity and percentage of positive cells are scored by at least two pathologists blinded to the lab of origin, or via digital image analysis.
- Statistical Evaluation: Calculate the intra-class correlation coefficient (ICC) or inter-rater Kappa for staining scores between laboratories. An ICC > 0.7 indicates good reproducibility.
Signaling Pathway & Workflow Visualizations
Title: Sequential-Iterative IHC Antibody Validation Workflow
Title: Core IHC Detection Cascade for FFPE Tissues
Data Analysis & Interpretation Guidelines
- Digital Image Analysis (DIA): Use for objective quantification of staining intensity (optical density) and percentage of positive cells. Essential for reproducibility studies.
- Scoring Systems: Semi-quantitative systems (H-score, Allred score) remain valuable but require pathologist training to ensure inter-observer consistency. Always report the scoring method used.
- Statistical Tests: Use Pearson/Spearman correlation for orthogonal validation, ICC for reproducibility, and Student's t-test or ANOVA for comparing signal intensity between groups (e.g., KO vs. WT).
The Scientist's Toolkit: Essential Research Reagent Solutions
Table 2: Key Reagents for IHC Validation Experiments
| Item | Function in Validation | Example/Notes |
|---|---|---|
| CRISPR-Cas9 KO Cell Lines | Gold-standard negative control for specificity testing. | Isogenic pairs (WT vs. KO) for the target protein. Commercially available from cell line repositories. |
| FFPE Cell Line Pellets | Controlled substrate for titration and specificity assays. | Can be created in-house from cultured cells or purchased as multi-tissue blocks. |
| Tissue Microarrays (TMAs) | High-throughput platform for assessing sensitivity, specificity, and relevance across many tissues. | Include cores of known positive/negative tissues, cancer subtypes, and normal organs. |
| Antibody Diluent with Stabilizer | Maintains antibody integrity, critical for lot-to-lot reproducibility and long-term protocol stability. | Often contain protein (BSA), carrier proteins, and antimicrobial agents. |
| Validated Positive Control Slides | Essential for daily assay monitoring and reproducibility. | FFPE sections from cell pellets or tissues with known, moderate target expression. |
| Multiplex IHC Detection Kits | Enable orthogonal co-localization validation on a single section. | Fluorescent or sequential chromogenic kits for detecting multiple antigens simultaneously. |
| Digital Slide Scanning System | Enables centralized, blinded analysis for ring studies and permanent archival of validation data. | Whole slide scanners with consistent lighting and magnification settings are required. |
| Antigen Retrieval Buffers (pH 6 & pH 9) | Unmask epitopes cross-linked by formalin. Optimal pH is epitope-dependent and must be standardized. | Citrate-based (pH 6.0) and Tris/EDTA-based (pH 9.0) are most common. |
Within a comprehensive thesis on Immunohistochemistry (IHC) antibody validation for formalin-fixed paraffin-embedded (FFPE) tissues research, pre-validation checks constitute the critical first pillar. Prior to any experimental investment, assessing antibody clonality, host species, and the landscape of published data mitigates risk, ensures experimental integrity, and aligns with recommendations from groups like the International Working Group for Antibody Validation (IWGAV). This protocol outlines the systematic approach for these essential preliminary assessments.
Application Notes & Protocols
Assessment of Antibody Clonality and Host Species
A. Rationale: Clonality (monoclonal vs. polyclonal) and host species of origin directly impact an antibody's specificity, consistency, and compatibility with multiplexing or detection systems. This assessment prevents cross-reactivity and identifies optimal experimental setups.
B. Protocol: Data Gathering and Analysis
- Source Identification: Obtain the antibody datasheet from the manufacturer's website. Record the Product ID, Clone ID (e.g., SP6, D4B7), Host Species (e.g., Rabbit, Mouse, Goat), and Reactivity (e.g., Human, Mouse, Rat).
- Clonality Analysis:
- Monoclonal Antibodies: Identify the clone name/number. Proceed to search for this specific clone in literature databases (e.g., PubMed, Google Scholar) using the query
"[Clone ID]" AND "[Target Antigen]". - Polyclonal Antibodies: Note the lack of a single clone. Acknowledge potential batch-to-batch variability. Search using the host species, target, and catalog number.
- Monoclonal Antibodies: Identify the clone name/number. Proceed to search for this specific clone in literature databases (e.g., PubMed, Google Scholar) using the query
- Host Species Strategic Planning:
- Map the host species against the experimental model. For example, using a rabbit anti-human antibody on mouse tissue requires the target epitope to be conserved.
- Plan detection systems: Avoid secondary antibody cross-reactivity with endogenous immunoglobulins in the tissue. Use secondary antibodies raised against the primary antibody's host species and consider species-adsorbed conjugates.
- Tabulate Findings: Summarize data in a structured table.
Table 1: Antibody Clonality & Host Species Assessment
| Parameter | Details to Record | Impact on Experimental Design |
|---|---|---|
| Catalog # | e.g., ab12345, #1234S | Unique identifier for tracking. |
| Target Antigen | e.g., HER2, CD8, p53 | Defines biological question. |
| Clonality | Monoclonal (Clone: _) / Polyclonal | Specificity vs. breadth; reproducibility. |
| Host Species | Rabbit, Mouse, Goat, etc. | Informs secondary antibody choice. |
| Reactivities | Human, Mouse, Rat, etc. | Confirms species compatibility. |
| Recommended Applications | IHC-P, WB, IP (per vendor) | Checks vendor's FFPE-IHC claim. |
| Conjugation/Isotype | Unconjugated, IgG1, IgG2a, etc. | Affects detection method and controls. |
Systematic Interrogation of Published Data
A. Rationale: Peer-reviewed literature provides evidence of an antibody's performance in contexts similar to your intended use. A systematic review identifies established protocols, common pitfalls, and orthogonal validation data.
B. Protocol: Literature Mining and Evidence Grading
- Search Strategy: Execute targeted searches in PubMed and Google Scholar.
- Search 1 (Specific):
"[Antibody Catalog #]" OR "[Clone ID]" AND "[Target]" AND ("IHC" OR "immunohistochemistry") - Search 2 (Broad):
"[Target]" AND "FFPE" AND "validation"to find studies that may have used different antibodies.
- Search 1 (Specific):
- Data Extraction: For each relevant publication, extract:
- Experimental Context: Tissue type (normal vs. disease), FFPE processing details.
- Protocol Parameters: Antigen retrieval method (citrate/EDTA, pH), dilution, incubation time, detection kit.
- Validation Evidence: Presence of genetic or pharmacological controls, comparison with another antibody (western blot, siRNA), expression patterns consistent with known biology.
- Images: Quality of staining (specific vs. background).
- Evidence Weighting: Grade publications based on the robustness of their validation.
- High: Includes genetic (KO/Knockdown) or orthogonal (MS-based) validation in the same tissue.
- Medium: Compares with another well-characterized antibody or shows expected cellular/localization patterns.
- Low: Relies solely on vendor data or lacks appropriate controls.
- Tabulate Findings: Create a consolidated evidence table.
Table 2: Published Data Evidence Assessment
| Publication (PMID) | Antibody ID Used | Tissue Type (FFPE) | Key Protocol Details | Validation Evidence Provided | Evidence Grade |
|---|---|---|---|---|---|
| e.g., 34567890 | Rabbit mAb, Clone D8Q5J | Breast carcinoma | EDTA pH 9.0, 1:200, 30 min | Correlation with RNA-seq data from same blocks; KO cell pellet control. | High |
| e.g., 45678901 | Mouse mAb, Clone 1A7 | Colon, normal & tumor | Citrate pH 6.0, 1:50, o/n | Comparison with commercial mAb from different vendor; predictable subcellular localization. | Medium |
Experimental Protocol: Orthogonal Validation Cross-Check
Methodology: To verify findings from the literature review, a quick preliminary experiment using an available positive control tissue is recommended.
- Materials: FFPE cell pellet from a cell line with known target expression (positive control) and a CRISPR/Cas9 knockout line or irrelevant cell line (negative control).
- Sectioning: Cut 4 µm sections from both control blocks.
- IHC Staining:
- Deparaffinize and rehydrate sections.
- Perform antigen retrieval as per the most promising literature-derived method (e.g., Tris-EDTA, pH 9.0, 20 min, pressure cooker).
- Block endogenous peroxidase (3% H₂O₂) and apply protein block (e.g., 2.5% normal horse serum).
- Apply the primary antibody at the literature-derived optimal dilution. Include a no-primary antibody control.
- Apply appropriate HRP-conjugated polymer secondary system (e.g., anti-rabbit polymer).
- Visualize with DAB chromogen, counterstain with hematoxylin, and mount.
- Analysis: Confirm specific staining in the positive control and absence of signal in the negative control. This cross-check validates the antibody's basic specificity before proceeding to full tissue studies.
Visualizations
Title: Pre-validation Assessment Workflow
Title: Evidence Gradient for Published Data
The Scientist's Toolkit: Research Reagent Solutions
| Essential Material | Function in Pre-validation Checks |
|---|---|
| Vendor Antibody Datasheets | Primary source for clonality, host species, recommended applications, and suggested protocols. |
| PubMed / Google Scholar | Critical databases for performing systematic literature reviews and gathering independent validation data. |
| Reference Management Software (e.g., Zotero, EndNote) | Organizes extracted literature data, protocol details, and findings for synthesis. |
| FFPE Control Cell Pellets (Positive/Negative) | Essential biological reagents for performing quick orthogonal validation cross-checks before tissue studies. |
| Multispecies Blocking Serum | Enables flexible testing of antibodies from different host species by blocking non-specific background. |
| Modular IHC Detection Kits (e.g., Polymer-HRP) | Flexible detection systems compatible with various primary antibody host species. |
| Antigen Retrieval Buffers (Citrate & EDTA/Tris) | Key reagents for testing different retrieval conditions derived from literature mining. |
| Digital Slide Scanner or High-Quality Microscope Camera | Allows documentation and critical evaluation of staining patterns from control experiments. |
Within Immunohistochemistry (IHC) validation for formalin-fixed paraffin-embedded (FFPE) tissues, the use of systematic tissue controls is the cornerstone of assay specificity, sensitivity, and reproducibility. This protocol details the implementation of three essential control types: Positive Tissue Controls (PTCs), Negative Tissue Controls (NTCs), and Expression Level Tissue Controls (ELTCs). Their integrated use is mandated by guidelines from the International Immunohistochemistry Quality Control (IQC) and the College of American Pathologists (CAP) to ensure reliable biomarker data in research and drug development.
Core Definitions & Rationale
Positive Tissue Control (PTC): A tissue known to express the target antigen at detectable levels. It validates antibody sensitivity and confirms assay run integrity. Negative Tissue Control (NTC): A tissue known to be devoid of the target antigen expression. It identifies non-specific staining, cross-reactivity, and background. Expression Level Tissue Control (ELTC): A set of tissues representing a known gradient of antigen expression (negative, low, moderate, high). It establishes a quantitative or semi-quantitative reference for scoring and ensures linearity of detection.
Application Notes: Selection & Sourcing
Positive & Negative Control Tissues
- Source: Commercial tissue microarrays (TMAs), in-house archives of characterized surgical specimens, or validated cell line FFPE pellets.
- Characterization: Must be pre-validated by orthogonal methods (e.g., Western blot, mRNA in situ hybridization, mass spectrometry).
- Key Consideration: NTCs should be matched for tissue type and fixative protocol where possible to control for autofluorescence and endogenous enzyme activity.
Expression Level Tissue Controls (ELTCs)
- Construction: Requires a well-characterized biological model system. Common approaches include:
- Xenograft TMAs from cell lines with known, graded expression of the target.
- Pathologically characterized tumor tissues with consensus expression scores (e.g., HER2 IHC 0, 1+, 2+, 3+).
- Recombinant protein-spiked cell pellets.
- Utility: Essential for validating companion diagnostics and for longitudinal studies where staining intensity must be comparable across batches.
Table 1: Recommended Control Tissues for Common Biomarkers
| Biomarker | Recommended Positive Control Tissue | Recommended Negative Control Tissue | Expression Level Control (Gradient) Source |
|---|---|---|---|
| HER2 (ERBB2) | Invasive breast carcinoma (IHC 3+) | Tonsil, Skin | Breast cancer TMA with certified 0, 1+, 2+, 3+ scores |
| PD-L1 (CD274) | Placenta, tonsil, or positive NSCLC | Brain parenchyma | Commercial PD-L1 IHC control TMA |
| Ki-67 (MKI67) | Tonsil (proliferative zone) / Lymphoma | Adult skeletal muscle | Lymph node TMA with varying proliferation indices |
| Cytokeratin AE1/A3 | Skin, Esophagus | Brain, Lymphocyte-rich tissue | Mixed epithelium TMA |
| p53 (TP53) | Serous ovarian carcinoma (mutant pattern) | Normal colon mucosa | Cell line pellets with known wild-type and mutant status |
Experimental Protocols
Protocol A: Integrated Control Tissue TMA Construction
Objective: To create a reusable TMA block containing PTCs, NTCs, and ELTCs for routine antibody validation. Materials:
- Recipient paraffin block
- Tissue microarrayer
- Donor FFPE blocks (characterized)
- Haematoxylin and Eosin (H&E) stain
- Slides, adhesive tape, or charged
Procedure:
- Design: Map the TMA layout. Include at least 2 cores (1.0 mm diameter) per control tissue type to account for heterogeneity. Place PTCs and NTCs at opposite ends to track edge effects.
- Punch & Array: Using the microarrayer, punch cores from designated donor blocks and insert them into pre-defined coordinates in the recipient block.
- Embedding: Melt paraffin over the array at 58°C for 20 minutes to fuse cores. Cool and solidify.
- Sectioning: Cut 4-5 μm sections using a microtome with a dedicated blade. Float sections on a water bath at 40°C and mount on charged slides.
- Validation: Stain one section with H&E to confirm tissue integrity and core placement.
Protocol B: Staining Run with Controls & Interpretation
Objective: To perform an IHC run with integrated controls and interpret results against established benchmarks. Materials:
- Primary antibody (clone, species)
- Detection system (e.g., HRP-polymer, detection kit)
- Antigen retrieval solution (e.g., citrate pH 6.0, EDTA pH 9.0)
- DAB chromogen and substrate
- Automated IHC stainer or humidified chamber
Procedure:
- Slide Preparation: Deparaffinize and rehydrate TMA sections containing controls and test tissues.
- Antigen Retrieval: Perform heat-induced epitope retrieval optimized for the target antigen.
- IHC Staining: Follow optimized protocol: peroxidase blocking, protein block, primary antibody incubation, polymer incubation, DAB development, counterstain, dehydration, mounting.
- Interpretation:
- PTC: Must show the expected localization and intensity of staining. Failure indicates assay failure.
- NTC: Must show no specific staining. Any signal indicates non-specific binding or cross-reactivity requiring troubleshooting.
- ELTC: Staining intensity should follow the known gradient. Non-linearity indicates assay saturation or sensitivity issues.
- Test Tissue: Interpret only if all controls perform as expected.
Table 2: Troubleshooting Based on Control Tissue Results
| Control Result | Potential Issue | Corrective Action |
|---|---|---|
| PTC Negative | Antibody degradation, retrieval failure, detection failure | Check reagent ages, re-optimize retrieval, validate detection system. |
| NTC Positive | Non-specific binding, cross-reactivity, over-retrieval | Increase blocking, use antibody diluent with protein, titrate antibody, shorten retrieval. |
| ELTC Gradient Lost | Antibody concentration too high/low, chromogen over-development | Titrate primary antibody, optimize DAB incubation time. |
| High Background | Endogenous enzyme active, inadequate blocking | Use appropriate endogenous enzyme blocks (peroxidase/alkaline phosphatase), optimize protein block. |
The Scientist's Toolkit
Table 3: Essential Research Reagent Solutions
| Item | Function in IHC Validation |
|---|---|
| FFPE Control TMAs (Commercial) | Pre-validated tissues providing reliable PTC/NTC. Essential for initial antibody qualification. |
| Multitissue Blocks (e.g., Human Organ Atlas) | Survey a new antibody's reactivity profile across many tissues to assess specificity. |
| Cell Line FFPE Pellets (Validated) | Provide a genetically defined, homogeneous source of antigen for PTCs and ELTCs. |
| Isotype Control (Same species/clone) | Matched immunoglobulin control at the same concentration as the primary antibody. Critical for confirming specificity alongside the NTC. |
| Antibody Diluent with Protein | Stabilizes antibody and reduces non-specific binding to NTCs. |
| Automated IHC Stainer | Ensures protocol consistency and reproducibility across multiple runs and users. |
| Digital Pathology Slide Scanner | Enables quantitative image analysis (QIA) of ELTCs and test tissues for objective scoring. |
| Image Analysis Software | Quantifies staining intensity (H-score, % positivity) on ELTCs to establish dynamic range and scoring thresholds. |
Visual Workflows & Pathways
IHC Validation Control Workflow
IHC Staining Protocol with Controls
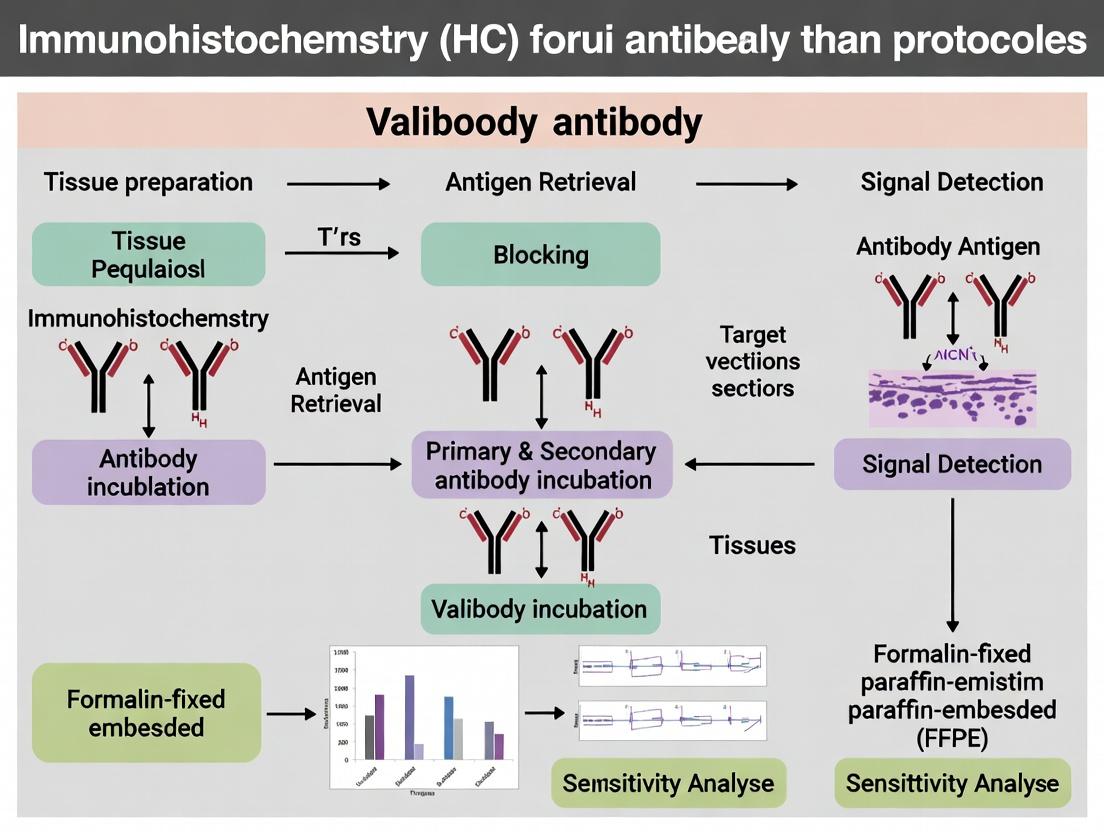
Step-by-Step IHC Validation Protocol: From Antigen Retrieval to Signal Detection
Optimized Tissue Sectioning and Slide Preparation for Consistent Results
Within the context of IHC antibody validation for FFPE tissues, consistent and high-quality tissue sections are the non-negotiable foundation. Variability introduced during sectioning and slide preparation directly compromises antibody performance assessment, leading to unreliable validation data. This application note details optimized protocols to ensure reproducible tissue morphology and antigen preservation for downstream IHC protocols.
The following table summarizes key quantitative parameters that directly impact section quality and consistency.
Table 1: Quantitative Parameters for Optimal FFPE Sectioning and Slide Preparation
| Parameter | Optimal Range | Impact of Deviation |
|---|---|---|
| Block Temperature | -5°C to -10°C | >-5°C: Ribbons crumple; <-10°C: Sections shatter. |
| Microtome Sectioning Thickness | 4-5 µm | <3 µm: Loss of morphological detail; >5 µm: Increased risk of non-uniform staining, folding. |
| Water Bath Temperature | 42-48°C | <42°C: Incomplete spreading; >48°C: Over-expansion, thermal damage to epitopes. |
| Slide Drying Time & Temperature | 60 min at 60°C or Overnight at 37°C | Insufficient drying: Tissue loss during staining; Excessive heat: Increased non-specific background. |
| Slide Storage (before IHC) | 2-8°C, desiccated | Room temperature/humidity: Accelerated antigen degradation over time. |
Protocol 1: Optimized Microtomy for Ribbon Generation
Objective: To produce serial, wrinkle-free tissue ribbons of consistent thickness.
Materials:
- Pre-cooled FFPE tissue block (faced)
- Rotary microtome with a sharp, clean high-profile blade
- Fine-tipped forceps and a small artist's brush
- Ice tray or cooled block holder
Methodology:
- Block Orientation: Secure the pre-faced block in the microtome chuck. Ensure the cutting plane is parallel to the blade.
- Initial Trim: Set microtome to 10-15 µm. Trim the block until the full tissue face is exposed. For biopsies, trim carefully to preserve tissue.
- Final Setting: Adjust thickness to 4-5 µm. Cool block surface with ice (if needed) to achieve optimal cutting temperature.
- Ribbon Formation: Engage the microtome wheel with smooth, consistent strokes. Use the brush to gently guide the ribbon as it forms, preventing compression or curling.
- Transfer: Using forceps, lift the ribbon starting from the last-cut section. Do not touch the tissue surface.
Protocol 2: Controlled Water Bath Spreading & Slide Mounting
Objective: To mount tissue sections without folds, tears, or over-expansion.
Materials:
- Positive-charged or poly-L-lysine coated microscope slides
- Temperature-controlled water bath (clean, distilled water)
- Drying oven or slide warmer
Methodology:
- Bath Preparation: Fill water bath with distilled water. Set temperature to 45°C (±2°C). Allow to stabilize.
- Spreading: Gently float the ribbon (shiny/paraffin side down) onto the water surface. Allow 30-60 seconds for gentle spreading. Do not submerge the ribbon.
- Mounting: Submerge a coated slide at a ~45° angle into the water beside the section. Gently maneuver the slide under the section. In one smooth motion, lift the slide, allowing the section to adhere centrally.
- Drainage: Drain excess water vertically onto absorbent paper. Do not touch the tissue.
Protocol 3: Slide Drying and Pre-IHC Storage
Objective: To ensure firm tissue adhesion and preserve antigenicity until staining.
Methodology:
- Orientation: Place slides in a vertical rack to air-dry for 15-20 minutes at room temperature to remove residual water.
- Baking: Transfer slides to a pre-warmed oven. Bake at 60°C for 60 minutes. Alternative: Place slides horizontally overnight in a 37°C incubator.
- Storage: After cooling, place slides in a sealed slide box with desiccant. Store at 2-8°C. Process for IHC within 4 weeks for optimal results.
Visualization: Workflow and Impact
Diagram Title: Optimized vs Suboptimal Sectioning Impact on IHC
The Scientist's Toolkit: Essential Research Reagents & Materials
Table 2: Key Research Reagent Solutions for Tissue Sectioning
| Item | Function in Protocol |
|---|---|
| Positive-Charged Microscope Slides | Provide a permanent electrostatic bond with tissue sections, preventing detachment during rigorous IHC procedures. |
| High-Profile Microtome Blades | Ensure clean, deflection-free cutting of FFPE blocks for uniform section thickness and minimal compression artifacts. |
| RNase/DNase-Free Water Bath Water | Prevents introduction of nucleases or contaminants that could interfere with downstream multi-omics analyses (e.g., RNA-ISH). |
| Desiccant (e.g., silica gel) | Maintains a low-humidity environment in slide storage boxes, preventing moisture-related antigen degradation and microbial growth. |
| Block Cooling Media (e.g., ice packs, freezing spray) | Rapidly lowers block temperature to the optimal cutting window, facilitating ribbon formation for difficult tissues (e.g., fatty, fibrous). |
Within the rigorous thesis on IHC antibody validation for FFPE tissues, antigen retrieval (AR) is the critical, non-negotiable first step. Fixation-induced methylene crosslinks mask epitopes, and without optimal AR, even a perfectly specific antibody will fail. Mastery of AR—choosing between heat-induced (HIER) and enzymatic (EER) methods, and optimizing pH and buffer chemistry—is fundamental to validation, ensuring the accurate detection of true positive signals and the rejection of false negatives.
Core Principles & Comparative Analysis
Heat-Induced Epitope Retrieval (HIER)
HIER uses heat (95-100°C) to break protein crosslinks. The buffer's pH and ionic strength are crucial for reversing formaldehyde modifications and stabilizing the exposed epitopes.
Enzymatic Epitope Retrieval (EER)
EER employs proteases (e.g., proteinase K, trypsin) to digest proteins and physically expose epitopes. It is gentler but can destroy some epitopes or damage tissue morphology if overdone.
Table 1: Quantitative Comparison of Primary AR Methods
| Parameter | Heat-Induced Epitope Retrieval (HIER) | Enzymatic Epitope Retrieval (EER) |
|---|---|---|
| Primary Mechanism | Reversal of crosslinks via heat & chemical hydrolysis. | Proteolytic cleavage of proteins around epitope. |
| Typical Conditions | 95-100°C for 20-40 min in buffer. | 37°C for 5-20 min in enzyme solution. |
| Key Buffers | Citrate (pH 6.0), Tris-EDTA/EGTA (pH 8.0-9.0). | Proteinase K (0.05-0.1mg/ml), Trypsin. |
| Optimal pH Range | Broad: pH 6.0 for many phospho-epitopes; pH 8-9 for nuclear antigens. | Narrow: ~pH 7.4-7.8 for enzyme activity. |
| Tissue Morphology | Generally well-preserved. | Risk of over-digestion & hole formation. |
| Epitope Specificity | Superior for a wide range, especially nuclear. | Selective; effective for some tightly crosslinked cytoplasmic/membrane targets. |
| Reproducibility | High with precise time/temp control. | Moderate; sensitive to enzyme lot & digestion time. |
Table 2: Buffer Optimization & Target Antigen Guide
| Buffer Type | pH | Common Formulation | Ideal Antigen Targets | Contraindications |
|---|---|---|---|---|
| Citrate Buffer | 6.0 | 10mM Sodium Citrate, 0.05% Tween 20 | ER, PR, HER2, Ki-67, many cytoplasmic & membrane proteins. | Some nuclear antigens may require higher pH. |
| Tris-EDTA Buffer | 9.0 | 10mM Tris Base, 1mM EDTA, 0.05% Tween 20 | p53, FoxP3, most nuclear transcription factors, CD20. | May be too harsh for some labile epitopes. |
| EDTA/EGTA Buffer | 8.0-9.0 | 1mM EDTA/EGTA, 0.05% Tween 20 | Tightly crosslinked nuclear antigens, some cytokeratins. | As above. |
| Enzyme (Proteinase K) | 7.4-7.8 | 0.05mg/ml in Tris-HCl or PBS | Amyloid, Immunoglobulin deposits, some collagens. | Avoid for nuclear antigens; destroys tissue architecture. |
Detailed Application Notes & Protocols
Universal Protocol: Heat-Induced Retrieval (Pressure Cooker Method)
This robust, high-throughput method is recommended as the first-line approach in validation protocols.
Materials:
- FFPE tissue sections (4-5 µm) on charged slides
- Target retrieval buffer (e.g., Citrate pH 6.0 or Tris-EDTA pH 9.0)
- Pressure cooker or commercial decloaking chamber
- Coplin jars or slide rack/staining dish
- Hot plate
Method:
- Dewax & Hydrate: Bake slides at 60°C for 20 min. Deparaffinize in xylene (3 x 5 min). Rehydrate through graded ethanol series (100%, 100%, 95%, 70% - 2 min each) to distilled water.
- Buffer Preparation: Preheat 1-2 L of chosen retrieval buffer in the pressure cooker. Bring to a boil.
- Retrieval: Place slide rack into boiling buffer. Seal pressure cooker and bring to full pressure. Start timer for 3 minutes once full pressure is reached.
- Cooling: Immediately transfer the cooker to a sink and run cold water over the lid to release pressure rapidly. Open carefully. Let slides cool in the buffer for 20 min at room temperature.
- Rinse: Transfer slides to a dish of distilled water. Rinse briefly.
- Immunostaining: Proceed immediately to peroxidase blocking and primary antibody incubation steps.
Specialized Protocol: Enzymatic Retrieval
Use for antigens known to be refractory to HIER or when recommended in antibody datasheets.
Materials:
- Hydrated FFPE tissue sections (after Step 1 above)
- Proteinase K solution (0.05mg/ml in 50mM Tris-HCl, pH 7.6)
- Humidity chamber or water bath
Method:
- Enzyme Preparation: Pre-warm Proteinase K solution to 37°C in a Coplin jar placed in a water bath.
- Digestion: Immerse slides in pre-warmed enzyme solution. Incubate at 37°C for 10 minutes.
- Termination: Rinse slides thoroughly in two changes of distilled water for 5 min each to stop the enzymatic reaction.
- Immunostaining: Proceed immediately to subsequent IHC steps. Do not allow sections to dry.
Visualization of Decision Pathways & Workflows
Title: Antigen Retrieval Method Decision Pathway
Title: HIER vs EER Mechanism of Action
The Scientist's Toolkit: Essential Research Reagent Solutions
Table 3: Key Reagents for Antigen Retrieval Optimization
| Item | Function & Role in Validation | Key Consideration |
|---|---|---|
| Citrate Buffer, pH 6.0 | Mild acidic buffer for HIER; ideal for many phosphorylated epitopes and surface receptors. Maintains tissue integrity. | Standard first-line buffer. Check antibody datasheet for recommendation. |
| Tris-EDTA/EGTA Buffer, pH 9.0 | Alkaline high-pH buffer for HIER; effective for breaking crosslinks on nuclear antigens and challenging targets. | Can be aggressive; optimize time/temp to prevent tissue detachment. |
| Proteinase K, Recombinant | Serine protease for EER; cleaves peptide bonds adjacent to hydrophobic residues. Crucial for retrieving tightly packed proteins. | Concentration and time are critical; over-digestion is a common pitfall. |
| Pressure Cooker / Decloaking Chamber | Provides consistent, high-temperature heating for HIER. Superior to microwave for reproducibility across runs. | Essential for standardized validation protocols. |
| Charged/Superfrost Microscope Slides | Ensure tissue section adhesion during high-temperature and enzymatic retrieval steps. | Prevents sample loss, a catastrophic failure in validation experiments. |
| pH Meter & Calibration Buffers | For accurate preparation and quality control of retrieval buffers. pH is a critical variable. | Daily calibration is mandatory for reproducible results. |
| Positive Control FFPE Tissue | Tissue known to express the target antigen at variable levels. Used to validate the AR step for each new antibody. | The cornerstone of any IHC validation thesis. |
Within the rigorous framework of immunohistochemistry (IHC) antibody validation for formalin-fixed paraffin-embedded (FFPE) tissues, minimizing nonspecific background staining is paramount. Accurate validation hinges on distinguishing true positive signal from artifact. Effective blocking of endogenous proteins, enzymes, and non-specific binding sites is a critical prerequisite step. This application note details three core blocking strategies—serum, protein, and avidin/biotin—providing protocols and data to integrate into a comprehensive IHC validation thesis.
The Role of Blocking in IHC Validation
A validated IHC protocol must demonstrate specificity. Background staining can arise from:
- Non-specific antibody binding to charged sites or Fc receptors.
- Endogenous enzyme activity (e.g., peroxidase, alkaline phosphatase).
- Endogenous biotin, particularly problematic in tissues like liver, kidney, and brain. Uncontrolled background confounds interpretation, leading to false positives and invalidating the antibody's performance data. Systematic blocking is, therefore, a foundational control experiment.
Quantitative Comparison of Blocking Agents
The efficacy of common blocking agents varies by tissue type and target. The following table summarizes typical results from controlled studies on FFPE tissues.
Table 1: Efficacy of Common Blocking Agents for IHC on FFPE Tissue
| Blocking Strategy | Target of Block | Recommended Concentration/Format | Typical Reduction in Background* | Key Considerations for Validation |
|---|---|---|---|---|
| Normal Serum | Non-specific protein binding, Fc receptors | 2-5% (v/v) in buffer, from host of secondary Ab | 60-75% | Must match species of secondary antibody host. Inexpensive and simple. |
| BSA (Bovine Serum Albumin) | Hydrophobic & charged non-specific sites | 1-5% (w/v) in buffer | 50-70% | Inert protein blocker. Often used in combination with serum. |
| Casein | Hydrophobic & charged non-specific sites | 0.5-2% (w/v) in buffer | 55-75% | Effective in phosphate buffers; can be less sticky than BSA. |
| Non-fat Dry Milk | General protein binding | 0.5-3% (w/v) in buffer | 40-65% | Cost-effective but may contain endogenous biotin and impurities. |
| Endogenous Peroxidase Block | HRP enzyme activity | 3% H₂O₂ in methanol or buffer | >95% (for enzyme) | Essential for HRP-based systems. Methanol may damage some epitopes. |
| Endogenous Biotin Block (Avidin/Biotin) | Endogenous biotin | Sequential Avidin, then Biotin incubation | 80-90% (for biotin) | Critical for tissues high in biotin when using ABC or streptavidin systems. |
*Reduction compared to unblocked control, as quantified by mean optical density of negative areas.
Detailed Experimental Protocols
Protocol 1: Combined Protein and Peroxidase Blocking for HRP-IHC
Objective: To eliminate background from non-specific protein binding and endogenous peroxidase activity during primary antibody validation. Materials:
- Tris-Buffered Saline (TBS), pH 7.4
- Normal Serum (from species matching secondary antibody host)
- Bovine Serum Albumin (BSA), Fraction V
- 30% Hydrogen Peroxide (H₂O₂)
- Absolute Methanol
- Humidified chamber
Workflow:
- Deparaffinization & Rehydration: Follow standard FFPE protocol (Xylene → Ethanol series → Water).
- Antigen Retrieval: Perform optimized heat-induced or enzymatic retrieval.
- Peroxidase Blocking: Prepare 3% H₂O₂ in absolute methanol (1:9 ratio of 30% H₂O₂:MeOH). Incubate slides for 15 minutes at room temperature (RT) in the dark.
- Wash: Rinse slides 3x with TBS, 2 minutes per wash.
- Protein Blocking: Prepare a solution of 5% normal serum and 1% BSA in TBS. Apply sufficient volume to cover the tissue section. Incubate for 30 minutes at RT in a humidified chamber.
- Primary Antibody Incubation: Tap off blocking solution. Do not wash. Apply diluted primary antibody directly and proceed with the validated protocol.
Protocol 2: Sequential Avidin/Biotin Blocking
Objective: To quench endogenous biotin signals prior to using avidin-biotin-complex (ABC) or streptavidin-based detection systems. Materials:
- Avidin Solution (e.g., Avidin D, 0.1% in buffer)
- Biotin Solution (e.g., D-Biotin, 0.01% in buffer)
- TBS or PBS buffer
Workflow:
- Prepare Tissue: Complete deparaffinization, rehydration, antigen retrieval, and peroxidase blocking (Protocol 1, Steps 1-4).
- Optional Protein Block: Apply a general protein block (e.g., serum/BSA) for 10 minutes. Rinse with buffer.
- Avidin Incubation: Apply ready-to-use avidin solution to completely cover tissue. Incubate for 15 minutes at RT.
- Wash: Rinse slides 3x with buffer, 2 minutes per wash.
- Biotin Incubation: Apply ready-to-use biotin solution. Incubate for 15 minutes at RT.
- Wash: Rinse slides 3x with buffer, 2 minutes per wash.
- Proceed: Continue with primary antibody application and the subsequent ABC/Streptavidin detection steps.
Visualizing Blocking Strategies in IHC Workflow
IHC Blocking Strategy Decision Workflow
The Scientist's Toolkit: Key Research Reagent Solutions
Table 2: Essential Reagents for Background Blocking in IHC Validation
| Reagent | Primary Function in Blocking | Recommended Product Considerations |
|---|---|---|
| Normal Sera (Goat, Donkey, Horse) | Provides generic proteins to occupy non-specific binding sites; contains antibodies to bind Fc receptors. | Use serum from the same species as the host of the secondary antibody. Ensure it is non-immune and filtered. |
| Bovine Serum Albumin (BSA), Protease-Free | Inert protein that adsorbs to hydrophobic and charged sites on tissue and slides. | Use Fraction V or better. Protease-free grade is critical to avoid epitope degradation. |
| Avidin (e.g., Avidin D) | High-affinity binding to endogenous biotin, saturating its sites. | Avidin D is recommended over native avidin as it is deglycosylated, reducing non-specific lectin binding. |
| D-Biotin | Saturates any remaining binding sites on the avidin applied in the previous step. | Use high-purity D-Biotin. The sequential application prevents later detection reagents from binding. |
| Hydrogen Peroxide (H₂O₂) | Irreversibly inactivates endogenous peroxidase enzymes by oxidation. | Use a fresh dilution from a concentrated stock (e.g., 30%). Methanol-based blocks are more stable but aqueous is gentler. |
| Casein-Based Blockers | Alternative to BSA; effective blocker with low non-specific affinity in phosphate buffers. | Commercial casein blockers are often optimized for consistency. Check compatibility with polymer detection systems. |
| Tris or PBS Blocking Buffers | Provide the ionic and pH environment for optimal blocking protein function. | Include Tween-20 (0.025-0.1%) to reduce hydrophobic interactions. Match the buffer used in antibody dilutions. |
Within a comprehensive thesis on immunohistochemistry (IHC) antibody validation for formalin-fixed paraffin-embedded (FFPE) tissues, antibody titration stands as the fundamental, non-negotiable first step. It is the systematic process of determining the optimal dilution for both primary and secondary antibodies to maximize signal-to-noise ratio. Incorrect titers lead to false negatives, high background, nonspecific binding, and wasted reagents, compromising all subsequent validation data. This protocol details a rigorous methodology for antibody titration specifically tailored to the challenges of FFPE tissue research.
The Core Principle
The goal is to identify the dilution at which the primary antibody produces a strong, specific signal with minimal background. The optimal secondary antibody dilution is then determined in conjunction with this primary antibody dilution to achieve maximum detection efficiency without amplifying noise. This is an empirical process that must be performed for each new antibody-lot and tissue-antigen combination.
Research Reagent Solutions Toolkit
| Item | Function in FFPE IHC Titration |
|---|---|
| FFPE Tissue Microarray (TMA) | Contains multiple tissue types and controls on one slide, enabling high-throughput, consistent comparison of antibody dilutions across different tissues. |
| Validated Positive Control Tissue | Tissue known to express the target antigen at moderate levels. Essential for distinguishing specific signal from background. |
| Validated Negative Control Tissue | Tissue known to lack the target antigen (e.g., knockout tissue, irrelevant cell line). Critical for assessing nonspecific binding and background. |
| Isotype Control Antibody | An immunoglobulin of the same class (IgG, IgM) as the primary antibody but with irrelevant specificity. Used to control for Fc receptor binding and nonspecific protein interactions. |
| Antigen Retrieval Reagents (e.g., citrate buffer, EDTA, Tris-EDTA) | Reverse formaldehyde-induced cross-links to expose epitopes masked during fixation. The method (heat-induced, enzymatic) must be optimized for the target. |
| Blocking Serum/Normal Serum | From the same species as the secondary antibody. Reduces nonspecific binding of the secondary antibody to tissue. |
| Chromogen (DAB, AEC, etc.) | Enzyme substrate that produces a visible, insoluble precipitate upon reaction with the enzyme (HRP/AP) conjugated to the secondary antibody. |
| Hematoxylin Counterstain | Provides morphological context by staining cell nuclei, contrasting with the chromogen signal. |
Experimental Protocol: Checkerboard Titration for Primary and Secondary Antibodies
Materials
- FFPE tissue sections (5 µm) on positively charged slides, including positive and negative control tissues.
- Primary antibody (clone/antiserum of interest).
- HRP-conjugated secondary antibody (species-specific for primary antibody host).
- Antigen retrieval buffer.
- Blocking solution (e.g., 2.5% normal serum in PBS).
- Washing buffer (PBS with 0.025% Tween-20, PBST).
- Detection system (e.g., HRP polymer system or traditional avidin-biotin complex).
- DAB chromogen substrate kit.
- Hematoxylin, dehydrants, mounting medium.
Detailed Methodology
Day 1: Slide Preparation and Primary Antibody Incubation
- Bake & Deparaffinize: Bake slides at 60°C for 1 hour. Deparaffinize in xylene and rehydrate through graded alcohols to distilled water.
- Antigen Retrieval: Perform heat-induced epitope retrieval (HIER) in appropriate buffer (e.g., citrate pH 6.0 or Tris-EDTA pH 9.0) using a pressure cooker or decloaking chamber for 20-25 minutes. Cool slides for 30 minutes at room temperature (RT).
- Peroxidase Block: Incubate with 3% H₂O₂ in methanol for 10 minutes to quench endogenous peroxidase activity. Rinse with wash buffer.
- Protein Block: Apply sufficient volume of blocking serum (e.g., 2.5% Normal Goat Serum) for 30 minutes at RT to reduce nonspecific binding.
- Primary Antibody Titration: Do not rinse off blocking serum. Apply primary antibody dilutions in a checkerboard pattern.
- Prepare a series of doubling dilutions (e.g., 1:50, 1:100, 1:200, 1:400, 1:800, 1:1600) of the primary antibody in antibody diluent.
- Apply each dilution to the appropriate tissue section(s). Include a negative control where diluent alone is applied (No Primary Ab Control).
- Incubate in a humidified chamber for 1 hour at RT or overnight at 4°C (optimize for your target).
- Wash: Rinse slides 3 times for 5 minutes each in wash buffer.
Day 2: Secondary Antibody Incubation and Detection
- Secondary Antibody Titration: Apply the HRP-conjugated secondary antibody.
- Prepare a series of dilutions (e.g., 1:100, 1:200, 1:400, 1:800) of the secondary antibody.
- Apply the different secondary antibody dilutions across the different primary antibody dilutions, creating a "checkerboard" of combinations.
- Incubate for 30-60 minutes at RT in a humidified chamber.
- Wash: Rinse slides 3 times for 5 minutes each in wash buffer.
- Signal Detection: Apply prepared DAB chromogen substrate for 3-10 minutes, monitoring development under a microscope. Stop reaction in distilled water.
- Counterstain & Mount: Counterstain with hematoxylin for 30-60 seconds, "blue" in tap water, dehydrate, clear, and mount with permanent mounting medium.
Analysis and Interpretation
Score each tissue spot for:
- Specific Staining Intensity (0-3+): Assessed in known positive structures.
- Background/Non-specific Staining (0-3+): Assessed in stroma, negative tissue, or areas known not to express the antigen.
- Signal-to-Noise Ratio: The combination yielding the highest specific intensity with the lowest background is the optimal titer.
Data Presentation: Titration Results Table
Table 1: Example Checkerboard Titration Results for Anti-ERα (Clone SP1) on FFPE Breast Carcinoma TMA
| Primary Ab Dilution | Secondary Ab (1:100) | Secondary Ab (1:200) | Secondary Ab (1:400) | Secondary Ab (1:800) |
|---|---|---|---|---|
| 1:50 | Intensity: 3+ Background: 3+ | Intensity: 3+ Background: 2+ | Intensity: 3+ Background: 1+ | Intensity: 2+ Background: 0 |
| 1:100 | Intensity: 3+ Background: 2+ | Intensity: 3+ Background: 1+ | Intensity: 3+ Background: 0 | Intensity: 2+ Background: 0 |
| 1:200 | Intensity: 2+ Background: 1+ | Intensity: 2+ Background: 0 | Intensity: 2+ Background: 0 | Intensity: 1+ Background: 0 |
| 1:400 | Intensity: 1+ Background: 0 | Intensity: 1+ Background: 0 | Intensity: 1+ Background: 0 | Intensity: ± Background: 0 |
| No Primary | Intensity: 0 Background: 0 | Intensity: 0 Background: 0 | Intensity: 0 Background: 0 | Intensity: 0 Background: 0 |
Optimal Combination: Primary Antibody 1:100 + Secondary Antibody 1:400.
Key Signaling Pathways & Workflows
IHC Signal Generation Workflow for FFPE Tissues
Titration Impact on Signal and Noise
For IHC antibody validation in FFPE tissues, a rigorously performed checkerboard titration is the cornerstone of reliable data. The optimal dilution is not the one that gives the strongest signal, but the one that provides the clearest, most specific signal over the lowest possible background. This protocol, integrated with appropriate controls, establishes a solid foundation for subsequent validation steps such as assessment of staining specificity and reproducibility, which are critical for both research reproducibility and drug development biomarker assays.
In the context of a thesis on IHC antibody validation for FFPE tissues, the selection and optimization of a detection system are critical. This document provides application notes and detailed protocols for chromogenic and fluorescent detection, including amplification strategies and counterstaining, essential for generating reproducible, high-quality data in research and drug development.
Detection Systems: Core Principles & Quantitative Comparison
Chromogenic Detection (DAB/HRP)
Chromogenic detection utilizes enzymes such as Horseradish Peroxidase (HRP) conjugated to a secondary antibody to catalyze the conversion of a soluble chromogen (e.g., 3,3’-Diaminobenzidine - DAB) into an insoluble, colored precipitate at the antigen site. The signal is permanent and visible with brightfield microscopy.
Fluorescent Detection
Fluorescent detection uses fluorophore-conjugated secondary antibodies (e.g., Alexa Fluor dyes) that emit light of a specific wavelength upon excitation. Signal is visualized using fluorescence or confocal microscopy, allowing for multiplexing.
Table 1: Quantitative Comparison of Chromogenic vs. Fluorescent Detection
| Parameter | Chromogenic (DAB/HRP) | Fluorescent (e.g., Alexa Fluor 488) |
|---|---|---|
| Signal Type | Permanent, insoluble precipitate | Ephemeral, emitted light |
| Detection Limit | ~100-1000 copies/cell (with amplification) | ~10-100 copies/cell (high sensitivity) |
| Multiplexing Capacity | Low (typically 1-2 markers with different enzymes) | High (3-5+ markers with distinct spectra) |
| Photostability | High (permanent) | Variable (prone to photobleaching) |
| Background/ Autofluorescence | Low (but can have endogenous peroxidase activity) | Can be high (requires blocking) |
| Quantification Ease | Moderate (density-based) | High (intensity-based) |
| Common Applications | Diagnostic pathology, single biomarker studies | Multiplex studies, co-localization, live-cell imaging (if applicable) |
Amplification Methods
Amplification is employed to enhance signal intensity, crucial for detecting low-abundance targets in FFPE tissues.
Tyramide Signal Amplification (TSA)
TSA, or catalyzed reporter deposition (CARD), uses HRP to deposit numerous labeled tyramide molecules near the antigen-antibody complex, providing >100-fold signal amplification.
Polymer-Based Systems
These systems use dextran polymer chains carrying multiple enzyme and secondary antibody molecules, offering ~10-20 fold amplification over standard streptavidin-biotin (LSAB) methods.
Table 2: Comparison of Amplification Methods
| Method | Principle | Amplification Factor | Key Advantage | Key Disadvantage |
|---|---|---|---|---|
| Standard Direct/Indirect | Primary or secondary antibody-conjugated enzyme/fluorophore. | 1x (Baseline) | Simple, low background. | Low sensitivity. |
| Streptavidin-Biotin (LSAB) | High-affinity biotin-streptavidin binding with enzyme. | ~5-10x | Well-established, robust. | High endogenous biotin in some tissues. |
| Polymer-Based | Polymer backbone conjugated with multiple secondary antibodies and enzymes. | ~10-20x | No endogenous biotin issues, one-step. | Potential for non-specific polymer binding. |
| Tyramide (TSA) | HRP-catalyzed deposition of tyramide-conjugated reporters. | >100x | Extremely high sensitivity. | Signal diffusion risk, requires optimization. |
Counterstaining
Counterstains provide contextual tissue morphology.
- For Chromogenic IHC (DAB: brown): Hematoxylin (blue) is standard. Differentiation in acid alcohol and bluing in Scott's tap water or buffer is crucial.
- For Fluorescent IHC: Nuclear counterstains include DAPI (blue, AT-rich DNA), Hoechst (blue, cell-permeant), or Propidium Iodide (red, impermeant). For cytoplasmic context, phalloidin (actin) or autofluorescence quenching agents (e.g., Vector TrueVIEW) are used.
Detailed Experimental Protocols
Protocol 4.1: Chromogenic IHC with Polymer-Based Amplification for FFPE Tissue
Title: Validating Primary Antibody Specificity Using Chromogenic Detection. Application Note: This protocol is designed for the initial validation of a novel primary antibody on FFPE tissue sections, providing a permanent record for pathologist evaluation.
Materials (Research Reagent Solutions):
| Item | Function |
|---|---|
| FFPE Tissue Sections (4-5 µm) | Sample substrate for IHC. |
| Xylene & Ethanol Series | Deparaffinization and rehydration. |
| Target Retrieval Solution (Citrate, pH 6.0 or EDTA/ Tris, pH 9.0) | Epitope unmasking by breaking cross-links. |
| Endogenous Peroxidase Block (3% H₂O₂) | Eliminates background from tissue peroxidases. |
| Protein Block (5% Normal Serum / BSA) | Reduces non-specific antibody binding. |
| Validated Primary Antibody | Target-specific binding agent. |
| Polymer-HRP Conjugated Secondary Antibody | Amplified detection system. |
| DAB Chromogen Substrate | Enzyme substrate yielding brown precipitate. |
| Hematoxylin | Nuclear counterstain. |
| Aqueous Mounting Medium | Preserves and coverslips stained section. |
Methodology:
- Deparaffinization & Rehydration: Bake slides at 60°C for 20 min. Immerse in xylene (2 x 5 min), then 100%, 95%, 70% ethanol (2 min each), and finally distilled water.
- Antigen Retrieval: Perform heat-induced epitope retrieval (HIER) in a decloaking chamber or microwave in appropriate buffer (e.g., citrate, pH 6.0, 20 min at 95-100°C). Cool for 30 min. Rinse in PBS.
- Peroxidase Blocking: Apply 3% H₂O₂ for 10 min at RT. Wash in PBS.
- Protein Blocking: Apply protein block for 30 min at RT. Drain (do not wash).
- Primary Antibody Incubation: Apply optimized dilution of primary antibody in antibody diluent. Incubate at 4°C overnight in a humidified chamber. Wash in PBS + Tween 20 (PBST, 3 x 5 min).
- Polymer-HRP Secondary: Apply polymer-HRP conjugated secondary antibody for 30 min at RT. Wash in PBST (3 x 5 min).
- Chromogen Development: Prepare DAB solution per manufacturer's instructions. Apply to tissue and monitor development under a microscope (typically 30 sec - 5 min). Stop reaction by immersing in distilled water.
- Counterstaining: Immerse in hematoxylin for 30-60 sec. Differentiate in 1% acid alcohol (1-2 dips), then rinse in tap water. Perform bluing in Scott's tap water or buffer for 30 sec. Rinse.
- Dehydration & Mounting: Dehydrate through 70%, 95%, 100% ethanol (2 min each) and xylene (2 x 2 min). Mount with permanent mounting medium.
Protocol 4.2: Multiplex Fluorescent IHC with Tyramide Amplification
Title: Co-localization Study Using TSA-Based Fluorescent Multiplexing. Application Note: This protocol enables the simultaneous detection of three low-abundance targets in a single FFPE section, critical for understanding tumor microenvironment interactions in drug development.
Methodology:
- Steps 1-4: As per Protocol 4.1 (deparaffinization to protein block).
- Primary Antibody 1 (Mouse monoclonal): Apply, incubate overnight at 4°C. Wash.
- HRP-Conjugated Anti-Mouse Secondary: Apply for 30 min at RT. Wash.
- Tyramide-Fluorophore 1 (e.g., Tyramide-Cy3): Apply at recommended dilution for 5-10 min. Wash thoroughly.
- Antibody Stripping/HRP Inactivation: To prevent cross-reactivity, perform heat-mediated stripping (e.g., in retrieval buffer at 95°C for 20 min) or chemical HRP inactivation (e.g., with sodium azide/hydrogen peroxide solution).
- Repeat Cycle: Repeat steps 2-5 for Primary Antibody 2 (Rabbit polyclonal) with Tyramide-Fluorophore 2 (e.g., Tyramide-FITC).
- Repeat Cycle: For Primary Antibody 3 (e.g., Armenian hamster monoclonal) with Tyramide-Fluorophore 3 (e.g., Tyramide-Cy5).
- Counterstaining and Mounting: Apply DAPI (300 nM in PBS) for 5 min. Wash. Mount with anti-fade fluorescent mounting medium (e.g., ProLong Diamond).
- Imaging: Image immediately using a fluorescence microscope with appropriate filter sets. Store slides at 4°C in the dark.
Signaling Pathways and Workflow Diagrams
Title: Chromogenic IHC Workflow for FFPE
Title: Tyramide Signal Amplification (TSA) Principle
Title: Sequential Multiplex Fluorescent IHC Workflow
Solving Common IHC Problems: A Troubleshooting Guide for FFPE Tissues
Within the critical framework of IHC antibody validation for FFPE tissues, the occurrence of weak or absent signal presents a major hurdle in research and drug development. This application note provides a systematic diagnostic and remediation protocol, addressing the three primary pillars of failure: inadequate epitope retrieval, suboptimal antibody titration, and primary antibody failure. A rigorous approach is essential for generating reproducible, reliable data in preclinical and diagnostic applications.
Systematic Diagnostic Workflow
A logical, stepwise approach is required to isolate the cause of signal failure. The following workflow should be followed sequentially.
Diagram Title: IHC Signal Failure Diagnostic Decision Tree
Table 1: Impact of Epitope Retrieval Methods on IHC Signal Intensity
| Retrieval Method | Typical pH Range | Common Incubation | Signal Recovery Rate* | Best For |
|---|---|---|---|---|
| Citrate Buffer, Heat | 6.0 | 20-40 min, 95-100°C | 85-95% | Many nuclear & cytoplasmic antigens |
| Tris-EDTA/EGTA, Heat | 8.0-9.0 | 20-40 min, 95-100°C | 90-98% | Challenging, cross-linked epitopes |
| Protease-Induced | N/A | 5-15 min, 37°C | 60-80% | Some membrane proteins |
| High-pH, High-Temp | 9.0-10.0 | 20-30 min, 110-120°C | 95-99% | Highly fixed, difficult targets |
*Estimated recovery based on published validation studies in FFPE.
Table 2: Antibody Titration Results for a Hypothetical Nuclear Protein (p53)
| Antibody Dilution | Signal Intensity (0-3+) | Background (0-3+) | Optimal Scoring Index (S-B) | Conclusion |
|---|---|---|---|---|
| 1:50 | 3+ | 3+ | 0 | Unusable, high background |
| 1:200 | 3+ | 2+ | 1 | Suboptimal |
| 1:500 | 3+ | 1+ | 2 | Optimal |
| 1:1000 | 2+ | 0 | 2 | Acceptable, less sensitive |
| 1:2000 | 1+ | 0 | 1 | Weak, risk of false negative |
| No Primary | 0 | 0 | 0 | Valid negative control |
Detailed Experimental Protocols
Protocol 1: Comprehensive Epitope Retrieval Optimization
Principle: Reverse formaldehyde-induced cross-links to expose masked epitopes. Materials: See "Scientist's Toolkit" below. Procedure:
- Deparaffinization & Rehydration: Process slides through xylene (3 x 5 min) and graded ethanol (100%, 100%, 95%, 70% - 2 min each). Rinse in distilled water.
- Retrieval Buffer Selection: Prepare citrate (pH 6.0) and Tris-EDTA (pH 9.0) buffers.
- Heat-Induced Epitope Retrieval (HIER):
- Place slides in a coplin jar filled with retrieval buffer.
- Heat using a pressure cooker (121°C, 15 min), water bath (95-100°C, 20-40 min), or steamer (95-100°C, 20-40 min).
- Cool slides at room temperature in the buffer for 30 min.
- Protease-Induced Epitope Retrieval (PIER): (Optional parallel test)
- Apply enough protease (e.g., proteinase K, trypsin) solution to cover tissue.
- Incubate at 37°C for 5-15 min.
- Washing: Rinse slides thoroughly in PBS (pH 7.4) for 3 x 5 min.
- Proceed with standard IHC protocol (peroxidase blocking, primary antibody application, etc.).
Protocol 2: Checkerboard Antibody Titration for Validation
Principle: Determine the optimal primary antibody concentration that maximizes signal-to-noise ratio. Procedure:
- Sectioning & Retrieval: Use a single FFPE block of a known positive control tissue. Subject all slides to the same optimized retrieval method.
- Titration Setup: Prepare a series of primary antibody dilutions (e.g., 1:50, 1:200, 1:500, 1:1000, 1:2000) in antibody diluent.
- Application: Apply each dilution to separate tissue sections. Include a no-primary antibody control (diluent only).
- Standardized Detection: Use the same detection system (e.g., polymer-HRP), chromogen (DAB), and development time for all slides.
- Analysis: Score signal intensity (0-3+) and background (0-3+) for each dilution. Calculate an Optimal Scoring Index (Signal - Background). The dilution with the highest index is optimal.
Protocol 3: Antibody Salvage & Specificity Confirmation
Principle: Verify antibody functionality and specificity when standard protocols fail. A. Signal Amplification:
- After primary antibody, apply a biotinylated secondary antibody (30 min, RT).
- Apply Streptavidin-Biotin Complex (ABC) or Streptavidin-HRP/AP (20 min, RT).
- This adds an extra amplification step, enhancing weak signals. B. Antibody Specificity Verification (Mandatory for Validation):
- Peptide Blocking: Pre-incubate the primary antibody (at working dilution) with a 5-10 fold molar excess of the target immunizing peptide for 2 hours at RT.
- Parallel Staining: Use the pre-adsorbed antibody on the test tissue alongside the normal primary antibody.
- Interpretation: Specific signal should be abolished or drastically reduced in the peptide-blocked sample.
The Scientist's Toolkit: Key Research Reagent Solutions
| Item | Function in IHC Troubleshooting |
|---|---|
| pH 6.0 Citrate Buffer | Standard low-pH retrieval solution for many epitopes. |
| pH 9.0 Tris-EDTA Buffer | High-pH retrieval solution for challenging, highly cross-linked epitopes. |
| Proteinase K | Enzyme for protease-induced epitope retrieval (PIER). |
| Bovine Serum Albumin (BSA) | Common blocking agent to reduce non-specific background. |
| Polymer-HRP Detection System | High-sensitivity, low-background detection kit. |
| Biotinylated Secondary Antibody | Enables use with ABC amplification for weak signals. |
| Immunizing Peptide | Critical reagent for confirming antibody specificity via blocking. |
| Humidified Staining Chamber | Prevents antibody evaporation during incubations. |
Key Signaling Pathways in IHC Detection
The final visualization in IHC relies on a catalyzed detection pathway. The following diagram outlines the common HRP-based detection cascade.
Diagram Title: HRP-DAB IHC Detection Pathway
Within the comprehensive framework of a thesis on IHC antibody validation protocols for formalin-fixed paraffin-embedded (FFPE) tissues, addressing non-specific signal is paramount. High background noise, stemming from inadequate blocking, suboptimal wash stringency, and antibody cross-reactivity, critically compromises data integrity, leading to false-positive interpretations and unreliable research outcomes. These factors are intrinsically linked to the rigorous validation parameters of specificity and sensitivity. This document outlines targeted application notes and detailed protocols to systematically mitigate these issues, ensuring the generation of clean, specific, and reproducible IHC data essential for both basic research and drug development.
Impact of Blocking Conditions on Signal-to-Noise Ratio (SNR)
Recent studies (2023-2024) systematically evaluate blocking agents in FFPE tissue sections. Key quantitative findings are summarized below.
Table 1: Efficacy of Common Blocking Agents in FFPE IHC
| Blocking Agent | Concentration | Incubation Time | Avg. Background Reduction (%)* | Optimal For | Key Consideration |
|---|---|---|---|---|---|
| Normal Serum (Host) | 2-5% v/v | 30-60 min | 45-60% | Secondary antibody host matching | May contain cross-reactive immunoglobulins. |
| BSA (Fraction V) | 1-5% w/v | 30 min | 50-65% | General purpose, phospho-epitopes | Can be less effective for highly charged tissues. |
| Casein-Based | 0.1-0.5% w/v | 30 min | 60-75% | High endogenous biotin/avidin systems | Effective at masking hydrophobic interactions. |
| Protein-Free Blockers | As per mfr. | 30 min | 70-85% | Minimizing animal-derived reagents | Often proprietary; may require optimization. |
| Dual-Block (Serum + BSA) | 2% Serum + 1% BSA | 60 min | 75-80% | Challenging tissues (e.g., spleen, liver) | Combines advantages of both agents. |
*Compared to unblocked control, as measured by DAB mean optical density in non-target regions.
Effect of Wash Buffer Stringency on Non-Specific Binding
Wash stringency, controlled by ionic strength, detergent concentration, and temperature, is critical for removing loosely bound antibodies.
Table 2: Wash Buffer Stringency Parameters and Outcomes
| Buffer Component | Low Stringency | High Stringency | Effect on Background | Risk |
|---|---|---|---|---|
| Salt (NaCl) | 50-100 mM | 300-500 mM | High salt reduces ionic interactions. | Excessive salt can disrupt some specific epitope-antibody bonds. |
| Detergent (Tween-20) | 0.01-0.05% | 0.1-0.5% | Increased detergent removes hydrophobic bonds. | Can strip off tissue sections if concentration is too high. |
| Temperature | Room Temp (22°C) | 37-45°C | Increased temperature increases kinetic energy, aiding dissociation. | May cause tissue morphology deterioration. |
| pH | 7.2-7.6 | 8.0-8.5 | Moderately alkaline pH can reduce non-ionic interactions. | Must be compatible with antibody and epitope stability. |
| Typical Result | -- | -- | Up to 60% reduction in background stain intensity. | Potential for up to 20% loss of specific signal if over-optimized. |
Assessing Antibody Cross-reactivity
Cross-reactivity remains a leading cause of off-target staining. Validation via genetic (knockout/Knockdown) or orthogonal (MS, IF) methods is essential.
Table 3: Cross-reactivity Validation Methods and Data Interpretation
| Validation Method | Protocol Summary | Acceptable Outcome Metric | Advantage | Limitation |
|---|---|---|---|---|
| Genetic Knockout (KO) | IHC on isogenic WT vs. KO cell pellets or tissues. | Complete absence of signal in KO sample. | Gold standard for specificity. | KO tissues/cell lines not always available. |
| siRNA/shRNA Knockdown | IHC on FFPE blocks of transfected/transduced cells. | >70% reduction in signal intensity vs. control. | Applicable to a wider range of targets. | Knockdown may not be complete. |
| Antibody Competitive Block | Pre-incubate primary Ab with immunizing peptide. | >80% reduction in staining intensity. | Simple, direct test for epitope binding. | Peptide may not fully mimic native folded epitope. |
| Orthogonal MS Validation | Immunoprecipitation from lysate followed by Mass Spec. | Primary target is top-ranking identified protein. | Unbiased identification of all bound proteins. | Expensive, requires specialized equipment. |
Detailed Experimental Protocols
Protocol 1: Optimized Dual-Blocking for FFPE Sections
Objective: To maximally reduce non-specific binding of primary and secondary antibodies.
Materials: See "Scientist's Toolkit" below. Workflow:
- Deparaffinization & Antigen Retrieval: Perform standard steps (xylene, ethanol series, heat-induced epitope retrieval in citrate buffer, pH 6.0).
- Peroxidase Block: Incubate slides in 3% H₂O₂ in methanol for 15 min at RT. Rinse in PBS.
- Protein Block: Apply enough Dual Block Solution (2% normal serum from secondary host + 1% BSA in PBS) to cover the tissue. Incubate in a humidified chamber for 1 hour at RT.
- Blot: Gently tap off blocking solution. Do not rinse.
- Primary Antibody Application: Apply primary antibody diluted in antibody diluent (e.g., 1% BSA/PBS) directly onto the tissue. Proceed with incubation.
Protocol 2: High-Stringency Wash Post-Primary Antibody
Objective: To remove non-specifically bound primary antibody without eluting specific complexes.
Materials: High-stringency wash buffer (0.3M NaCl, 0.1% Tween-20 in PBS, pH 7.4), standard wash buffer (PBS, 0.05% Tween-20). Workflow:
- After primary antibody incubation, perform first wash with standard wash buffer (3 x 2 min) to remove bulk unbound antibody.
- Perform a single 5-minute wash with high-stringency buffer at RT with gentle agitation.
- Return to standard wash buffer for a final 2 x 2 min washes before applying the secondary antibody.
- Note: Post-secondary antibody washes should use standard buffer only to avoid disrupting the streptavidin-biotin or polymer complexes.
Protocol 3: Cross-reactivity Check Using Peptide Block
Objective: To confirm the specificity of staining for the target epitope.
Materials: Immunizing peptide (10x molar excess relative to antibody), isotype control antibody. Workflow:
- Prepare two aliquots of the optimized primary antibody dilution.
- To the test aliquot, add the immunizing peptide. To the control aliquot, add an equal volume of diluent (or a scrambled peptide control).
- Incubate both aliquots at 4°C overnight with gentle mixing.
- Proceed with standard IHC on adjacent tissue sections, using the pre-absorbed test antibody and the control antibody.
- Interpretation: A significant reduction (>80%) in staining intensity in the pre-absorbed section confirms epitope-specific binding. Persistent staining suggests cross-reactive binding.
Visualization Diagrams
Title: IHC Background Troubleshooting Workflow
Title: IHC Background Sources and Solutions Matrix
The Scientist's Toolkit: Essential Research Reagents & Materials
Table 4: Key Reagents for Background Reduction in FFPE-IHC
| Item Name | Category | Primary Function | Example/Note |
|---|---|---|---|
| Normal Serum | Blocking Reagent | Saturates non-specific Fc receptor and charged site binding. | From the same species as the secondary antibody host (e.g., Normal Goat Serum). |
| Bovine Serum Albumin (BSA) | Blocking Reagent | Inert protein that blocks non-specific hydrophobic binding sites. | Fraction V, protease-free. Often used at 1-5% in PBS or TBS. |
| Casein-Based Blocker | Blocking Reagent | Effective blocker for avidin-biotin systems and hydrophobic interactions. | Often included in commercial kits to block endogenous biotin. |
| Protein-Free Blocking Buffer | Blocking Reagent | Provides blocking without animal proteins, reducing potential cross-reactivity. | Proprietary formulations (e.g., from Vector Labs, Thermo Fisher). |
| Tween-20 or Triton X-100 | Detergent | Reduces hydrophobic interactions in wash buffers; aids in tissue permeabilization. | Typical concentration: 0.05-0.1% for standard washes. |
| High-Salt Buffer | Wash Buffer | Disrupts non-specific ionic interactions between antibody and tissue components. | 0.3-0.5M NaCl in PBS/TBS. Use for selective high-stringency washes. |
| Hydrogen Peroxide (H₂O₂) | Enzyme Inhibitor | Quenches endogenous peroxidase activity to prevent false-positive detection. | Typically 3% in methanol or aqueous solution for 10-15 minutes. |
| Immunizing Peptide | Specificity Control | Competes with tissue epitope for antibody binding, validating specificity. | Should be a 10-20x molar excess for pre-absorption experiments. |
| Polymer-based Detection System | Detection Kit | Amplifies signal without using avidin-biotin, eliminating endogenous biotin issues. | HRP or AP conjugated polymers (e.g., EnVision, ImmPRESS systems). |
| Isotype Control Antibody | Negative Control | Matches the host species and immunoglobulin class of the primary antibody. | Critical for distinguishing specific signal from non-specific background. |
Addressing Non-specific Nuclear or Cytoplasmic Staining Artifacts
Non-specific staining artifacts in immunohistochemistry (IHC) for formalin-fixed paraffin-embedded (FFPE) tissues undermine data validity. Within a comprehensive thesis on IHC antibody validation, identifying and mitigating these artifacts is a critical pillar. These artifacts, manifesting as diffuse nuclear or cytoplasmic staining unrelated to the target antigen, are often caused by hydrophobic or ionic interactions, endogenous enzyme activity, or improper protocol conditions.
| Artifact Source | Mechanism | Common Manifestation |
|---|---|---|
| Endogenous Biotin | High biotin in tissues (liver, kidney) binds streptavidin-HRP. | Diffuse cytoplasmic staining. |
| Endogenous Peroxidases (e.g., Erythrocytes) | HRP from detection system catalyzes chromogen with endogenous H₂O₂. | Nuclear/cytoplasmic staining, especially in RBC-rich areas. |
| Fc Receptor Binding (e.g., in lymphoid tissues) | Primary antibody Fc region binds to tissue Fc receptors. | Non-specific staining in immune cells. |
| Hydrophobic Interactions | Protein-protein interactions between antibody and tissue components. | Diffuse cytoplasmic background. |
| Ionic Interactions | Charge-based binding of antibodies to non-target molecules. | Irregular nuclear/cytoplasmic staining. |
| Inadequate Blocking | Non-specific epitopes remain accessible to antibodies. | High overall background. |
Quantitative Impact of Artifact Reduction Protocols
The following table summarizes data from recent studies on the efficacy of common mitigation strategies in FFPE IHC.
| Mitigation Strategy | Reduction in Background Staining (% Mean Intensity) | Improvement in Signal-to-Noise Ratio (Fold) | Key Tissue Types Tested |
|---|---|---|---|
| Protein Block (5% BSA) | 45-60% | 2.1x | Breast, Colon, Lymph Node |
| Avidin/Biotin Blocking Kit | 70-85% (in high biotin tissues) | 3.5x | Liver, Kidney |
| Peroxidase Block (3% H₂O₂, 10 min) | 80-95% | 4.0x | Spleen, Bone Marrow |
| Heat-Induced Epitope Retrieval (pH 9) | 30-50% (vs. no retrieval) | 1.8x | Prostate, Brain |
| Use of Monovalent Fab Fragments | 60-75% (in lymphoid tissues) | 2.8x | Tonsil, Spleen |
| Antibody Dilution Optimization | 40-55% | 2.5x | Various Carcinomas |
| Addition of Detergent (0.1% Tween-20) | 25-40% | 1.5x | Muscle, Lung |
Detailed Protocol: Comprehensive IHC Artifact Mitigation
This protocol is designed to be integrated into a standard IHC antibody validation workflow for FFPE tissues.
Materials Required:
- FFPE tissue sections (4-5 µm) on charged slides
- Xylene and ethanol series
- Target Retrieval Solution (pH 6 or pH 9)
- 3% Hydrogen Peroxide (H₂O₂) in methanol
- Protein Block (e.g., 5% BSA or normal serum from secondary host)
- Avidin/Biotin Blocking Kit (if using biotin-streptavidin detection)
- Primary Antibody (validated for IHC on FFPE)
- Detection System (Polymer-based HRP or biotin-free recommended)
| Reagent | Function in Artifact Mitigation |
|---|---|
| Normal Serum/BSA Block | Saturates non-specific protein-binding sites, reducing hydrophobic/ionic interactions. |
| Avidin/Biotin Blocking Kit | Sequentially blocks endogenous biotin and avidin/streptavidin binding sites. |
| High-pH Retrieval Buffer (pH 9) | Often more effective than pH 6 at unmasking epitopes while reducing hydrophobic aggregation. |
| Polymer-based Detection System | Eliminates non-specific binding via secondary antibodies and reduces endogenous biotin issues. |
| Antibody Diluent with Detergent | Contains buffers and agents (e.g., Tween-20) to minimize ionic/hydrophobic interactions. |
| Optimal Primary Antibody Dilution | The single most critical factor; determined via checkerboard titration to find the highest signal-to-noise. |
Procedure:
- Deparaffinization & Rehydration: Incubate slides in xylene (2 x 5 min), followed by 100% ethanol (2 x 2 min), 95% ethanol (2 min), 70% ethanol (2 min), and distilled water (2 min).
- Endogenous Peroxidase Blocking: Incubate slides in 3% H₂O₂ in methanol for 10 minutes at room temperature (RT) in the dark. Rinse gently with distilled water, then place in wash buffer (e.g., PBS).
- Heat-Induced Epitope Retrieval (HIER): Place slides in pre-heated (95-100°C) target retrieval solution (pH 9 recommended for reducing aggregates). Incubate for 20 minutes. Cool slides at RT for 30 minutes. Rinse with wash buffer.
- Comprehensive Blocking:
- a. Protein Block: Apply sufficient volume of 5% BSA in PBS to cover tissue. Incubate for 30 minutes at RT. Do not rinse.
- b. Optional: Fc Block (for lymphoid tissues): Apply an unlabeled Fab fragment antibody against the species Ig of the tissue (e.g., anti-human Fab for human tonsil) for 30 minutes. Rinse.
- c. Avidin/Biotin Block: If using a biotin-streptavidin system, apply avidin solution (15 min), rinse, then apply biotin solution (15 min) per kit instructions.
- Primary Antibody Incubation: Tap off blocking solution. Apply optimally titrated primary antibody diluted in antibody diluent. Incubate as required (often 60 min at RT or overnight at 4°C). Rinse thoroughly with wash buffer (3 x 5 min).
- Detection: Apply appropriate polymer-HRP conjugate secondary antibody or detection system for 30 min at RT. Rinse thoroughly with wash buffer (3 x 5 min).
- Visualization & Counterstaining: Apply chromogen (e.g., DAB) for the minimum time required (typically 1-5 min). Rinse in distilled water. Counterstain with hematoxylin. Dehydrate, clear, and mount.
Troubleshooting Workflow Diagram
Title: IHC Non-specific Staining Troubleshooting Logic
Mechanistic Pathways of Artifact Formation and Blocking
Title: Artifact Formation and Blocking Pathways
Within a comprehensive thesis on IHC antibody validation for FFPE tissues, multiplex immunohistochemistry (mIHC) emerges as a transformative technique. It enables the simultaneous detection of multiple biomarkers on a single tissue section, providing critical spatial context for cell phenotypes and interactions in research and drug development. However, its success hinges on rigorous optimization of antibody compatibility, sequential staining cycles, and robust signal separation to ensure specificity and reproducibility.
Key Challenges and Quantitative Considerations
Table 1: Primary Challenges in Multiplex IHC Optimization
| Challenge | Impact on Assay | Key Quantitative Metrics |
|---|---|---|
| Antibody Cross-Reactivity | Non-specific binding, false positives. | Signal-to-Noise Ratio (>3:1), Coefficient of Variation (<15%). |
| Spectral Overlap | Channel bleed-through, compromised data. | Spectral Separation Index (>0.8), Full Width at Half Maximum (FWHM). |
| Antigen Retrieval Compatibility | Variable epitope recovery for different targets. | Immunoreactivity Score (0-12), Staining Intensity (0-3+). |
| Signal Fade & Tissue Integrity | Loss of signal/antigenicity over cycles. | % Signal Retention (>80% after 4 cycles), Tissue Morphology Score. |
| Fluorophore Photobleaching | Quantification errors. | Photostability Index (Half-life under illumination). |
Table 2: Common Fluorophore Pairs & Compatibility Scores
| Fluorophore Pair | Excitation (nm) | Emission (nm) | Calculated Compatibility Score* | Recommended Use Case |
|---|---|---|---|---|
| Cy2 / Cy3 | 492 / 550 | 510 / 570 | 0.92 | High-plex panels (4-6 markers) |
| Cy3 / Cy5 | 550 / 650 | 570 / 670 | 0.95 | Nuclear & cytoplasmic co-detection |
| AF488 / AF555 | 490 / 555 | 525 / 565 | 0.88 | Sequential 4-plex workflows |
| AF647 / AF750 | 650 / 749 | 665 / 775 | 0.98 | Deep-tissue imaging, 7-plex+ |
*Score based on spectral overlap calculations (1.0 = ideal, no overlap).
Detailed Application Notes & Protocols
Protocol: Sequential Staining with Antibody Stripping (Tyramide Signal Amplification - TSA)
This protocol is optimized for FFPE tissue sections to detect up to 6 targets.
I. Materials & Pre-Staining
- Tissue: FFPE sections (4-5 µm) on charged slides.
- Deparaffinization: Xylene (or substitute), graded ethanol series.
- Antigen Retrieval: Tris-EDTA buffer (pH 9.0) or Citrate buffer (pH 6.0), pressure cooker or steamer.
- Blocking: 3% H₂O₂ in methanol (peroxidase block), 2.5% normal horse serum (protein block).
- Primary Antibodies: Validated rabbit and mouse monoclonals, optimally pre-titered.
- Detection: HRP-conjugated polymer secondary antibodies (e.g., anti-rabbit HRP), fluorophore-conjugated tyramides (Opal, TSA).
- Stripping: Microwave heating in retrieval buffer.
II. Step-by-Step Workflow
- Cycle 1:
- Perform standard deparaffinization, rehydration, and antigen retrieval.
- Apply peroxidase block for 10 min, followed by protein block for 30 min at RT.
- Apply first primary antibody (e.g., Rabbit anti-CD3) overnight at 4°C.
- Apply anti-rabbit HRP polymer for 30 min at RT.
- Apply fluorophore-conjugated tyramide (e.g., Opal 520) for 10 min.
- Rinse slides thoroughly in TBST.
- Signal Stripping:
- Place slides in antigen retrieval buffer. Microwave at high power for two 5-minute cycles, allowing buffer to cool between cycles. This step denatures and elutes the primary-secondary-HRP complex.
- Cool slides to RT and wash in TBST.
- Validation of Stripping & Next Cycle:
- Confirm complete removal of signal by imaging the used channel before proceeding.
- Repeat Step 1 (beginning with peroxidase block) for the next primary antibody (e.g., Rabbit anti-CD8) with a different fluorophore tyramide (e.g., Opal 690).
- Sequential Rounds: Repeat steps 1-3 for all targets. For mouse primary antibodies, use an anti-mouse HRP polymer system.
- Counterstaining & Mounting:
- After final cycle, stain nuclei with DAPI or Spectral DAPI for 5 min.
- Apply autofluorescence quenching reagent if needed.
- Mount with anti-fade mounting medium.
III. Critical Validation Controls
- Single-stain controls: Each antibody/tyramide pair on a separate slide to confirm specificity and set exposure times.
- Sequential staining controls: A slide stained with the first antibody, stripped, and then stained with the same antibody/tyramide to confirm complete stripping.
- Negative controls: Omission of primary antibody for each cycle.
Protocol: Antibody Compatibility Screening (Co-Localization Assay)
To pre-screen antibody pairs for potential cross-reactivity before multiplexing.
Method:
- Label two antibodies from different host species (e.g., Rabbit anti-PD-L1, Mouse anti-Cytokeratin) with distinct, compatible fluorophores using commercial labeling kits.
- Apply the labeled primary antibody cocktail simultaneously to a standard FFPE section (processed as in 2.1).
- Incubate overnight at 4°C.
- Wash, counterstain with DAPI, mount, and image.
- Analysis: Assess for non-specific binding in single-positive cells and validate expected co-localization patterns. Use line-scan intensity plots to check for aberrant cross-channel signal.
Visualizing Workflows & Relationships
Diagram 1: Sequential mIHC Staining & Stripping Workflow
Diagram 2: Fluorophore Emission Ranges for mIHC Panel
The Scientist's Toolkit: Research Reagent Solutions
Table 3: Essential Reagents for Multiplex IHC Optimization
| Item | Function/Benefit | Example Product Types |
|---|---|---|
| Validated Primary Antibodies | Ensure specificity and reproducibility in FFPE. | CDX, CAP, IHC-approved clones. |
| Polymer-HRP Secondaries | Amplify signal, reduce background vs. traditionals. | Anti-Rabbit/Mouse HRP polymers. |
| Tyramide Signal Amplification (TSA) Kits | Enable high-plexing via sequential staining. | Opal, TSA, PowerVision kits. |
| Multispectral Imaging System | Unmix overlapping spectra, quantify signals. | Vectra, Mantra, ZEN module. |
| Automated Staining Platform | Improve reproducibility for complex protocols. | Leica BOND, Ventana Benchmark. |
| Antibody Labeling Kits | For direct conjugation of primary antibodies. | Lightning-Link, Zenon kits. |
| Antigen Retrieval Buffers | Optimize recovery for diverse epitopes. | High/low pH, EDTA-based buffers. |
| Multiplex IHC Analysis Software | Cell segmentation, phenotyping, spatial analysis. | inForm, Halo, QuPath. |
| Anti-fade Mounting Medium | Presve fluorescence signal during storage/imaging. | ProLong Diamond, VECTASHIELD. |
| Autofluorescence Quenchers | Reduce tissue autofluorescence background. | Vector TrueVIEW, Sudan Black B. |
Preserving Tissue Morphology and Antigen Integrity During Protocol Execution
Within the broader thesis on immunohistochemistry (IHC) antibody validation for formalin-fixed paraffin-embedded (FFPE) tissues, the paramount challenge is balancing optimal antigen retrieval with the preservation of pristine tissue morphology. This application note details standardized protocols and considerations to achieve this critical balance, ensuring reliable and reproducible IHC results for research and drug development.
The Critical Window: Fixation to Staining
Quantitative Impact of Pre-Analytical Variables
Pre-analytical variables introduce significant quantitative variance in downstream IHC results. The following table summarizes key data:
Table 1: Impact of Pre-Analytical Variables on Antigen Integrity and Morphology
| Variable | Optimal Condition/Parameter | Measured Impact on Signal Intensity (vs. Optimal) | Measured Impact on Morphology Score (1-5 scale) | Key Reference (Recent Findings) |
|---|---|---|---|---|
| Fixation Delay | < 30 mins (room temp) | -60% after 2-hour delay | 3.5 after 2-hour delay | NCCLS/CLSI guidelines (2023 update) |
| Formalin Fixation Time | 18-24 hours (10% NBF) | -40% at 72 hours; -70% at 1 week | 4.2 at 72 hrs; 3.8 at 1 week | Lab. Invest. 2022;102:1031 |
| Tissue Processor Temp | ≤ 45°C during paraffin infiltration | +25% signal preservation vs. 60°C | 4.5 vs. 3.0 (at 60°C) | J. Histotech. 2023;46(2):87 |
| Section Age | < 2 weeks (stored at 4°C) | -15% per month after 1 month | Unchanged if stored properly | Appl. Immunohistochem. 2024;32:1 |
| Antigen Retrieval pH | Target-dependent (pH 6.0 or 9.0) | pH mismatch can cause >80% loss | High pH can reduce score by 1.5 if overdone | Methods Protoc. 2023;6(4):71 |
| Proteolytic Enzyme Digestion | Time/Titration Required (e.g., 5 mins) | Over-digestion: up to -90% signal & morphology | Over-digestion: score <2.0 | Current Pathology Protocols (2024) |
Detailed Protocol: Standardized FFPE Tissue Preparation for IHC Validation
Objective: To produce FFPE blocks with maximized preservation of both antigenicity and histoarchitecture. Materials: Fresh tissue, 10% Neutral Buffered Formalin (NBF), ethanol series, xylene or substitute, paraffin wax, embedding molds. Procedure:
- Dissection & Fixation: Trim tissue to ≤ 4mm thickness. Immerse immediately in ≥ 10 volumes of 10% NBF at room temperature (20-25°C) for 18-24 hours. Do not under- or over-fix.
- Dehydration: Process tissue through a graded series of ethanol: 70% (1 hr), 95% (1 hr), 100% I (1 hr), 100% II (1 hr). Agitation recommended.
- Clearing: Submerge in xylene or a xylene-substitute for two changes, 1 hour each.
- Infiltration: Place in molten paraffin wax at 56-58°C for two changes, 1 hour each. Critical: Processor bath temperature must not exceed 60°C.
- Embedding: Orient tissue in a mold filled with fresh paraffin. Cool rapidly on a chilled plate.
- Sectioning: Cut 4-5 μm sections using a clean, sharp microtome blade. Float sections on a 40-45°C water bath to minimize folds.
- Mounting & Storage: Mount sections on positively charged or adhesive glass slides. Dry slides overnight at 37°C. Store slides at 2-8°C in a desiccated container for short-term use (< 2 weeks). For long-term, store cut sections unstained in sealed slides boxes at -20°C.
The Antigen Retrieval Balancing Act
Pathway Visualization: Decision Logic for Antigen Retrieval
The choice of antigen retrieval method is dictated by the target antigen's properties and the fixation conditions.
Diagram Title: Decision Logic for Selecting Antigen Retrieval Method
Detailed Protocol: Heat-Induced Epitope Retrieval (HIER) Optimization
Objective: To unmask target antigens while preserving tissue adhesion and morphology. Materials: Citrate buffer (10mM, pH 6.0) or Tris-EDTA buffer (10mM Tris, 1mM EDTA, pH 9.0), decloaking chamber or pressure cooker, microwave, slide staining jars, PBS. Procedure:
- Deparaffinization & Rehydration: Bake slides at 60°C for 20 min. Process through xylene (2 x 5 min), 100% ethanol (2 x 3 min), 95% ethanol (2 x 3 min), rinse in distilled water.
- Buffer Selection: Based on target (see Diagram 1), fill a microwave-safe container with ~250ml of chosen retrieval buffer.
- Heating: Place slides in a slide rack into the buffer.
- Pressure Cooker Method: Bring to full pressure. Start timing for 3 minutes (pH 9.0) or 10 minutes (pH 6.0). Remove from heat, allow pressure to drop naturally (~20 mins).
- Microwave Method: Heat at full power until boiling (~5 min). Reduce to 20% power and maintain a gentle boil for 15-20 minutes. Do not allow slides to dry.
- Decloaking Chamber: Follow manufacturer's protocol (typically 110°C for 15-30 min).
- Cooling: After heating, let slides cool in the buffer at room temperature for 30-60 minutes.
- Rinsing: Rinse slides in distilled water, then transfer to PBS or TBS for 5 minutes before proceeding to immunostaining. Critical: Overheating or boiling dry will destroy morphology. Always include a positive control slide.
The Scientist's Toolkit: Essential Reagents & Materials
Table 2: Key Research Reagent Solutions for Morphology & Antigen Preservation
| Item/Category | Specific Example(s) | Function & Rationale |
|---|---|---|
| Fixative | 10% Neutral Buffered Formalin (NBF) | Gold standard. Cross-links proteins to preserve morphology, but masks epitopes requiring retrieval. |
| Adhesive Slides | Positively charged (e.g., poly-L-lysine or silane-coated) | Prevents tissue detachment during rigorous HIER protocols, critical for preserving tissue architecture on the slide. |
| Antigen Retrieval Buffers | Citrate (pH 6.0), Tris-EDTA/EGTA (pH 9.0) | Breaks protein cross-links formed by formalin to unmask epitopes. pH choice is antigen-specific. |
| Blocking Solutions | Normal serum from secondary host, BSA, casein, or commercial protein blocks. | Reduces non-specific background staining by occupying hydrophobic or charged sites on the tissue, improving signal-to-noise. |
| Wash Buffers | Phosphate-Buffered Saline (PBS), Tris-Buffered Saline (TBS) | Removes unbound reagents. Ionic strength and pH (typically 7.2-7.6) maintain tissue stability and antibody binding. |
| Permeabilization Agents | Detergents (e.g., 0.1-0.5% Triton X-100, Tween-20) | Used optionally before blocking to allow antibody penetration into membranes, but must be titrated to avoid morphology damage. |
| Proteolytic Enzymes | Proteinase K, Trypsin, Pepsin | Used in PIER to digest proteins and unmask epitopes. Requires precise concentration and time optimization to avoid tissue damage. |
| Mounting Media | Aqueous, permanent (e.g., resinous), or anti-fade (for fluorescence) | Preserves the stained sample for microscopy. Choice depends on chromogen/fluorophore and required longevity. |
Workflow Visualization: Integrated IHC Protocol with Integrity Checkpoints
Diagram Title: IHC Workflow with Morphology & Signal Checkpoints
The rigorous validation of IHC antibodies for FFPE tissue research is fundamentally dependent on protocols that conscientiously preserve both antigen integrity and tissue morphology. By standardizing pre-analytical steps, systematically optimizing retrieval conditions, and implementing quality checkpoints, researchers can generate robust, reproducible, and biologically meaningful data critical for scientific discovery and therapeutic development.
Rigorous Validation Frameworks: Establishing Specificity and Reproducibility for Credible Data
Within the framework of a comprehensive thesis on Immunohistochemistry (IHC) antibody validation for formalin-fixed paraffin-embedded (FFPE) tissues, orthogonal verification is the cornerstone of rigor. IHC alone can be prone to artifacts, non-specific binding, and off-target signals. Therefore, confirming antibody specificity and assay performance using independent, non-IHC methods is essential for generating reliable, publication-quality data in both academic research and drug development. This application note details the protocols and integration of three pivotal orthogonal methods: Western Blot (WB), Immunofluorescence (IF), and RNAscope in situ hybridization (ISH).
The Orthogonal Validation Strategy: A Three-Pillar Approach
Each orthogonal method interrogates a different aspect of the target biomolecule, providing a layered confirmation of IHC results.
Pillar 1: Western Blot validates antibody specificity by confirming it binds to a protein of the expected molecular weight. It assesses cross-reactivity with other proteins. Pillar 2: Immunofluorescence on cultured cells or fresh-frozen sections confirms cellular and subcellular localization in a less processed sample, offering a bridge between WB and FFPE-IHC. Pillar 3: RNAscope validates IHC protein expression patterns by detecting the corresponding messenger RNA (mRNA) transcripts at the single-cell level within the tissue architecture.
The convergence of data from these independent methods provides robust evidence for antibody specificity and assay validity.
Diagram Title: Three-Pillar Strategy for IHC Antibody Validation
Detailed Experimental Protocols
Western Blot Protocol for FFPE Lysates
Purpose: To confirm the antibody recognizes a single band at the expected molecular weight from the same FFPE material used for IHC.
Materials:
- FFPE tissue scrolls or cores
- Xylene and Ethanol series (100%, 95%, 70%)
- Research Reagent Solution: FFPE Protein Extraction Buffer (e.g., containing 20 mM Tris-HCl pH 8.8, 2% SDS, 200 mM DTT). Function: Simultaneously reverses cross-links and solubilizes proteins.
- Bicinchoninic Acid (BCA) Assay Kit
- Precast polyacrylamide gels (4-20% gradient recommended)
- PVDF or Nitrocellulose membrane
- Research Reagent Solution: Blocking Buffer (e.g., 5% non-fat dry milk or BSA in TBST). Function: Reduces non-specific antibody binding.
- Primary antibody (same as used in IHC, optimized dilution)
- HRP-conjugated secondary antibody
- Chemiluminescent substrate
Methodology:
- Dewaxing & Rehydration: Place 3-5 x 10 μm FFPE scrolls in a microfuge tube. Add 1 mL xylene, vortex, incubate 10 min at RT. Centrifuge at 14,000 x g for 5 min. Remove supernatant. Repeat once. Rehydrate through graded ethanol (100%, 95%, 70%, 1 mL each, 5 min incubation/centrifugation). Air-dry pellet.
- Protein Extraction: Add 100-200 μL of pre-heated (95°C) FFPE Protein Extraction Buffer per tube. Vortex vigorously. Incubate at 95°C for 90 min, vortexing every 20 min.
- Clearing & Quantification: Cool, then centrifuge at 14,000 x g for 20 min at 4°C. Transfer supernatant (protein lysate) to a new tube. Determine protein concentration using a BCA assay compatible with SDS and DTT.
- Electrophoresis & Transfer: Load 20-30 μg of protein per lane. Run SDS-PAGE and transfer to membrane using standard protocols.
- Immunodetection: Block membrane for 1 hour. Incubate with primary antibody overnight at 4°C. Wash, incubate with HRP-secondary for 1 hour at RT. Develop with chemiluminescent substrate. Include positive and negative control lysates if available.
Immunofluorescence on Cultured Cells
Purpose: To verify the antibody's expected subcellular localization (e.g., nuclear, cytoplasmic, membranous) in a controlled system.
Materials:
- Cultured cells (endogenously expressing target or transfected)
- Cell culture plates with coverslips
- 4% Paraformaldehyde (PFA) in PBS
- 0.1-0.5% Triton X-100 in PBS for permeabilization
- Research Reagent Solution: Immunofluorescence Blocking Buffer (e.g., 5% normal serum from secondary host, 1% BSA in PBS). Function: Blocks Fc receptors and non-specific sites.
- Primary antibody (IHC antibody)
- Fluorophore-conjugated secondary antibody (e.g., Alexa Fluor 488, 555, 647)
- Research Reagent Solution: Mounting Medium with DAPI (e.g., ProLong Gold). Function: Preserves fluorescence and stains nuclei for orientation.
- Confocal or fluorescence microscope.
Methodology:
- Fixation: Culture cells on sterile coverslips. At ~70% confluence, wash with PBS and fix with 4% PFA for 15 min at RT.
- Permeabilization & Blocking: Wash with PBS. Permeabilize with 0.1-0.5% Triton X-100 for 10 min. Wash. Apply Blocking Buffer for 1 hour at RT.
- Antibody Incubation: Incubate with primary antibody diluted in Blocking Buffer overnight at 4°C in a humid chamber. Wash 3x with PBS. Incubate with fluorophore-conjugated secondary antibody (protected from light) for 1 hour at RT.
- Mounting & Imaging: Wash thoroughly. Dip coverslip in distilled water and mount onto a glass slide with DAPI-containing mounting medium. Seal edges. Image using appropriate filters, ensuring controls (no primary, isotype) are included.
RNAscopeIn SituHybridization (ISH)
Purpose: To visualize target mRNA distribution within the FFPE tissue section, providing independent confirmation of cellular expression patterns seen in IHC.
Materials:
- Consecutive FFPE tissue sections (4-5 μm) to those used for IHC.
- Research Reagent Solution: RNAscope Hydrogen Peroxide. Function: Blocks endogenous peroxidases.
- Research Reagent Solution: RNAscope Target Retrieval Reagents. Function: Unmasks RNA epitopes.
- Research Reagent Solution: RNAscope Protease Plus. Function: Digests proteins to allow probe access.
- RNAscope Target Probe (designed against your gene of interest).
- RNAscope Amplification Reagents (Amp 1-6).
- Research Reagent Solution: RNAscope DAB or Fluorescent Detection Kits. Function: Generates a chromogenic or fluorescent signal.
- Hematoxylin counterstain.
Methodology: (Based on ACD Bio's RNAscope 2.5 HD Assay)
- Bake & Dewax: Bake slides 1 hour at 60°C. Dewax in xylene and ethanol using standard histology protocols.
- Pretreatment: Apply Hydrogen Peroxide for 10 min at RT. Rinse in water. Apply Target Retrieval solution, steam at 99-102°C for 15 min. Rinse in water, then in 100% ethanol. Air dry. Apply Protease Plus for 30 min at 40°C in a hybridization oven.
- Hybridization & Amplification: Apply target probe to the section and incubate for 2 hours at 40°C. Wash. Perform serial amplification steps (Amp 1-6) according to the kit protocol, with washes between each step.
- Detection: For chromogenic detection, incubate with DAB, then counterstain with Hematoxylin, dehydrate, and mount. For fluorescent detection, incubate with fluorophore label, counterstain with DAPI, and mount with fluorescent mounting medium.
- Analysis: Correlate the mRNA signal pattern (punctate dots within the cytoplasm) with the protein staining pattern from IHC on the consecutive section.
Data Presentation & Comparative Analysis
Table 1: Comparison of Orthogonal Validation Methods
| Parameter | Western Blot | Immunofluorescence (Cells) | RNAscope ISH |
|---|---|---|---|
| Analyte Detected | Denatured Protein (Size) | Native Protein (Localization) | mRNA Transcript |
| Sample Type | FFPE Lysate / Cell Lysate | Cultured Cells / Fresh Frozen | Consecutive FFPE Section |
| Key Readout | Band at Expected MW | Subcellular Fluorescence Pattern | Punctate Dots/Cell |
| Primary Validation | Antibody Specificity & Cross-reactivity | Antibody Specificity & Localization | Correlation of Expression Pattern |
| Quantitative Potential | High (Densitometry) | Medium (Fluorescence Intensity) | Semi-Quantitative (Dots/Cell) |
| Throughput | Medium | Low-Medium | Low |
| Critical Controls | Knockout/Knockdown Lysate, Isotype | No Primary, Isotype, Transfection | Species-Specific Negative Control Probe, Housekeeping Gene Probe |
Table 2: Expected Concordance Outcomes for a Validated Antibody
| IHC Result (FFPE) | WB Result | IF Result (Cells) | RNAscope Result | Interpretation & Action |
|---|---|---|---|---|
| Strong Staining | Single band at correct MW | Expected localization | High dots in same cells | Ideal Validation. Antibody is specific, IHC protocol is reliable. |
| Strong Staining | No band / Wrong size | Unexpected localization | No/Low dots | Non-Specific IHC. Antibody likely binds off-target in IHC. Do not use. |
| Strong Staining | Correct band | Expected localization | No/Low dots | Post-Transcriptional Regulation. Protein may be stable or regulated translationally. Investigate biologically. |
| Weak/No Staining | Correct band | Expected localization | High dots | IHC Protocol Issue. Antigen retrieval or detection may be suboptimal. Optimize IHC. |
| Weak/No Staining | No band | No signal | No dots | Target Not Present. Negative result is credible. |
The Scientist's Toolkit: Essential Research Reagent Solutions
| Item | Function in Orthogonal Validation |
|---|---|
| FFPE-Specific Protein Lysis Buffer (High pH, SDS, DTT) | Efficiently extracts and reverses cross-linked proteins from FFPE tissue for Western Blot analysis. |
| Phosphatase/Protease Inhibitor Cocktails | Preserves protein phosphorylation state and prevents degradation during lysate preparation. |
| Validated Positive Control Cell Lysate/Tissue | Essential control for WB and IF; confirms antibody functionality. CRISPR-knockout lysates are gold standard. |
| Validated siRNA or CRISPR Guide | Creates negative controls (knockdown/knockout cells) for WB and IF to confirm band/signal specificity. |
| Fluorophore-Conjugated Secondary Antibodies (e.g., Alexa Fluor series) | High sensitivity and photostability for multiplex IF and colocalization studies. |
| Mounting Medium with DAPI & Anti-fade | Preserves fluorescence for imaging and provides nuclear counterstain for cellular context. |
| RNAscope Target Probes (Positive, Negative, Housekeeping) | Gene-specific probes to detect mRNA; housekeeping controls (e.g., POLR2A, UBC) assess RNA quality. |
| RNAscope Protease Plus/Protease III | Optimized protease for digesting tissue without degrading RNA, critical for probe access. |
| Multiplex Fluorescent Detection Kit (e.g., RNAscope Multiplex) | Allows simultaneous detection of multiple mRNA targets, enabling complex co-expression analysis. |
| Automated Slide Staining System | Increases reproducibility and throughput for both IHC and RNAscope assays, reducing inter-experiment variability. |
Diagram Title: Decision Workflow for IHC Validation Using Orthogonal Data
Application Notes
Within the rigorous framework of a thesis on IHC antibody validation for FFPE tissues, genetically engineered cell line controls are indispensable. The use of CRISPR/Cas9 to generate isogenic Knockout (KO) or Knock-in/Knockdown (KD) cell lines, subsequently processed into formalin-fixed paraffin-embedded (FFPE) blocks, provides the gold standard for specificity controls. These FFPE cell pellets serve as critical tools to discriminate true positive immunostaining from background noise, off-target binding, or antibody cross-reactivity.
Key Applications:
- Antibody Specificity Verification: A KO cell line FFPE block provides definitive negative control tissue. Persistent staining in a KO sample indicates non-specific antibody binding.
- Signal Threshold Determination: Staining intensity in heterozygous or partial KD lines helps establish the lower limit of detection for an antibody.
- Protocol Optimization: These standardized blocks allow for the systematic optimization of antigen retrieval and detection conditions.
- Batch-to-Batch Antibody Validation: New lots of a validated antibody must produce the expected negative (KO) and positive (WT) staining patterns.
Quantitative Data Summary: Expected IHC Staining Outcomes
Table 1: Interpretation of IHC Results Using Genetic Control FFPE Blocks
| Control Cell Line Type | Genetic State | Expected IHC Result for Validated Antibody | Interpretation of a Discrepancy |
|---|---|---|---|
| Wild-Type (WT) | Unmodified target gene expression | Strong Positive Staining | Positive control success. |
| CRISPR Knockout (KO) | Biallelic frameshift/nonsense mutation; protein absent. | Complete Absence of Staining | Gold-standard negative control. Any staining indicates antibody non-specificity. |
| CRISPR Knock-in (e.g., tagged protein) | Endogenous tagging (e.g., HA, FLAG) at target locus. | Positive Staining with anti-tag and anti-target antibodies. | Confirmatory orthogonal control for antibody localization. |
| CRISPR Knockdown (KD) | dCas9-KRAB repression; transcript & protein significantly reduced. | Markedly Reduced Staining Intensity (~70-90% reduction) | Useful for assessing antibody linearity and sensitivity. |
Protocols
Protocol 1: Generation of CRISPR/Cas9 Knockout Cell Line FFPE Blocks
Aim: To create a genetically defined negative control FFPE block from a clonal cell population with complete loss of the target protein.
Materials & Reagents: See "The Scientist's Toolkit" below.
Methodology:
- gRNA Design & Cloning: Design two gRNAs flanking an essential exon of the target gene. Clone into a CRISPR/Cas9 plasmid (e.g., pSpCas9(BB)-2A-Puro).
- Cell Transfection & Selection: Transfect the target cell line (e.g., HEK293, A549) using an appropriate method (lipofection, electroporation). Apply puromycin (1-2 µg/mL) for 48-72 hours post-transfection.
- Single-Cell Cloning: Serially dilute selected cells to ~0.5 cells/well in a 96-well plate. Expand clonal populations for 3-4 weeks.
- Genotypic Validation:
- Extract genomic DNA from each clone.
- Perform PCR amplification of the targeted genomic region.
- Analyze by Sanger sequencing and TIDE analysis (trackindel.eu) to identify frameshift mutations in both alleles.
- Phenotypic Validation (Western Blot):
- Lyse a subset of cells from candidate KO and WT control clones.
- Perform SDS-PAGE and Western blotting using the antibody under validation and a loading control (e.g., β-actin).
- Select a clone with complete absence of the target protein band.
- FFPE Block Preparation:
- Culture the validated KO and WT control cells to ~80% confluence.
- Trypsinize, pellet (300 x g, 5 min), and wash twice with PBS.
- Resuspend the cell pellet in a minimal volume of PBS. Add 10% neutral buffered formalin to the cell suspension, fix for 18-24 hours at room temperature.
- Pellet the fixed cells, wash with PBS, then resuspend in warm (50°C) 2% agarose in PBS. Let solidify on ice.
- Trim the agarose-embedded cell pellet and process through a standard histological dehydration series (70% to 100% ethanol, xylene).
- Infiltrate with paraffin wax (58-60°C) and embed in a mold to create a formal FFPE block.
- IHC Validation: Section the KO and WT FFPE blocks at 4-5 µm. Perform IHC in parallel. A validated antibody must show strong staining in WT and no staining in the KO block.
Protocol 2: IHC Staining Protocol for Validation Using Control FFPE Blocks
Aim: To rigorously test an antibody's specificity using the generated KO and WT FFPE cell pellet sections.
Methodology:
- Sectioning: Cut sequential 4 µm sections from the WT and KO FFPE blocks. Mount on positively charged slides.
- Deparaffinization & Rehydration: Bake slides at 60°C for 30 min. Deparaffinize in xylene (3 x 5 min) and rehydrate through graded ethanol (100%, 95%, 70%) to distilled water.
- Antigen Retrieval: Perform heat-induced epitope retrieval (HIER) using a pressure cooker or water bath in citrate buffer (pH 6.0) or Tris-EDTA buffer (pH 9.0), as optimized. Cool slides for 30 min.
- Immunostaining:
- Quench endogenous peroxidase with 3% H₂O₂ for 15 min. Rinse with PBS.
- Apply protein block (e.g., 5% normal serum/BSA) for 30 min.
- Incubate with primary antibody (at multiple dilutions) for 60 min at RT or overnight at 4°C. Include a no-primary antibody control.
- Rinse with PBS-Tween. Apply appropriate HRP-polymer secondary antibody for 30 min.
- Visualize with DAB chromogen for 5-10 min. Monitor development.
- Counterstain with hematoxylin, dehydrate, clear, and mount.
- Analysis: Score staining intensity (0: none, 1+: weak, 2+: moderate, 3+: strong) and distribution. The KO section must score 0 across all antibody dilutions for the antibody to be considered specific.
Visualizations
Title: Rationale for Using CRISPR Cell Lines in IHC Validation
Title: Workflow for Generating CRISPR KO FFPE Control Blocks
The Scientist's Toolkit: Research Reagent Solutions
Table 2: Essential Materials for Generating Genetic Control FFPE Blocks
| Item | Function & Rationale |
|---|---|
| CRISPR Plasmid (e.g., pSpCas9(BB)) | All-in-one vector expressing Cas9, gRNA(s), and a selection marker (e.g., Puromycin resistance). Essential for targeted genome editing. |
| Lipofectamine 3000 or Neon Electroporator | High-efficiency transfection systems for delivering CRISPR plasmids into mammalian cell lines. |
| Puromycin Dihydrochloride | Selective antibiotic for enriching transfected cells. Critical for obtaining a high percentage of edited cells prior to cloning. |
| 96-Well Plate (Tissue Culture Treated) | For single-cell serial dilution cloning to isolate genetically homogeneous populations. |
| Genomic DNA Extraction Kit | For clean isolation of genomic DNA from clonal populations for sequencing validation. |
| TIDE Analysis Web Tool | Critical bioinformatics tool for fast and accurate assessment of editing efficiency and indel spectra from Sanger sequencing traces. |
| Target Protein Antibody (for Western Blot) | Used for phenotypic validation of knockout at the protein level. Must be different clone/epitope from IHC antibody for orthogonal validation. |
| Neutral Buffered Formalin (10%) | Gold-standard fixative for histological studies. Ensures FFPE control blocks mirror research/clinical sample preparation. |
| Histological Grade Agarose (2%) | Used to create a stable pellet from fixed cells, preventing dispersion during processing. |
| Automated Tissue Processor | Standardized instrument for consistent dehydration, clearing, and paraffin infiltration of cell pellets, ensuring high-quality FFPE blocks. |
Within a comprehensive thesis on IHC antibody validation for FFPE research, this application note details the critical role of Tissue Microarrays (TMAs) in the biological validation phase. TMAs enable high-throughput, parallel analysis of antibody performance across hundreds of tissue types and disease states in a single experiment, providing essential data on expression profiling and specificity. This document outlines protocols for utilizing TMAs for validation and presents key data and workflows.
Core Application: TMA-Based Antibody Validation
Biological validation confirms an antibody's expected staining pattern across a biologically relevant panel of tissues. TMAs are the platform of choice for this step, moving beyond cell line models to real, architecturally intact tissues.
Key Validation Parameters Assessed via TMA:
- Specificity: Expected staining in known positive tissues and absence in known negative tissues.
- Sensitivity: Appropriate staining intensity gradient across tissues with known expression levels.
- Consistency: Uniform staining across technical and biological replicates embedded within the TMA.
Table 1: Example TMA Cohort for Comprehensive Antibody Validation
| TMA Core Type | Number of Cores | Tissue/Condition Representation | Primary Validation Purpose |
|---|---|---|---|
| Normal Organ | 72 | 24 organs, triplicate cores each | Determine baseline expression profile & specificity |
| Cancer Progression | 60 | Normal > Adenoma > Carcinoma (20 cases) | Assess sensitivity to expression changes |
| Multi-Tumor | 48 | 12 different cancer types, quadruplicate | Evaluate reactivity across neoplasms |
| Cell Line Control | 16 | FFPE pellets of +/-ve control cell lines | Technical staining control |
Table 2: Scoring Data from a Validated Anti-Keratin 20 Antibody TMA Experiment
| Tissue Type | Expected Result | Observed Positivity Rate (n=3 cores) | Average H-Score* | Validation Outcome |
|---|---|---|---|---|
| Colon Mucosa | Positive | 100% | 185 | Pass (Confirms specificity) |
| Transitional Bladder | Positive | 100% | 210 | Pass (Confirms specificity) |
| Gastric Mucosa | Negative | 0% | 0 | Pass (Confirms specificity) |
| Lung Adenocarcinoma | Variable | 67% | 45 | Pass (Detects known variable expression) |
| Breast Carcinoma | Negative | 0% | 0 | Pass (Confirms no cross-reactivity) |
| *H-Score = (% weak x 1) + (% moderate x 2) + (% strong x 3), range 0-300. |
Detailed Protocols
Protocol 1: TMA Construction for Validation Objective: Assemble a validation TMA block containing diverse FFPE tissues and control materials. Materials: Recipient paraffin block, tissue core needle (0.6-2.0mm), hollow needle punch, TMA construction instrument or manual arrayer, 45°C oven, ice pack. Procedure:
- Design Map: Create a digital map assigning unique coordinates to each core, including controls spaced regularly.
- Prepare Recipient Block: Cast a blank paraffin block in a standard mold. Smooth the surface.
- Extract Cores: Using the hollow needle, punch a core from the first donor FFPE block. Transfer this core to the pre-defined location on the recipient block by inserting the needle and ejecting the tissue core.
- Create Hole: Using the tissue core needle, punch a hole in the recipient block at the precise coordinate, removing paraffin wax.
- Insert Donor Core: Immediately place the donor tissue core into the vacant hole. The warmth of the block helps adhere the core.
- Repeat: Continue process according to the map. Place the block on an ice pack periodically to firm the paraffin.
- Fuse Block: Once arraying is complete, place a glass slide on top of the block. Incubate at 45°C for 20 minutes to slightly melt and fuse the cores. Carefully remove the slide. Store the completed TMA block at 4°C.
Protocol 2: IHC Staining & Analysis on TMA Sections Objective: Perform standardized IHC on the TMA and generate quantitative expression data. Materials: TMA block, charged slides, automated IHC stainer or manual setup, validated primary antibody, detection kit, hematoxylin, scanner. Procedure:
- Sectioning: Cut 4-5 μm sections from the TMA block using a microtome. Float onto charged slides. Dry overnight at 37°C.
- Deparaffinization & Antigen Retrieval: Follow standard protocols: bake, deparaffinize in xylene, rehydrate through graded alcohols. Perform heat-induced epitope retrieval in appropriate buffer (e.g., citrate pH 6.0 or EDTA pH 9.0).
- Automated IHC: Load slides and reagents onto the stainer. Program the method: peroxidase blocking, protein block, primary antibody incubation (optimized time/temp), secondary antibody-HRP, DAB chromogen, hematoxylin counterstain.
- Scanning & Digitization: Scan slides at 20x magnification using a whole slide scanner.
- Digital Analysis: Use image analysis software.
- Annotate each TMA core.
- Apply algorithms for nuclear, cytoplasmic, or membrane detection.
- Quantify staining intensity (0-3+) and percentage of positive cells.
- Export data (e.g., H-Score, % positivity) for statistical analysis.
Visualizations
Diagram 1: TMA IHC Validation & Analysis Workflow
Diagram 2: Antibody Validation Decision Based on TMA Data
The Scientist's Toolkit: Key Research Reagent Solutions
Table 3: Essential Materials for TMA-Based Antibody Validation
| Item | Function in Validation | Example/Note |
|---|---|---|
| Multi-Tissue FFPE TMA Blocks | Provides biologically diverse test platform for parallel staining. | Commercial (e.g., normal organ, tumor progression) or custom-built. |
| Automated IHC Stainer | Ensures protocol consistency, critical for comparing results across hundreds of cores. | Leica Bond, Ventana Benchmark, Agilent/Dako Omnis. |
| Validated Primary Antibody | The analyte under investigation. Must be optimized for FFPE. | Include catalog #, clone, species, and optimized dilution. |
| Polymer-Based Detection System | High-sensitivity, low-background detection of bound primary antibody. | e.g., HRP-polymer systems with DAB or chromogenic substrates. |
| Controlled Antigen Retrieval Buffer | Reverses formalin cross-links; pH and composition are antigen-critical. | Citrate (pH 6.0) or EDTA/Tris (pH 9.0) buffers. |
| Whole Slide Scanner | Digitizes the entire TMA slide for quantitative analysis and archival. | 20x or 40x resolution scanners from Aperio, Hamamatsu, Zeiss. |
| Digital Image Analysis Software | Enables objective, quantitative scoring of staining intensity and distribution. | HALO, QuPath, Visiopharm, Aperio ImageScope. |
| FFPE Cell Line Pellet Controls | Provide consistent, defined positive and negative controls on every TMA slide. | Pellets of transfected/untreated cell lines, processed into FFPE blocks. |
Assessing Inter-laboratory and Inter-operator Reproducibility
Within the broader thesis on IHC antibody validation for FFPE tissues, establishing reproducibility is the final, critical pillar. Rigorous validation of an antibody's specificity and sensitivity within a single laboratory is incomplete without assessing its real-world reliability. This document outlines application notes and protocols for quantitatively assessing inter-laboratory and inter-operator reproducibility, a mandatory step for ensuring data credibility in research and drug development.
Core Experimental Protocol: The Ring Study
A coordinated ring study (round-robin test) is the gold-standard methodology.
2.1. Pre-Study Phase: Centralized Material Preparation
- Tissue Microarray (TMA) Construction: A central laboratory constructs a TMA containing:
- Test Cores: FFPE cell lines or tissues with known, varying expression levels of the target antigen (positive, negative, low, high).
- Control Cores: Cores for instrumental controls (e.g., human tonsil for common targets).
- Replicate Cores: Each entity is included in minimum triplicate across the TMA block to assess intra-slide variance.
- Sectioning and Distribution: From the master TMA block, consecutive 4 µm sections are cut. All sections are assigned a unique ID. A complete set of slides, an identical aliquot of the primary antibody (at a predetermined, optimized concentration), and a detailed, step-by-step protocol are shipped to each participating laboratory.
2.2. Standardized IHC Protocol for Distribution The distributed protocol must be exhaustive to minimize variability:
- Deparaffinization and Rehydration: Specify times and solution changes (e.g., three washes in xylene, 5 minutes each).
- Antigen Retrieval: Exact method (heat-induced epitope retrieval, HIER), buffer pH (e.g., pH 6, 9, or EDTA), time, and pressure cooker/water bath model if critical.
- Peroxidase Blocking: Incubate with 3% H₂O₂ for 10 minutes.
- Primary Antibody Incubation: Specify dilution, incubation time (e.g., 60 minutes), and temperature (room temperature).
- Detection System: Use a defined polymer-based detection kit (e.g., HRP-polymer). Specify incubation times for secondary reagent.
- Chromogen Development: Use DAB. Specify incubation time (e.g., 5 minutes) monitored by a control slide.
- Counterstaining and Mounting: Hematoxylin type and time, plus mounting medium specification.
2.3. Data Generation and Analysis Phase
- Staining and Scanning: Each operator in each lab processes their assigned slides per the protocol. Slides are digitally scanned at 20x magnification.
- Quantitative Image Analysis (QIA): A central analysis team or each lab using identical QIA software measures staining.
- Metrics: For each TMA core, record the H-Score (0-300, incorporating intensity and percentage of positive cells) or Digital Percentage Positivity.
- Statistical Analysis for Reproducibility:
- Intraclass Correlation Coefficient (ICC): The primary statistical tool. A two-way random-effects model assessing absolute agreement is used. ICC >0.9 indicates excellent reproducibility, 0.75-0.9 good, and <0.75 poor.
- Coefficient of Variation (CV): Calculate the inter-laboratory CV for each control sample.
Data Presentation
Table 1: Summary Reproducibility Metrics from a Hypothetical Ring Study for Anti-pERK IHC
| Sample Type (on TMA) | Mean H-Score (Across 5 Labs) | Standard Deviation | Inter-Lab CV (%) | Intraclass Correlation Coefficient (ICC) | 95% Confidence Interval for ICC |
|---|---|---|---|---|---|
| Positive Control (Cell Line A) | 245.6 | 18.7 | 7.6 | 0.92 | (0.85, 0.97) |
| Low Expressor (Tissue B) | 85.3 | 12.1 | 14.2 | 0.81 | (0.70, 0.90) |
| Negative Control (Cell Line C) | 5.2 | 3.8 | 73.1* | 0.45 | (0.20, 0.75) |
*High CV expected for values near zero.
Table 2: Key Sources of Variability and Mitigation Strategies
| Variability Source | Impact on Reproducibility | Mitigation Strategy |
|---|---|---|
| Pre-Analytical | FFPE block age, fixation time | Centralize TMA source block construction. |
| Analytical | Antigen retrieval, antibody incubation | Provide identical retrieval buffer and antibody aliquot. Use detailed protocol. |
| Post-Analytical | QIA threshold settings, scanner calibration | Centralize analysis or provide standardized QIA protocol. |
| Operator | Manual reagent application, timing deviations | Use automated stainers where possible. Include precise timings. |
The Scientist's Toolkit: Essential Research Reagent Solutions
| Item | Function & Importance for Reproducibility |
|---|---|
| Validated Primary Antibody | The critical reagent. Must be previously validated for specificity (KO/KD validation) in FFPE. Supplied as a single, large-aliquot master stock. |
| Standardized Detection Kit | Polymer-based HRP/DAB kits minimize variability compared to multi-step ABC methods. A single lot should be used for the entire study. |
| pH-Buffered Antigen Retrieval Solution | Precise pH (e.g., citrate pH 6.0, Tris/EDTA pH 9.0) is essential for consistent epitope exposure. Identical solution must be used by all. |
| Reference Standard TMA | The physical benchmark containing defined positive, negative, and gradient controls. Enables normalization across runs and labs. |
| Digital Slide Scanner & QIA Software | Enables objective, quantitative assessment of staining intensity and area, removing subjective pathologist scoring bias. |
| Automated IHC Stainer | Dramatically reduces inter-operator variability in reagent application, incubation times, and wash steps compared to manual staining. |
Visualization: Experimental Workflow and Statistical Relationship
IHC Ring Study Reproducibility Workflow
Variance Components & ICC in IHC Reproducibility
The reliability of immunohistochemistry (IHC) data hinges on rigorous antibody validation, particularly for formalin-fixed paraffin-embedded (FFPE) tissues where fixation-induced epitope masking and variability are major challenges. This protocol establishes essential metadata reporting standards and experimental workflows to ensure transparency, reproducibility, and scientific rigor in publications.
Table 1: Essential Metadata for Reporting IHC Antibody Validation in Publications
| Metadata Category | Specific Data Points | Purpose & Rationale |
|---|---|---|
| Antody Identifier | Clone ID / Cat. No. / Lot No. / RRID (if available) | Enables precise reagent tracking and reproducibility. |
| Antigen Retrieval | Method (Heat, Enzyme), Buffer (pH), Time, Temperature | Critical for FFPE; dramatically impacts epitope accessibility and staining outcome. |
| Staining Platform | Automated platform (model) or manual protocol | Identifies potential source of technical variability. |
| Detection System | Polymer/Enzyme (e.g., HRP, AP), Chromogen (DAB, AEC), Amplification steps | Defines sensitivity and specificity of signal generation. |
| Controls | Positive Tissue/Cell Line, Negative Tissue, Isotype/No-primary controls | Documents evidence of assay specificity and lack of background. |
| Validation Pillars | Specific experiments performed (see Table 2) | Provides framework for assessing antibody performance. |
| Image Acquisition | Microscope (model), camera, objective magnification, software | Allows assessment of data granularity and potential for re-analysis. |
| Quantification Method | Manual scoring, software, algorithm parameters (if used) | Essential for interpreting semi-quantitative or quantitative conclusions. |
Experimental Protocols for Key Validation Pillars
Protocol 1: Genetic Validation (CRISPR/Knockout)
- Objective: To confirm antibody specificity by demonstrating loss of signal in cells or tissues where the target gene has been genetically ablated.
- Methodology:
- Obtain isogenic cell line pairs (wild-type and target gene knockout) generated via CRISPR-Cas9 or other validated methods.
- Culture cells, pellet, and fix in 10% neutral buffered formalin for 24 hours. Process into paraffin blocks to create FFPE cell pellets.
- Cut sections (4-5 µm) from both WT and KO FFPE blocks.
- Perform IHC using the antibody and optimized protocol (including antigen retrieval) in parallel on both sections.
- A valid antibody will show specific staining in WT cells and a clear, significant reduction in specific signal in the KO cells. Residual background should be equivalent in both.
Protocol 2: Orthogonal Validation (MS-IHC Comparison)
- Objective: To compare IHC staining patterns with an independent method for detecting the same target (e.g., mRNA in situ hybridization).
- Methodology:
- Select an FFPE tissue block known to express the target protein heterogeneously.
- Perform IHC on serial sections (or the same section for multiplex methods) using the antibody protocol.
- On the adjacent serial section, perform RNA in situ hybridization (RNAScope, etc.) for the mRNA corresponding to the protein target.
- Compare the spatial distribution and relative intensity of protein signal (IHC) and mRNA signal (ISH). High concordance supports antibody specificity.
Protocol 3: Biological Specificity Validation (Tissue Microarray)
- Objective: To assess antibody performance across a range of tissues with known expression profiles.
- Methodology:
- Assemble or procure a tissue microarray (TMA) containing cores of positive control tissues (known high expression), negative control tissues (known absent/low expression), and a range of relevant experimental tissues.
- Stain the entire TMA using the standardized IHC protocol.
- Evaluate staining patterns against known literature and database (e.g., Human Protein Atlas) expression data. The antibody should recapitulate expected tissue-specific patterns.
Table 2: Summary of Key Validation Pillars and Quantitative Metrics
| Validation Pillar | Core Experimental Approach | Key Quantitative Readout | Acceptance Criterion for FFPE-IHC |
|---|---|---|---|
| Genetic | IHC on isogenic WT vs. KO FFPE cell pellets | Signal intensity in KO vs. WT (e.g., H-Score, % positive cells) | ≥70% reduction in specific signal in KO. |
| Orthogonal | IHC vs. mRNA-ISH on serial FFPE sections | Spatial correlation coefficient (e.g., Pearson's) | Significant positive correlation (p<0.05, r >0.5). |
| Biological | Staining of a multi-tissue FFPE TMA | Concordance with established expression data | ≥90% concordance with expected positive/negative pattern. |
| Method Comparison | IHC with multiple independent antibodies to same target | Inter-antibody correlation of staining scores | Significant positive correlation (p<0.05, r >0.7). |
The Scientist's Toolkit: Essential Reagent Solutions
| Item | Function in FFPE-IHC Validation |
|---|---|
| FFPE Cell Pellets (WT & KO) | Provide controlled, homogeneous substrates for genetic validation without tissue architecture variability. |
| Tissue Microarray (TMA) | Enables high-throughput, parallel assessment of antibody performance across dozens of tissues on one slide. |
| CRISPR-Modified Cell Lines | Genetically defined resources essential for establishing antibody specificity at the genetic level. |
| Multiplex Fluorescence IHC Kits | Allow orthogonal validation (protein/protein or protein/mRNA) on the same tissue section, preserving spatial context. |
| Automated Slide Stainer | Increases reproducibility and throughput while reducing inter-protocol and inter-user variability. |
| Chromogenic & Fluorescent Detection Kits | Sensitive, standardized detection systems crucial for generating robust, comparable signal. |
| Image Analysis Software | Enables objective, quantitative scoring of staining intensity and distribution (H-score, % area). |
| Antigen Retrieval Buffers (pH 6, pH 9) | Key reagents for reversing formaldehyde-induced cross-links; optimal pH is target-specific and must be reported. |
IHC Antibody Validation Workflow for FFPE
Core IHC Staining Protocol Steps
Conclusion
Effective IHC antibody validation for FFPE tissues is not a single step but a comprehensive, iterative process built on understanding fixation artifacts, executing meticulous protocols, proactively troubleshooting, and employing rigorous, multi-faceted validation. By integrating the foundational knowledge, methodological precision, optimization strategies, and comparative frameworks outlined here, researchers can transform IHC from a qualitative technique into a robust, quantitative, and reliable tool. The future of IHC in biomedical and clinical research hinges on such rigorous validation, which is essential for advancing biomarker discovery, ensuring reproducibility in translational studies, and underpinning the accuracy of companion diagnostics in precision medicine. Moving forward, embracing standardized validation guidelines and novel orthogonal technologies will further solidify IHC's critical role in life science research and therapeutic development.